Author: pickandpitch

  • Positive thinking and changing your mindset

    Positive thinking and changing your mindset

    I Didn’t Just Book a Holiday! — I Trusted the Universe and used Law of attraction!

    How Belief, Courage, and Alignment Took Us to Lapland… and Beyond

    Some trips are planned with spreadsheets, checklists, and logic.

    Others are booked with your heart.

    Lapland was one of those.

    So is the Greek Isles cruise we have waiting for us.

    Both trips came from a place of belief — not certainty, not guarantees — but trust. And looking back now, I realise something powerful: I didn’t wait for permission from life to live it. I trusted that things would work out, even before I had proof.

    That choice changed everything.


    Lapland Was a Feeling Long Before It Was a Destination

    Lapland had been calling to me for years.

    Not in a loud, obvious way — but quietly. Gently. In that way certain places do, where you can’t quite explain why you’re drawn to them, only that you are.

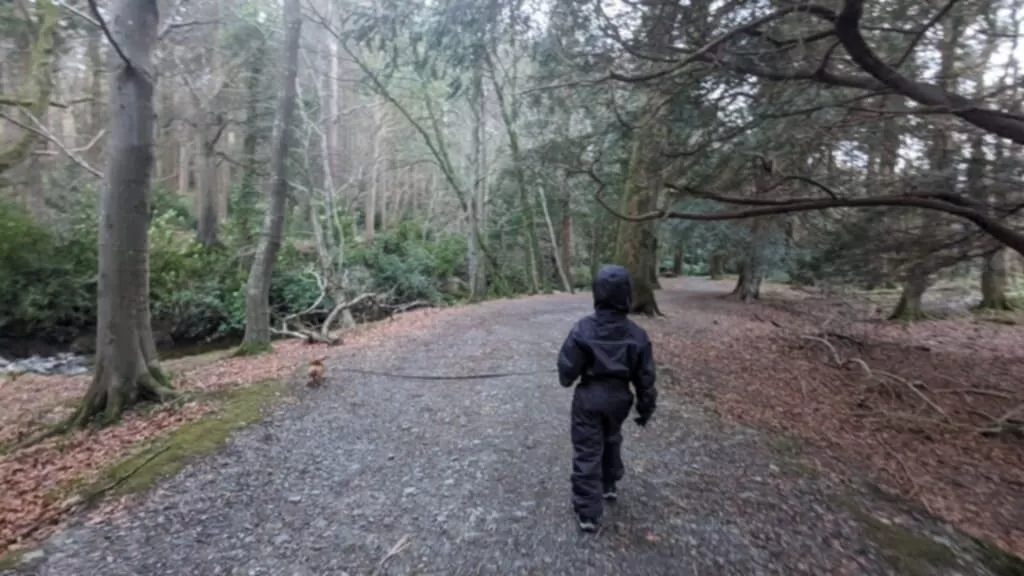
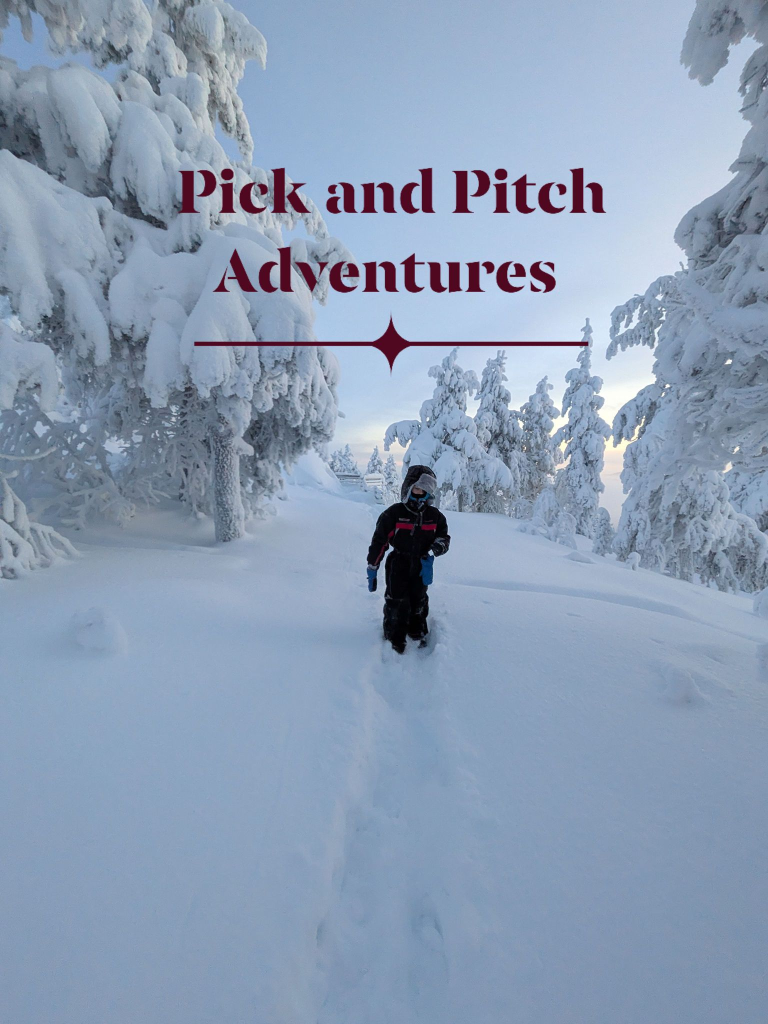
    I imagined snow crunching under our boots.
    I imagined silence so deep it felt healing.
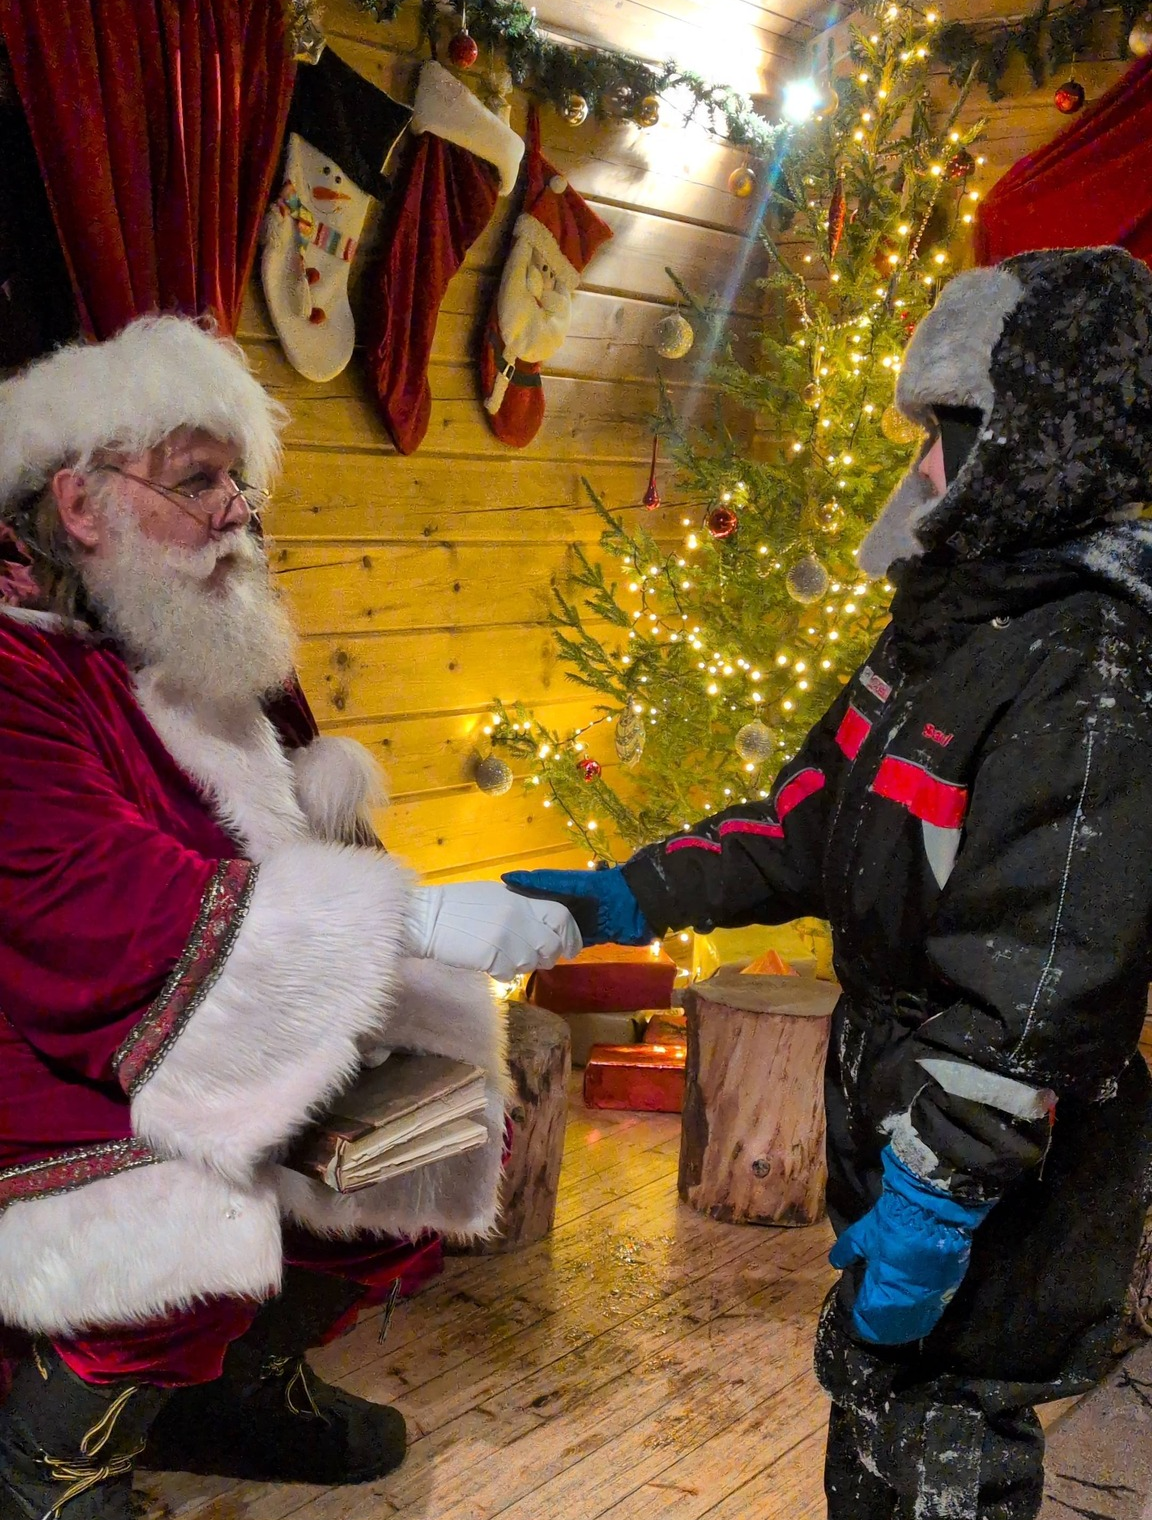
    I imagined my child’s eyes lighting up with wonder — real, pure wonder.

    Lapland wasn’t about Santa or activities or even travel itself. It was about how I wanted us to feel.

    Calm.
    Connected.
    Present.

    And once that feeling settled in my mind, it didn’t leave.


    The Promise I Made to Myself

    For a long time, foreign holidays felt out of reach.

    Not because we didn’t want them — but because life required extra planning, extra caution, extra “what ifs.” Food allergies have a way of making you second-guess everything. They add a layer of fear that people don’t always see.

    I remember saying it out loud, more than once:

    When he starts the egg ladder properly, I’ll book a foreign holiday.

    It felt sensible. Responsible. Safe.

    But deep down, something else was stirring.


    Booking Before the Proof

    Here’s the part that still gives me goosebumps.

    I booked Lapland before my child had officially passed the egg ladder.
    And I booked our Greek Isles cruise before he had passed it too.

    On paper, it probably didn’t make sense.

    But energetically?
    It felt completely right.

    I didn’t book from fear.
    I booked from belief.

    Belief that his progress would continue.
    Belief that we would manage.
    Belief that life didn’t need me to wait until everything was perfect before enjoying it.

    That was manifestation in its purest form — acting as if things were already working out.


    Trusting Without Guarantees Is Real Courage

    Manifestation isn’t about pretending challenges don’t exist. It’s about refusing to let fear make all your decisions.

    Of course I was aware of the risks.
    Of course I had moments of doubt.
    But I chose not to let those moments lead.

    Instead, I focused on intention:

    • Safety
    • Ease
    • Support
    • Positive outcomes

    I visualised smooth journeys. Helpful staff. Understanding people. I pictured us eating safely, laughing freely, enjoying experiences without constant worry.

    And slowly, that vision became our reality.


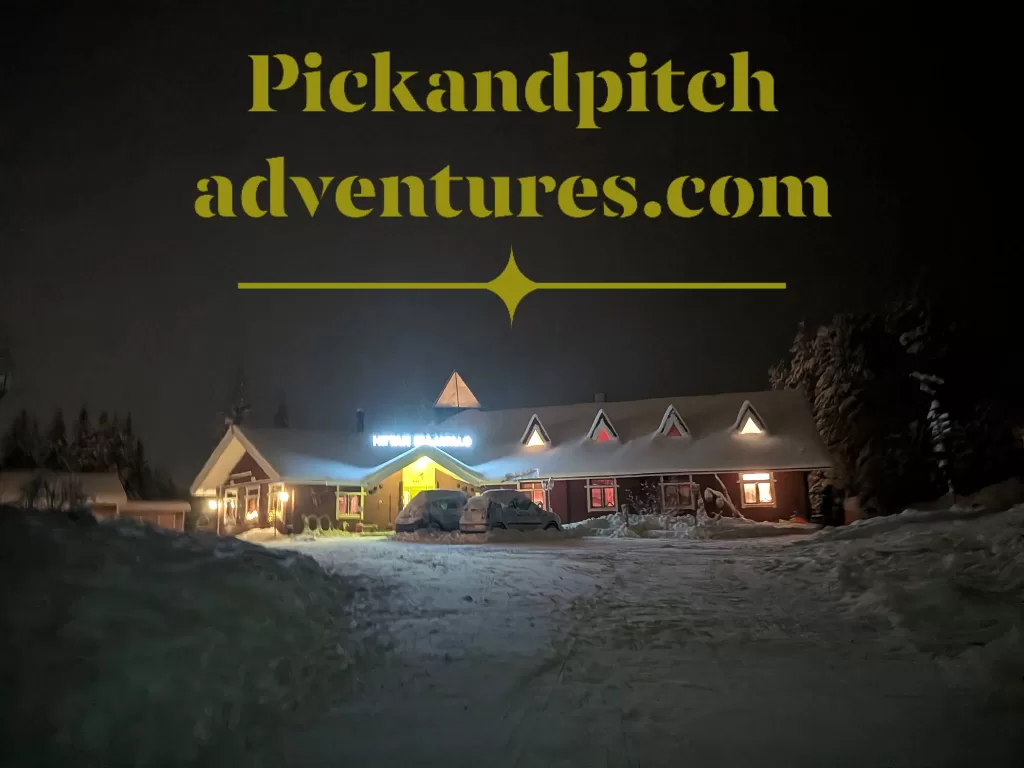
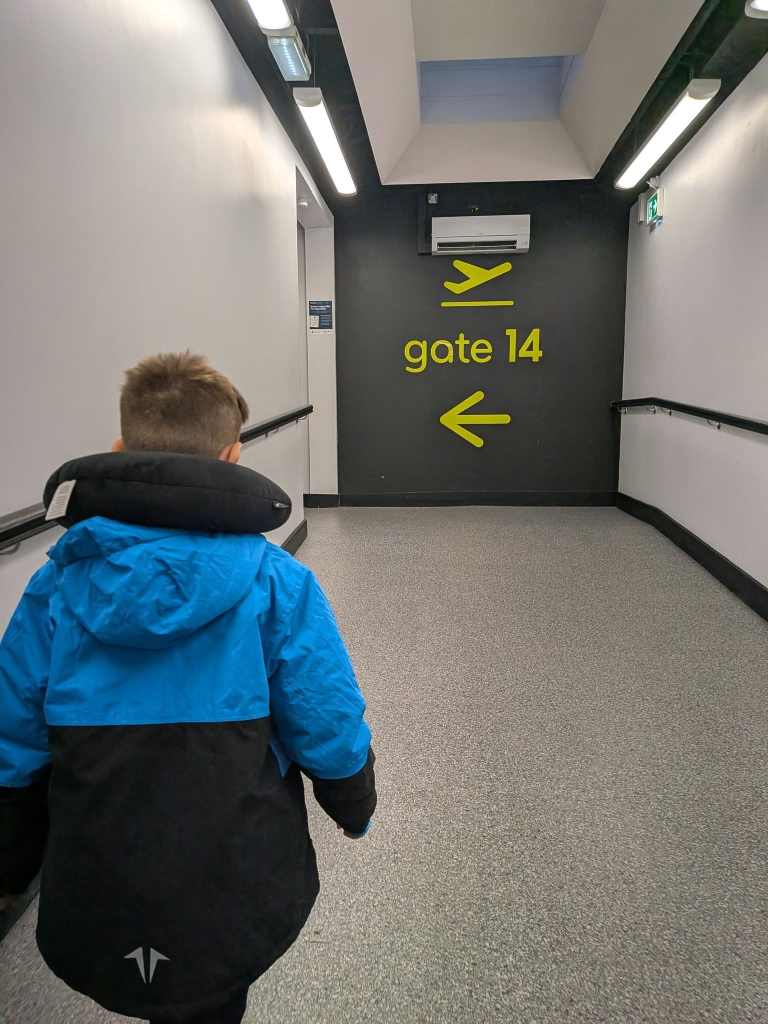
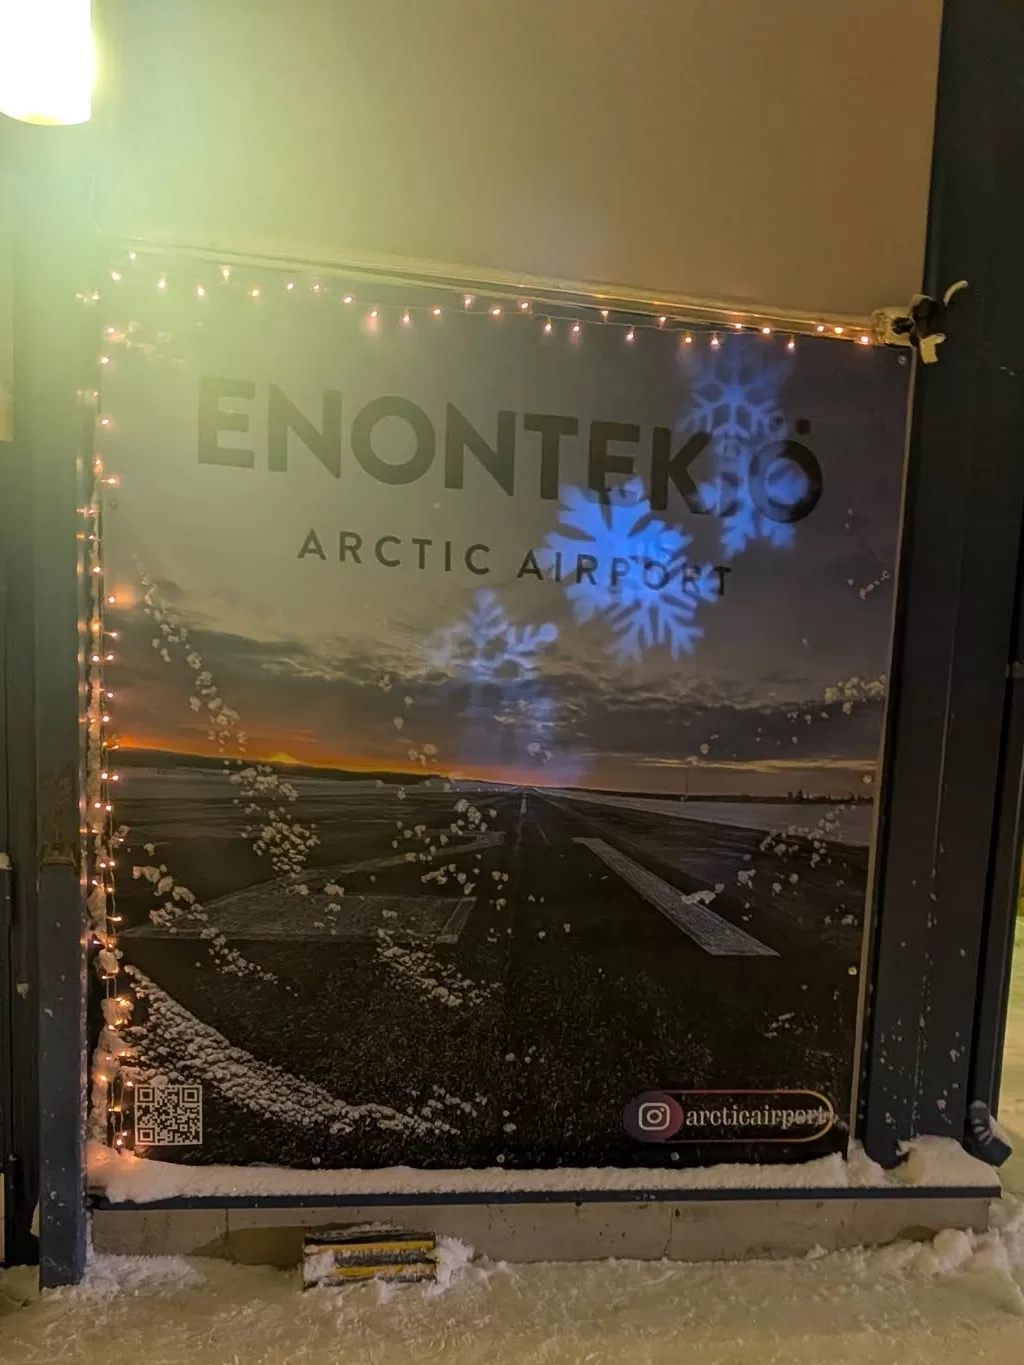
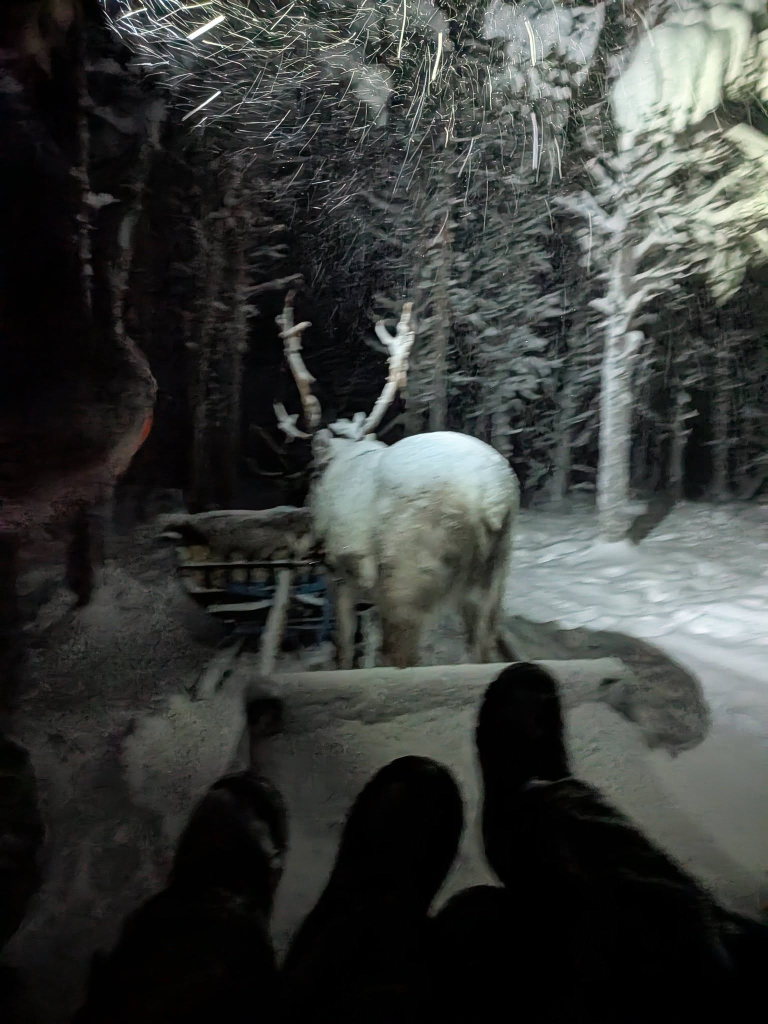
    Lapland Arrived Exactly When We Needed It

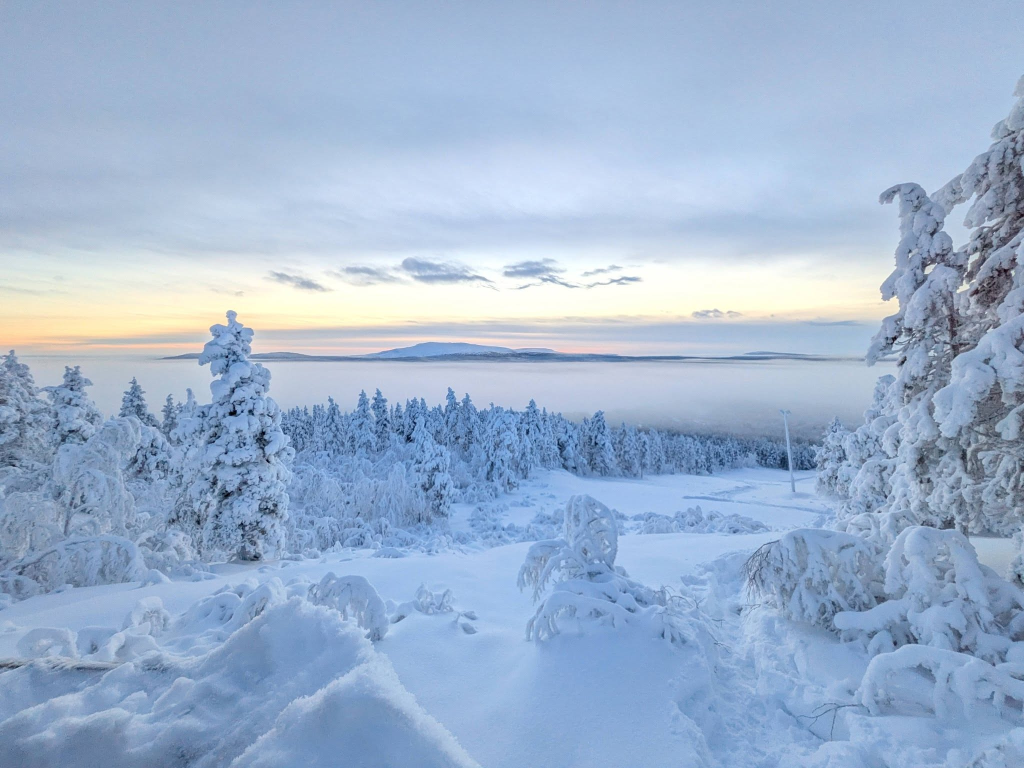
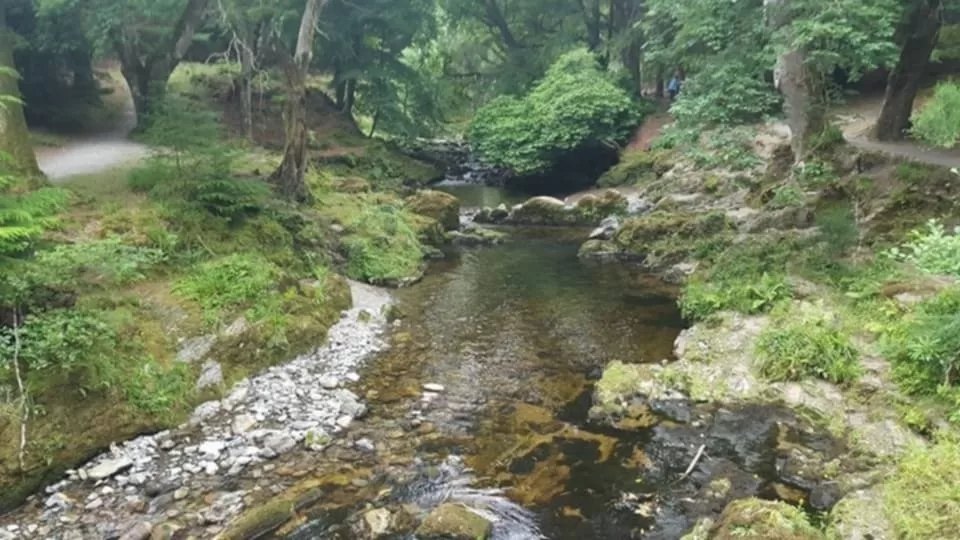
    From the moment we landed, Lapland felt different.

    The air was crisp and clean, like it had been waiting for us. The snow softened everything — sound, stress, even time. Life slowed down in the most beautiful way.

    There was no rush.
    No pressure.
    Just presence.

    I realised then that Lapland wasn’t just a trip — it was a reset.


    Watching Belief Become Reality

    One of the most emotional moments for me wasn’t something dramatic. It was something simple.

    It was the realisation that we were there.

    That I hadn’t waited.
    That I hadn’t postponed joy.
    That I hadn’t told myself “maybe someday.”

    I had trusted. And trust had carried us all the way to the Arctic Circle.


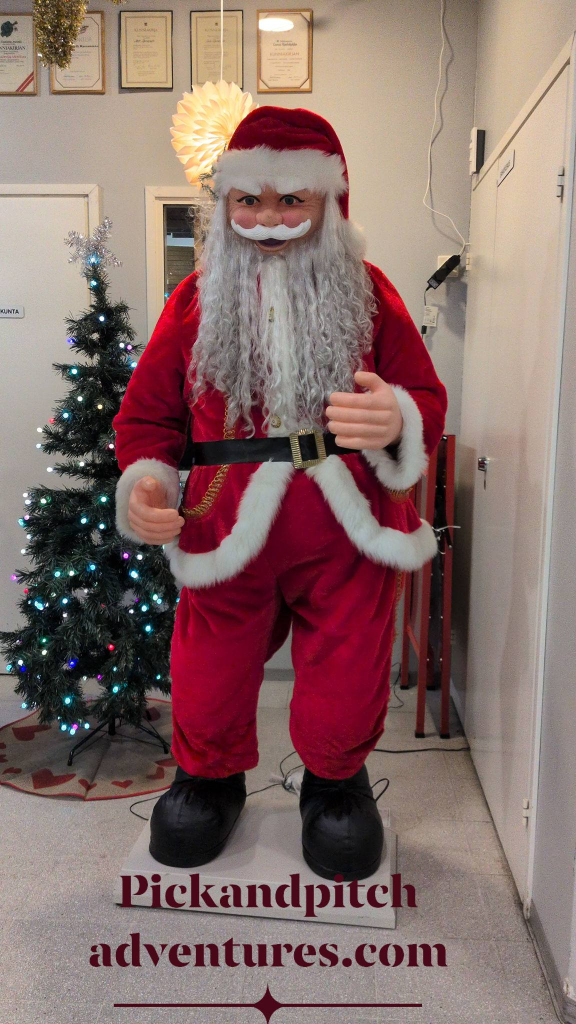
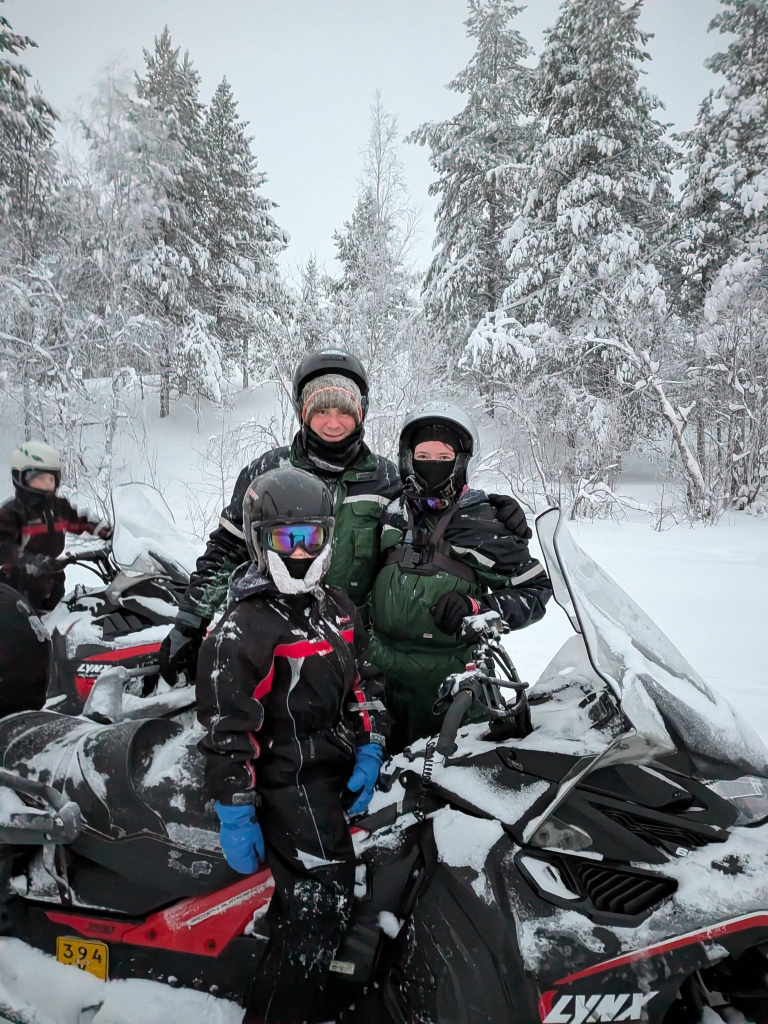
    Children Manifest Without Fear — and Lapland Proved That

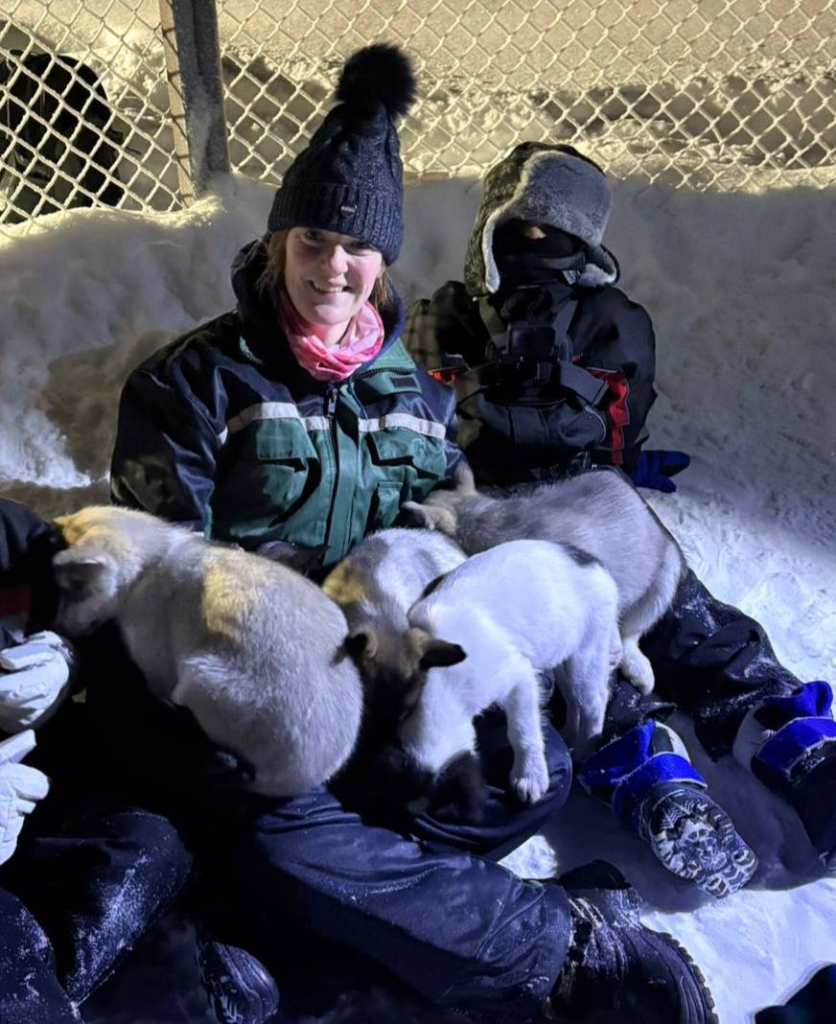
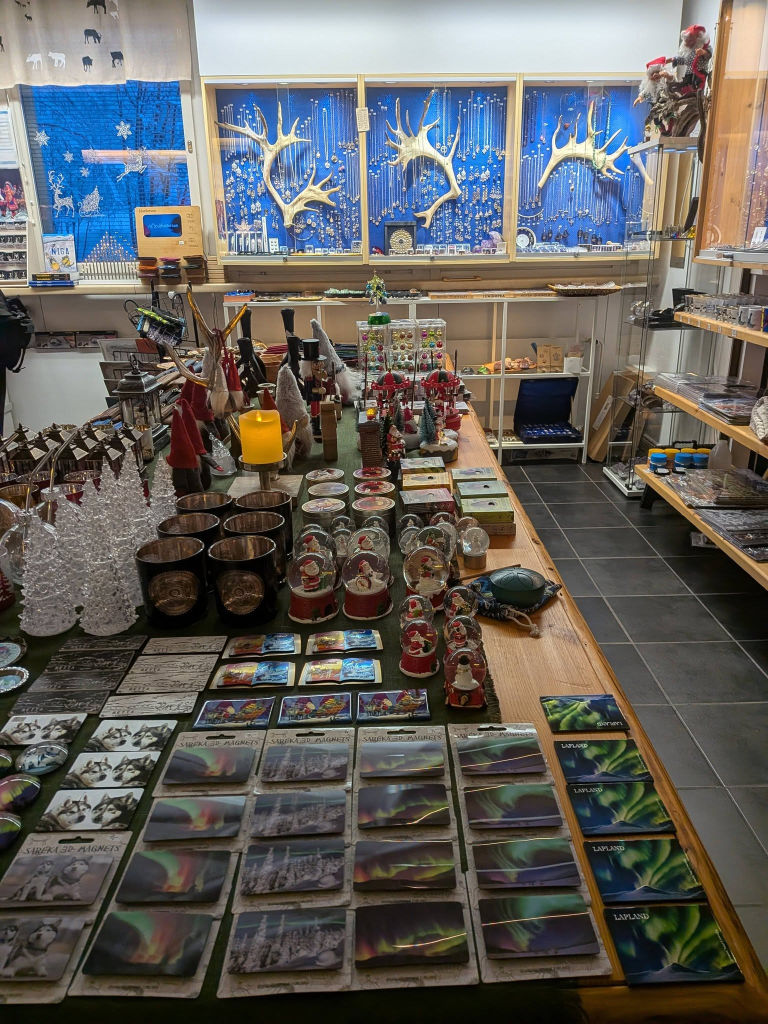
    Children don’t need convincing that magic exists.

    Lapland met my child exactly where his belief already lived. The excitement, the wonder, the absolute certainty that something special was happening — it was contagious.

    Watching him thrive in that environment reassured me in ways I didn’t even know I needed.

    It reminded me that my job wasn’t to protect him from every possibility — it was to show him that life can be expansive, joyful, and safe even when it’s unfamiliar.


    Gratitude Was Everywhere

    I felt grateful in a way that was almost overwhelming.

    Grateful that we went when we did.
    Grateful that I trusted my instincts.
    Grateful that I didn’t wait for perfect conditions.

    Every small moment felt significant — warm gloves, shared laughs, quiet walks, deep breaths of icy air.

    Gratitude amplifies manifestation. And Lapland gave me endless reasons to practice it.


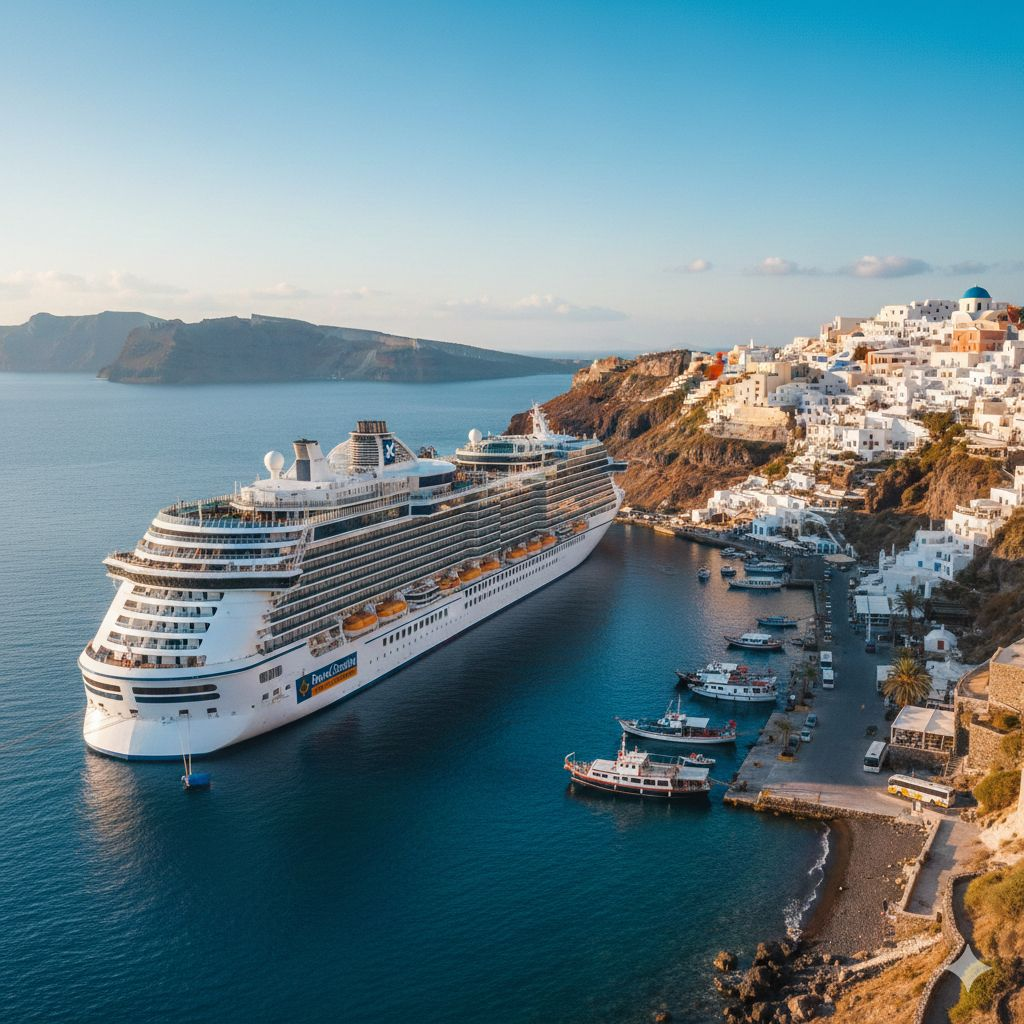
    The Greek Isles Cruise: Proof That I No Longer Wait

    Our Greek Isles cruise is still ahead of us — but energetically, it’s already ours.

    It represents something bigger than travel.

    It represents confidence.
    Growth.
    Freedom.

    It’s proof that I no longer wait for life to say “now it’s safe.” I listen inward instead.

    Booking it before the egg ladder was officially passed wasn’t reckless — it was hopeful. It was me saying:

    I trust our journey. I trust his progress. I trust myself.”

    And that trust has been rewarded again and again.


    What These Trips Taught Me About Manifestation

    Lapland and the Greek Isles aren’t just destinations on a map — they’re markers of personal growth.

    They taught me that:

    • Acting in faith changes outcomes
    • Joy doesn’t need to be postponed
    • You don’t need guarantees to move forward
    • Belief is a form of courage

    The universe responds to certainty — not perfection.


    Bringing the Energy Home

    The calm Lapland gave me didn’t stay behind in the snow.

    I brought it home.

    I returned more confident in my decisions, more trusting of my intuition, and more open to saying yes before fear speaks up.

    And that energy is now shaping everything else — including future travels we haven’t even imagined yet.


    If You’re Waiting for “After”, Read This

    If you’re telling yourself:

    • “After this stage passes…”
    • “When things are easier…”
    • “Once we’re fully ready…”

    I understand. Truly.

    But sometimes, the magic happens because you move before the proof arrives.

    Sometimes, booking the trip is the moment things start to fall into place.


    Final Thoughts: Lapland Wasn’t Luck — It Was Alignment

    Lapland didn’t happen because everything was perfect.

    It happened because I trusted that things were unfolding exactly as they should.

    And the Greek Isles will happen for the same reason.

    Travel, for me now, is no longer about escape. It’s about affirmation — proof that life expands when you let it.

    I didn’t just book these trips.

    I believed in them.

    And belief took us exactly where we were meant to be.

  • Seasonal Nature walks and Mental wellbeing

    Seasonal Nature walks and Mental wellbeing

    Seasonal Nature Walks: How Each Season Supports Mental Wellbeing

    There are moments in life when everything feels loud. The to-do lists, the notifications, the expectations, the constant feeling that we should be doing more, being more. For me, those moments are often quieted not by answers, but by stepping outside. A simple walk. No destination. No pressure. Just nature, moving at its own pace, reminding me that I’m allowed to do the same.

    Nature has been a constant support for my mental wellbeing, but what I’ve come to realise over time is that each season offers something different. Each one meets us exactly where we are, emotionally and mentally, if we’re willing to slow down enough to notice.

    This isn’t about hiking mountains or hitting step goals. It’s about gentle, grounding walks. Fifteen minutes. Half an hour. Sometimes longer. Sometimes shorter. What matters is the connection.


    Why Nature Walks Are So Powerful for Mental Wellbeing

    Before diving into the seasons, it’s worth understanding why nature walks have such a profound effect on our mental health.

    When we’re surrounded by natural environments, our nervous system begins to settle. Our breathing slows. Our thoughts soften. Studies consistently show that time spent in nature can reduce anxiety, lower cortisol levels, improve mood, and even enhance creativity and focus.

    But beyond the science, there’s something deeply human about walking among trees, beside water, or under open skies. Nature doesn’t rush us. It doesn’t judge us. It doesn’t expect us to explain ourselves.

    It simply allows us to exist.

    And that, in itself, is healing.


    Spring Walks: Hope, Renewal, and Gentle Growth

    Spring always feels like a deep breath after holding it all winter.

    The days slowly stretch longer, the air softens, and life begins to reappear in quiet, beautiful ways. Buds on branches. Daffodils pushing through the soil. Birds returning with their familiar songs.

    How Spring Supports Mental Wellbeing

    Spring is the season of renewal and hope. Mentally, it can feel like a reset button. After months of heaviness, darker mornings, and indoor living, spring gently invites us back outside.

    For mental wellbeing, spring walks can:

    • Encourage optimism and motivation
    • Reduce feelings of stagnation or low mood
    • Support emotional healing and fresh starts

    There’s something incredibly comforting about witnessing nature begin again. It reminds us that nothing stays frozen forever, even when it feels that way.

    Personal Reflection

    I often find spring walks especially emotional. Not in a sad way, but in a quietly hopeful one. There’s a sense that even after hard seasons, growth is still possible. Even when things felt heavy for a long time, life finds a way to bloom again.

    Some of my favourite spring walks are slow and observant. I notice the tiny details — new leaves unfurling, lambs in nearby fields, the smell of damp earth warming in the sun. It feels like permission to start gently, without pressure.

    Spring Walking Tips for Mental Health

    • Walk without headphones occasionally and listen to birdsong
    • Choose routes with wildflowers, parks, or woodland paths
    • Set intentions rather than goals — how do you want to feel after the walk?

    Summer Walks: Presence, Energy, and Emotional Release

    Summer walks feel different. Brighter. Warmer. More alive.

    The longer days invite us outside in the evenings, when the light lingers and the air feels softer. There’s a sense of freedom in summer that’s hard to replicate any other time of year.

    How Summer Supports Mental Wellbeing

    Summer encourages presence and joy. It’s a season that invites us to fully experience the moment.

    Mental health benefits of summer walks include:

    • Boosted mood from sunlight and vitamin D
    • Reduced stress and tension
    • Increased feelings of connection and gratitude

    Summer walks often feel less about reflection and more about being. Feeling the warmth on your skin. Hearing laughter drifting through open windows. Watching the world move.

    Personal Reflection

    Some of my favourite mental health moments happen on summer evenings. Walking just before sunset, when everything feels calmer and quieter. The day’s worries seem less intense, softened by golden light.

    When anxiety feels overwhelming, summer walks help me release it physically. I walk it out. I breathe it out. I let it dissolve into the open air.

    Summer Walking Tips for Mental Health

    • Walk early morning or evening to avoid heat overwhelm
    • Stay hydrated and choose shaded routes
    • Let go of structure — wander where feels good

    Autumn Walks: Letting Go, Reflection, and Emotional Processing

    Autumn is my most emotionally grounding season.

    There’s something deeply comforting about crisp air, crunchy leaves underfoot, and skies that feel bigger somehow. Autumn doesn’t rush change — it eases into it.

    How Autumn Supports Mental Wellbeing

    Autumn teaches us about letting go.

    Mentally, it’s a powerful season for:

    • Emotional processing and reflection
    • Accepting change and transition
    • Releasing what no longer serves us

    Watching leaves fall reminds us that shedding isn’t failure — it’s necessary.

    Personal Reflection

    Autumn walks feel like therapy sessions without words. I often walk through forest parks or tree-lined paths, letting my thoughts come and go without judgement.

    There’s a permission in autumn to slow down. To rest. To acknowledge what’s been heavy and gently lay it down.

    When life feels overwhelming, autumn reminds me that it’s okay to release expectations, habits, or even versions of myself that no longer fit.

    Autumn Walking Tips for Mental Health

    • Choose woodland walks for grounding
    • Wear cosy layers to feel safe and comfortable
    • Use walks as a space to reflect, not problem-solve

    Winter Walks: Stillness, Resilience, and Inner Strength

    Winter walks are often underestimated.

    Yes, they can be cold. Yes, they require more effort. But they also offer something incredibly powerful — stillness.

    How Winter Supports Mental Wellbeing

    Winter encourages us inward, but not into isolation — into self-connection.

    Mental wellbeing benefits include:

    • Building resilience and routine
    • Reducing seasonal low mood
    • Encouraging mindfulness and presence

    There’s a quiet strength in winter walks. A sense of achievement in showing up, even when it’s hard.

    Personal Reflection

    Winter walks have supported me through some of my toughest mental health periods. When motivation is low and anxiety is high, even a short walk feels like an act of self-care.

    The world feels quieter in winter. Less demanding. More forgiving. I often return home feeling calmer, clearer, and proud of myself for stepping outside.

    Winter Walking Tips for Mental Health

    • Keep walks short and manageable
    • Dress warmly and comfortably
    • Focus on breath, movement, and grounding

    How to Create a Seasonal Walking Ritual for Mental Wellbeing

    One of the most powerful things you can do is turn nature walks into a seasonal ritual, rather than a task.

    This might look like:

    • Choosing one favourite walk per season
    • Noticing how your emotional needs change
    • Allowing your pace to match the season

    Nature doesn’t expect consistency. It expects honesty.

    Some days you’ll walk far. Other days, just to the end of the road. Both count.


    Final Thoughts: Walking Through Life, One Season at a Time

    Mental wellbeing isn’t linear. Neither is nature.

    Some seasons feel light and expansive. Others feel heavy and quiet. All of them have something to teach us, if we’re willing to listen.

    Seasonal nature walks have taught me that healing doesn’t always look like progress. Sometimes it looks like pausing. Sometimes it looks like releasing. Sometimes it looks like simply putting one foot in front of the other.

    And that is more than enough.

    Find our other blogs here

    Grounding with Nature and Tree Bathing: Natural Ways to Improve Your Mental Wellbeing

  • Family Lapland Destinations

    Family Lapland Destinations

    5 Magical Areas to Visit in Lapland (and Which Airport to Fly Into)

    Lapland isn’t just one destination it’s a whole collection of very different experiences. From remote Arctic wilderness to festive Christmas villages, where you stay (and which airport you fly into) completely shapes your trip.

    We’ve been lucky enough to experience Enontekiö, Hetta, and it completely stole our hearts. Since then, I’ve spent far too many evenings planning future Lapland trips (standard behaviour, right?) and comparing the different areas.

    If you’re planning a family-friendly Lapland adventure with real Christmas magic, here are five of the best areas, who they suit best, which airport to fly into, and why each one feels so special.


    1. Enontekiö & Hetta – Remote, Magical & Truly Arctic

    Best airport: Enontekiö Airport (ENF)
    (Seasonal direct charter flights from the UK) – Mainly through Transun and Jet2. 3/4 Night trips or Day trips normally late November through to the end of January.

    This is the area we fell completely in love with — and honestly, if you’re craving a quiet, authentic Lapland Christmas, it’s hard to beat.

    Enontekiö sits far north, well inside the Arctic Circle, and it feels it. Snow arrives early, stays deep, and everything feels calmer, slower, and more real. There’s no big crowds, no over-commercialisation — just snow-covered forests, frozen lakes, and that magical Arctic silence.

    Why it’s perfect for families:

    • Fewer tourists = calmer excursions (huge win with kids)
    • Activities feel more personal and unrushed
    • Snow reliability in early December is excellent

    Local highlights:

    • Hetta Ski Slope – small, friendly, perfect for beginners and children
    • Ice fishing on frozen lakes – genuinely unforgettable
    • Husky & reindeer experiences in peaceful wilderness
    • Northern Lights – darker skies mean better chances
    • Sámi culture and storytelling that feels authentic, not staged

    This is Lapland for families who want real snow, real quiet, and real magic — not flashing lights and queues.

    We stayed in the lovely Hotteli Hetan Majatalo hotel and 4 generation family owned and run hotel which is bursting with history. Transun also use various other Hotels and lodges in the area some being on the swedish boarder, Davvi Artic Lodge.

    Pick and pitch Hottelli Hetan Majatalo
    Pick and pitch Hottelli Hetan Majatalo

    2. Saariselkä – Wilderness Adventure with Comfort

    Best airport: Ivalo Airport (IVL)

    Saariselkä is a brilliant middle ground. You still feel immersed in nature, but with a bit more infrastructure — cosy hotels, log cabins, and easy access to activities.

    It’s right beside Urho Kekkonen National Park, which means endless snowy landscapes and that “stepped into a Christmas film” feeling.

    Why families love it:

    • Easy transfers from Ivalo Airport
    • Lots of winter activities without feeling overwhelming
    • Great for slightly older kids who love adventure

    Local highlights:

    • Toboggan runs (including Finland’s longest!)
    • Snowshoeing and cross-country skiing trails
    • Reindeer sleigh rides through national park scenery
    • Aurora spotting straight from your accommodation

    It’s magical, scenic, and adventurous — without being too wild or too busy.


    3. Levi – Festive, Fun & Full of Activities

    Best airport: Kittilä Airport (KTT)

    Levi is one of Lapland’s most popular resorts — and for good reason. Everything is easy, organised, and designed with visitors (especially families) in mind.

    If you want a classic Christmas Lapland experience with lots going on, Levi delivers.

    Why families choose Levi:

    • Excellent flight connections
    • Short transfer times
    • Huge choice of family-friendly accommodation
    • Loads of activities in one place

    Local highlights:

    • Santa experiences and Christmas events
    • Ski school and gentle slopes for children
    • Husky safaris, snowmobiling, reindeer farms
    • Christmas markets and festive lights everywhere

    It’s more commercial than Enontekiö — but if you want big festive energy and convenience, Levi is fantastic.


    4. Rovaniemi – Santa, Sparkle & First-Time Magic

    Best airport: Rovaniemi Airport (RVN)

    Rovaniemi is often the first place families think of — and it really does feel like stepping into Christmas itself.

    It’s right on the Arctic Circle, home to Santa Claus Village, and packed with festive attractions.

    Why it’s ideal for first-timers:

    • The easiest Lapland destination to reach
    • Very child-focused experiences
    • Plenty of hotels, tours, and restaurants

    Local highlights:

    • Santa Claus Village (meeting Santa, posting letters, crossing the Arctic Circle)
    • Snowmobile and husky tours
    • Christmas decorations everywhere
    • Museums like Arktikum for a quieter afternoon

    It can be busy in December, but for families wanting that classic, storybook Christmas vibe, it’s unforgettable.

    Pick and Pitch Dancing Santa
    Pick and Pitch Dancing Santa

    5. Inari & Lake Inari – Culture, Calm & Arctic Beauty

    Best airport: Ivalo Airport (IVL)

    Inari is quieter, deeper, and incredibly beautiful. It’s a place that feels spiritual almost — especially in winter when Lake Inari freezes and the snow softens everything.

    This area offers a wonderful balance of culture, nature, and calm, making it ideal for families who want something meaningful as well as magical.

    Why it works for families:

    • Calm pace and less rushing
    • Strong cultural experiences
    • Incredible natural scenery

    Local highlights:

    • Siida Sámi Museum (brilliant for kids and adults)
    • Ice fishing and snowshoeing on Lake Inari
    • Northern Lights reflected on frozen lakes
    • Sámi storytelling and traditions

    It’s peaceful, authentic, and perfect if you want your Lapland trip to feel special and grounding, not hectic.

    Pick and Pitch Fell Visitor Centre Sami History
    Pick and Pitch Fell Visitor Centre Sami History

    When Is the Best Time to Book Flights to Lapland?

    From experience (and far too much research):

    • Best time to travel:
      Late November to mid-December
      • Deep snow
      • Fewer crowds than Christmas week
      • Better value flights
    • When to book flights:
      6–9 months in advance for December trips
      • Charter flights sell fast
      • Family-friendly accommodations book up early
    • Best snow reliability:
      Northern areas like Enontekiö, Inari, and Saariselkä tend to have the deepest snow earliest.

    Final Thoughts – Choosing the Right Lapland for Your Family

    If you want:

    • Quiet, snow-covered wilderness:Enontekiö
    • Adventure with comfort:Saariselkä
    • Festive fun and convenience:Levi
    • Classic Santa magic:Rovaniemi
    • Culture and calm beauty:Inari

    Every area has its own magic — but choosing the right one makes all the difference, especially when travelling with children.

    For us, Enontekiö set the bar very high… and I’m not sure anywhere else will ever quite compare for us. Still so much more to see and do in the area!

    Lapland (Finland) Is such a beautiful country that is rich in history, Culture and magical scenery. If visiting expescially the rural/remote areas please respect the area and its beauty!

    Visit our other Lapland Adventure Blog – Here

  • Lapland Adventure

    Lapland Adventure

    A Magical Family Trip to Lapland: Our Santa Adventure in Hetta, Finland

    On Sunday 14th December 2025 was the day our Christmas dreams truly came to life! The Cheeky Elves delivered the most magical news imaginable to our son that we were off to Lapland! Not only that, but they arrived with matching hoodies for all three of us and had our bags magically packed with everything we needed for a winter adventure beyond anything we could have imagined!

    From that moment on, the magic never stopped. We quickly got organized and rang for my parents to come and take us to the airport!


    Flying to Lapland from Belfast: The Adventure Begins

    Belfast to Lapland
    Belfast International Airport

    Our journey began at Belfast International Airport at check in we were met by an Elf that checked that we were all on the nice list and handed the kids a wee colouring pack. The excitement buzzed through the terminal as we boarded our Enter Air flight to Lapland. Breakfast was served on board, The Airline had an Egg Free option for our son which was great as this was our first foreign holiday and dealing with his allergy!

    Landing at Enontekiö Airport felt a little rocky to us, but the pilot handled it brilliantly. As soon as we stepped off the plane into the crisp Arctic air, we knew we had arrived somewhere truly special. The air felt so clean and fresh.

    Enontekio Artic Airport Lapland
    Enontekio Artic Airport Lapland

    A Warm Welcome from Transun & Our Lapland Base

    Straight away, we were met by the Transun reps — and honestly, we couldn’t have asked for better. We were Group 2, and every time a name was called, the entire group shouted a joyful “Ho Ho Ho!” 🎅
    Special mention has to go to Leah, our Transun rep, who was absolutely fantastic from start to finish she really made the trip!

    We were guided onto coaches and taken just five minutes down the road to get fitted with thermal suits and boots an absolute lifesaver in Lapland temperatures! Then from there, we were driven to our hotel, Hotelli Hetan Majatalo, a beautiful four-generation, family-run hotel that immediately felt warm, welcoming, and authentically Finnish.

    After settling in, we headed out to explore, enjoy our first meal, and attend the welcome meeting, where we were given a clear plan and timings for the days ahead something that made the whole experience feel relaxed and well organised. We also had plenty of free time to explore the surrounding area.

    That first night, we embraced the snow. Sledding, exploring the local area, and soaking in the magic of being surrounded by Arctic wilderness it was the perfect start to our magical trip!

    Hottelli Hetan Majatalo
    Hottelli Hetan Majatalo, Hetta

    Meeting Santa in Lapland: A Day We’ll Never Forget

    On the monday it was the day to meet Santa! . At 1pm, our coach arrived to take us on a 45-minute drive deep into the snowy landscape to meet Santa himself.

    Snowmobiling lapland
    Snowmobiling lapland

    We arrived at a fire-lit forest path, glowing softly against the snow. We were split into groups, and ours began with snowmobiling this was an experience that was exhilarating, exciting, and genuinely breathtaking. (A YouTube video will be linked soon!)

    After that, there was time for:

    • Tobogganing
    • Ice hockey
    • Roasting marshmallows
    • Warming up with hot drinks

    Then came the moment that felt straight out of a Christmas storybook.

    A snowmobile pulling a sleigh arrived to take us to the reindeer and they are the only ones who knew the way to Santa’s cabin. We were greeted by elves, all called Snowflake, who led us inside Santa’s cosy, warm cabin.

    Reindeer to santa
    Reindeer to santa

    Inside, Santa spoke directly to our child about their Christmas list, told stories, asked questions, and created a moment so personal and magical it’s impossible to fully put into words. It felt real. It felt special. And it’s a memory we’ll treasure forever. Our son was so taken back he was totally lost for words!

    Afterwards, it was back to the fire for more marshmallows (Leah also very kindly made sure everything was egg free and safe!) before returning to the hotel for dinner and, of course, more snowy adventures.

    Earlier that morning, we had also visited the local K-Market, and I have to say wandering around a Finnish supermarket was surprisingly fun and fascinating!


    Huskies, Laughter & Arctic Cuteness

    Hetta Huskies Cape Lapland
    Hetta Huskies Cape Lapland

    On The Tuesday it brought another bucket-list experience: husky sledding. After a quick safety briefing and meeting our dogs, we were off laughter, excitement, and pure amazement the entire way. It was one of those moments where you just think, “How is this real life?”

    Hetta Huskies Famous Sled Dogs
    Hetta Huskies Famous Sled Dogs

    The temperature that day sat around -15°C, so warming up in a cosy hut afterwards was very welcome. After lunch and some free time, myself and our child headed to Davvi Arctic Huskies for husky cuddling and honestly, the dogs were full of mischief, personality, and cuteness. Completely heartmelting. I fell in love with a puppy called Juno! At one point I had all the puppies on top of me cuddling in.

    Davvi Artic Huskies Puppy Encounter
    Davvi Artic Huskies Puppy Encounter

    Ice Fishing, Sami Culture & Tobogganing from the Top

    views from the top of the slopes
    views from the top of the slopes

    The dreaded last day… Wednesday was home time, with hotel check-out at 9am. Thankfully, we could leave our bags safely in the meeting room.

    My partner headed off for ice fishing, which included snowmobiling across frozen lakes, drilling through the ice, and cooking Finnish sausages over an open fire an experience he absolutely loved. This Excursion was via a company called Nakkala Adventures who were very knowledgeable.

    Meanwhile, myself, our child, and a few other families walked to the Hetta Fell Visitor Centre, where we learned about the Sámi people, the indigenous people of Finland. It was educational, eye-opening, and incredibly well done.

    Fell Vistor Centre
    Fell Vistor Centre

    Locals then pointed us towards a hidden gem — a 30–35 minute trek uphill to a breathtaking viewpoint with an amazing slope for tobogganing. The views were absolutely incredible, and there was even a small hut where you could light a fire if you wished.

    Tobogganing down from the top was unreal — such a rush, and such a special shared experience.

    We walked back to the hotel, stopping for hot chocolate at the lovely Cafe/ Souviner shop called Cafe Koru Laakso silver gallery, We then headed back to the hotel for lunch, and then it was time to return our thermal gear and head back to the airport.

    Souviner shop
    Souviner shop

    Heading Home — But Taking the Magic With Us

    At Enontekiö Airport, we browsed the small souvenir shops before boarding our 3 Hour 30 minute flight home to Belfast, smooth, calm, and reflective.

    This trip was nothing short of incredible and magical!

    From the authentic feel of Lapland, the Finnish food, the natural beauty, and the thoughtful organisation, to the magic created for children and parents alike it exceeded every expectation.


    Would We Do Lapland Again?

    In a heartbeat.

    We booked through Hays Travel, who used Transun’s Santa’s On His Way package, and the entire experience was seamless from start to finish. A special thank you again to Leah, our Transun rep, who truly made the trip unforgettable. Thank you to the lovely staff at the hotel! Also to the coach drivers and suits and boots staff! Ohh and of course all the airport and airline staff!!

    With Enontekio being very remote I would advise packing safe foods if you have a child that isnt great with different foods or has allergies! While the food was lovely there was a limited selection each meal time ( Plenty of food!) Just not many options so the local K Market is handy.

    Also we did over pack with clothes although gloves, socks, handwarmers, hats and snoods I would bring etc of those 1 or 2 baselayers each would be plenty then your mid layer the thermal suits are fab. Snow goggles are handy for heavy snow fall out sledding or snowmobiling.

    Lapland isn’t just a holiday — it’s a feeling. And one we’ll carry with us forever ❄️✨

    Heading home from lapland
    Heading home from lapland

  • How to winterize your caravan guide

    How to winterize your caravan guide

    How to Winterize Your Caravan: A Complete Step-by-Step Guide for Beginners

    If you’re a proud caravan owner, you know it brings endless freedom and joy throughout the spring and summer months. But when colder weather rolls in, winterizing your caravan is essential to protect it from frost damage, damp, mould, and wear caused by long periods of storage.

    Whether you’re storing your caravan on your drive, in a storage facility, or even using it occasionally through winter, this step-by-step beginner’s guide will walk you through exactly how to winterize your caravan—safely and confidently.


    Why Winterizing Your Caravan Is Essential

    Before diving into the practical steps, let’s quickly cover why winterizing matters:

    • Prevents frozen and burst water pipes
    • Avoids damage to pumps, boilers, and water systems
    • Stops build-up of mould, mildew, and bad smells
    • Prolongs battery life and prevents electrical faults
    • Saves costly repairs come springtime

    Even if you’re planning a few winter trips, these steps will help keep your caravan in tip-top condition in between outings.


    What You’ll Need

    Contains Affiliate links below

    Here are the tools and materials you might want to gather before starting:

    • Towels and cloths
    • Water container for draining
    • Caravan water pump and plug removal tools
    • Caravan antifreeze (non-toxic for use in waste systems—not for drinking water!)
    • Moisture absorbers or dehumidifiers
    • WD-40 or silicone spray
    • Vacuum and cleaning products
    • Battery charger/monitor
    • Insulated covers for vents/chimneys (if storing outside)
    A snow covered Elddis Crusader Aurora caravan parked behind a wall in winter
    Elddis Crusader Aurora caravan dusted with snow on a cold winter’s day

    Step-by-Step Guide to Winterizing Your Caravan


    Step 1: Deep Clean the Interior

    Before shutting up your caravan for weeks or months, give it a good clean.

    • Empty all cupboards and remove food: Even sealed packets can attract pests.
    • Wipe down all surfaces, including kitchen units, table tops, and bathroom fixtures.
    • Vacuum thoroughly: Especially around beds and seating where crumbs gather.
    • Clean the fridge/freezer: Leave the door ajar and place a cloth inside to absorb moisture.
    • Empty and clean bins and toilet cassette.

    Tip: Add a dish of bicarbonate of soda inside the fridge to absorb smells.


    Step 2: Drain Down the Water System

    One of the most important steps. Water left in pipes, tanks, or appliances can freeze and cause serious damage.

    How to Drain the Water System:

    1. Turn off the water pump and heater:
      • Ensure both are off and disconnected from power.
      • Let the boiler cool if it was recently used.
    2. Open all taps and shower heads:
      • Open both hot and cold sides of the mixer taps.
      • Remove any showerheads and leave the hoses hanging down.
    3. Open the drain valve (usually found near the onboard water tank or under the floor):
      • This allows the water to run out completely.
      • You may want to place a bucket or container underneath if you’re not on a service pitch.
    4. Blow out remaining water (optional but recommended):
      • You can use a low-pressure air pump or specialist device to force air through the pipes.
      • Alternatively, lift and lower the tap heads to help any water droplets run down.
    5. Empty and clean the toilet flush system:
      • Remove flush water from the header tank if separate.
      • Drain the cassette completely and clean it using a cassette cleaner.
    6. Use non-toxic caravan antifreeze (only for waste tanks or traps):
      • Pour a little into each plughole, shower trap, and the toilet to prevent seals drying out and freezing.
      • Do not use antifreeze in drinking water tanks or pipes.

    Tip: Leave all drain valves open until spring and remove water filters if installed.


    Step 3: Ventilation Is Key

    Contrary to instinct, sealing your caravan too tightly can cause condensation and damp.

    • Leave internal doors and cupboards open to allow air flow.
    • Lift up cushions and mattresses and store them on their sides or at an angle.
    • Use moisture traps or dehumidifiers (silica crystal types are good for winter).
    • Keep roof vents slightly open with vent covers to prevent snow/rain ingress.

    Tip: If storing your caravan indoors or undercover, consider removing soft furnishings entirely.


    🔌 Step 4: Disconnect and Maintain the Battery

    Caravan leisure batteries hate cold and inactivity. Here’s how to protect yours:

    1. Disconnect the battery from the caravan entirely.
    2. Store it indoors or in a dry, frost-free location.
    3. Charge every 4–6 weeks or use a smart charger with a maintenance mode.
    4. Check voltage regularly using a battery monitor or voltmeter (keep above 12.4V ideally).

    Tip: Never leave a discharged battery through winter—it shortens lifespan significantly.


    Step 5: Exterior Protection and Sealing

    Your caravan’s bodywork, seals, and exterior fittings also need winter protection:

    1. Wash and wax the exterior:
      • Remove grime, algae, and black streaks.
      • Use a quality caravan-safe wax to repel moisture.
    2. Inspect all seals around windows, doors, skylights, and vents:
      • Apply a silicone lubricant or rubber seal conditioner if needed.
    3. Lubricate locks, hinges, and corner steadies:
      • Use WD-40 or specialist spray to prevent seizing up.
    4. Fit wheel covers and levelling blocks:
      • Helps avoid flat spots on tyres.
      • If possible, rotate wheels monthly or move the van slightly.
    5. Use a breathable caravan cover:
      • Don’t use tarps or plastic sheeting—they trap moisture.
      • Ensure cover fits well and allows for airflow.

    Tip: If on a seasonal pitch, raise your jockey wheel and stabilisers slightly to keep the chassis from sitting in wet ground.


    Step 6: Clean and Protect the Toilet System

    Often forgotten—but crucial!

    • Empty the toilet cassette completely.
    • Rinse with a toilet tank cleaner to remove limescale and sludge.
    • Lubricate the seals using silicone spray.
    • Leave the blade slightly open to prevent it sticking over winter.

    Tip: Never use domestic bleach—it damages seals.


    Step 7: Secure and Store Safely

    When your caravan’s ready for storage, don’t forget these final steps:

    • Remove all valuables including electronics, TVs, and satellite dishes.
    • Close blinds/curtains halfway to prevent sun fading but allow visibility (to show it’s empty).
    • Lock all windows and doors and double-check security devices.
    • Engage wheel clamps, hitch locks, and alarms.
    • Check insurance requirements for winter storage.

    Tip: If you store your caravan at home, consider motion-sensor lights or a tracker for added security.

    A narrow country road covered in snow, with hedgerows and a bare tree under a clear blue sky
    Snow covered country lane glistening beneath bright winter sunshine

    What NOT to Do When Winterizing

    Let’s cover a few common mistakes to avoid:

    Mistake Better Option
    Leaving food or crumbs insideRemove all food and clean thoroughly
    Sealing every vent and windowMaintain airflow with covers and dehumidifiers
    Leaving the battery in place and flatRemove and maintain charge monthly
    Forgetting to open taps when drainingOpen all taps, showers, and drain valves
    Using domestic antifreezeUse only non-toxic caravan-safe antifreeze
    Covering with a plastic tarpUse a breathable caravan cover

    Optional Extras for Winterizing Like a Pro

    If you want to go a step further, here are some winter accessories that make life easier:

    • Caravan breathable winter cover
    • Tyre savers and levellers
    • Solar trickle charger for battery
    • Portable dehumidifier or crystal traps
    • Tow hitch and wheel lock covers
    • Ventilation chimney cowls
    • Smart battery monitor (Bluetooth enabled)

    When Should You Winterize Your Caravan?

    Most people winterize their caravan between late October and early December, depending on when you stop touring. If you’re planning winter getaways (Christmas trips or New Year), simply repeat the draining steps between uses.


    Reversing the Process in Spring

    When you’re ready to hit the road again in spring:

    • Close all drain valves
    • Reconnect the water system
    • Sanitize the fresh water tank
    • Check for signs of damp or rodent entry
    • Reinstall the battery
    • Run checks on gas, electrics, and heating
    • Air out all soft furnishings

    Tip: A spring caravan service is well worth booking ahead!


    Final Thoughts: Protect Your Investment All Year Round

    Winterizing your caravan isn’t just for peace of mind—it protects your investment, ensures a long-lasting lifespan, and sets you up for stress-free touring come springtime.

    While the first time can feel a bit intimidating, following this simple guide makes the process easy. Once you’ve done it once, it becomes a routine task each year.

    So grab a hot drink, set aside an afternoon, and give your caravan the winter prep it deserves!

  • Top 20 Caravan Hacks That Make Caravanning Easier

    Top 20 Caravan Hacks That Make Caravanning Easier

    Top 20 Caravan Hacks You Wish You Knew Sooner

    Caravanning is one of life’s great joys. There’s nothing quite like hitting the open road, setting up on a peaceful site, and enjoying the freedom of home comforts wherever you go. Although if you’ve ever travelled in a caravan, you’ll know it’s not always smooth sailing. From running out of fridge space to fighting with awning pegs, the little frustrations can sometimes overshadow the fun.

    Over time, though, you pick up clever tricks that make life so much easier. Some we’ve learned through trial and error (like discovering our leisure battery wasn’t the right grade for the motor mover and nearly exploding leaving us stuck getting the caravan into the garden). Others we’ve picked up from fellow caravanners over coffee (or Beer) in a campsite. These are the hacks you wish you knew sooner—the ones that save time, money, and stress.

    So here’s my roundup of the top 20 caravan hacks every caravanner should know. Whether you’re brand new to caravanning or have been towing for years, you’ll find something here to make your next trip smoother.


    1. Use Collapsible and Stackable Kitchenware

    Caravan kitchens are notoriously small, and cupboard space fills up fast. That’s why collapsible and stackable kitchenware is a lifesaver. (Contains Affiliate Amazon links below)

    Personal hack: We store ours in fabric baskets inside the cupboard. It stops rattling when towing and keeps everything in one place.


    2. Invest in a Caravan Battery Monitor

    Your leisure battery is the heart of your caravan. Without it, your motor mover, lights, fridge, and even alarms stop working. We learned the hard way when our caravan battery overheated and failed, it turned out it wasn’t the right grade to power our mover.

    Since then, we’ve installed a battery monitor that tracks:

    • Voltage
    • Charge percentage
    • Temperature

    This little gadget gives us peace of mind and helps us avoid costly breakdowns.

    Hack Tip: Pair it with a Grade A leisure battery if you use a motor mover.

    Caravan Battery Monitor that helps track your batteries health
    Caravan Battery Monitor that helps track your batteries health

    3. Magnetic or Stick onHooks for Extra Storage

    If you’re constantly losing keys, tea towels, or cables, magnetic hooks will change your life. Stick them to your fridge, cooker hood, or door for instant storage without drilling holes.

    They’re also great in the awning for hanging lanterns or dog leads.


    4. Levelling Made Easy with a Spirit Level App

    No one enjoys sleeping on a slant, and a fridge won’t run properly if your caravan isn’t level. Forget the guesswork—download a free spirit level app on your phone.

    1. Park up roughly where you want.
    2. Place your phone on the worktop or floor.
    3. Adjust your levelling ramps until the app reads zero.

    Personal note: We once tried “eyeballing it” and ended up with the kettle sliding across the counter. Never again!


    5. Shoe Organisers = Hidden Storage

    Over-the-door shoe organisers aren’t just for shoes—they’re the ultimate multi-purpose caravan storage hack.

    • Hang one on the bathroom door for toiletries.
    • Use one in the wardrobe for socks, underwear, or rolled t-shirts.
    • Keep one in the awning for toys, dog leads, or snacks.

    They’re lightweight, fold flat when not in use, and make everything easy to find.

    6. Use Pool Noodles to Protect Awning Poles and Edges

    Pool noodles are more than just swimming aids. Cut them lengthways and slide them over awning poles or sharp furniture edges inside your caravan.

    • Kid-friendly: Stops little heads from painful bumps.
    • Pet-friendly: Prevents injuries to dogs running around.
    • Budget-friendly: You can buy them for pennies in summer.

    7. Keep a Head Torch Handy

    A head torch might not sound glamorous, but once you use one you’ll never go back. It’s perfect for:

    • Late-night toilet block trips
    • Emergency awning repairs in the dark
    • Setting up on a pitch after sunset

    Personal hack: We keep one by the door so it’s always within reach.


    8. Frozen Water Bottles as Fridge Boosters

    Caravan fridges can be slow to cool, especially in summer. A frozen water bottle doubles up as an ice pack to keep your fridge cold while travelling.

    By the time it thaws, you’ve got a chilled drink ready to go. Win-win!


    9. Command Hooks and Strips for Damage-Free Hanging

    Caravan walls are delicate—screws or nails can cause expensive damage. Command hooks and strips give you extra hanging space for lights, utensils, or even artwork.

    The best part? They peel off without leaving marks when you’re ready to change things up.


    10. Caravan-Friendly Slow Cooker or Air Fryer

    Cooking in a small caravan kitchen isn’t always fun. That’s where a compact slow cooker or air fryer comes in.

    • Slow cooker: Prep dinner in the morning and let it cook while you’re out exploring.
    • Air fryer: Quick meals with minimal oil and washing up.

    Personal hack: Overnight oats in the slow cooker make the perfect grab-and-go breakfast before a long hike.


    11. Carry Spare Fuses, Bulbs, and Hose Connectors

    It’s amazing how such tiny items can cause such big problems. A blown fuse, dead bulb, or missing hose connector can ruin your setup.

    Keep a small tackle box filled with spares. It barely takes up space but could save your trip.

    In our old Elddis we got caught out by a fuse blowing so had to go on a hunt to local shops to find some!


    12. Use Reflective Thermal Blinds

    Thermal blinds are one of the best caravan hacks for comfort.

    • In summer, they reflect sunlight and keep your caravan cool.
    • In winter, they insulate your windows to retain heat.

    Ideal for older vans or vans that dont have great heating systems


    13. Caravan Levelling Ramps with Marked Points

    Levelling ramps can be tricky—how far should you pull forward? One hack is to paint lines or stick reflective tape at different heights.

    That way, you’ll know exactly where to stop every time. No more guesswork!

    Levelling Ramps – (Amazon Affiliate Link)

    Check out or post on How to level your caravan here.

    14. Portable Washing Line or Retractable Reel

    Caravans don’t come with much drying space, but a retractable washing line fixes that.

    • Attach it between two trees or posts.
    • Use it inside the awning on wet days.
    • Fold it away when not in use.

    Personal hack: We use ours for everything from swimsuits to muddy dog towels.

    15. Create a Pre-Trip Checklist

    A laminated checklist will save you countless headaches. Before towing, tick off things like:

    • Cupboards locked
    • Windows shut
    • Gas turned off
    • Tyres checked
    • Awning packed away

    We once forgot to secure a cupboard, and half our food ended up on the floor by the time we arrived. Lesson learned!

    16. Awning Carpet Peg Hack

    Awning carpets often come with flimsy pegs that bend easily. Swap them for heavy-duty metal pegs or plastic ones with handles.

    And don’t forget a rubber mallet—it’ll save your hands from blisters.

    Top Tip! Or really a tip to save time, your back and sanity! We have recently discovered Peggy Pegs or the cheaper alternatives! Absolute game changer!! Just use the the drill instead of beating the pegs in with a mallet! I will link affilate links below for them!

    Peggy Pegs – (Amazon Affilate Link)

    12 Pack Heavy Duty Metal Tent Pegs – (Amazon Affilate Link)

    17. Keep Moisture at Bay with Dehumidifier Bags

    Caravans are prone to damp, especially if stored over winter. Hanging moisture traps or dehumidifier bags help absorb excess condensation.

    They’re cheap, lightweight, and easy to replace every few months.

    Hanging Moisture Bags (Amazon Affilate Link)


    18. Use Stackable Storage Crates in Lockers

    Lockers quickly become cluttered. Stackable plastic crates keep everything neat and easy to access.

    Label them for tools, hoses, outdoor chairs, or kids’ toys so you can grab what you need without rummaging.

    19. Dog-Friendly Hacks for Pet Owners

    Travelling with a dog? A few hacks make it stress-free:

    • Collapsible water bowls for walks.
    • Cooling mats to keep dogs safe in summer.
    • A spare set of leads and towels in the caravan.

    Our dachshund/Jack Russell mix loves caravan trips, but he overheats easily. His cooling mat is a lifesaver on hot days.


    20. Keep a Spare Set of Keys Somewhere Safe

    It might sound obvious, but many caravanners only bring one set of keys. Getting locked out is a nightmare, especially if you’re far from home.

    Keep a spare in your tow vehicle or with a trusted family member. You’ll thank yourself one day.

  • The Healing Power of Nature

    The Healing Power of Nature

    How Getting Outdoors Helps Ease Stress and Anxiety

    In today’s busy world, stress and anxiety can creep up on us before we even realise it. For many of us, myself included, mental health isn’t just an occasional challenge—it’s something we live with and manage every day. I’ve suffered with anxiety and panic attacks for most of my life. At times, the weight of it all has felt overwhelming. But if there’s one thing that consistently helps lift that heavy fog, it’s getting out into nature.

    Whether it’s walking through a quiet forest, listening to the waves crash on a beach, or even a short stroll through the local park, nature has become a lifeline for me—and I know I’m not alone. Science backs it up, and so do countless people who’ve found solace in the natural world. So, let’s explore why nature is so powerful for our mental well-being, the benefits of spending time outside, and some simple yet joyful ways to reconnect with the great outdoors.


    My Journey with Anxiety—and How Nature Helped

    I’ve lived with anxiety for as long as I can remember. From heart-racing panic attacks to the kind of low moods that make you want to shut the world out, it’s been a journey of ups and downs. I used to think the answer had to be big and dramatic—a total life overhaul, some magical solution. But sometimes, the smallest changes make the biggest impact.

    One of those small changes for me was choosing to spend just 15 or 30 minutes outside. It started with little walks around the block when I felt a panic attack bubbling up. Then I began exploring local forest parks, taking slow strolls through the trees, breathing deeply, and just letting the world quieten down. I still remember the first time I sat alone on a beach, wrapped in a blanket, letting the sound of the waves soothe me. No phone. No pressure. Just me and nature.

    That feeling—that peace—is something I now actively seek. I’ve learned that even the shortest bit of time in nature can reset my mind. It doesn’t cure anxiety, but it grounds me. It gives me space to breathe. And on my worst days, it reminds me that I’m not alone in how I feel.

    Wild flowers spotted on a relaxing nature walk
    Wild flowers spotted on a relaxing nature walk

    The Science Behind Nature’s Mental Health Benefits

    It’s not just a hunch—there’s real science to back up why getting out into nature helps us feel better:

    1. Reduces Cortisol (the Stress Hormone)

    When we’re in natural settings, our body naturally lowers its cortisol levels. Cortisol is responsible for that “fight or flight” feeling—racing heart, tight chest, anxious thoughts. Spending time in nature helps our nervous system shift from “survival mode” to “rest and restore.”

    2. Boosts Serotonin and Dopamine

    These are the brain’s “feel good” chemicals, and they’re boosted when we spend time outdoors, especially in green spaces. Think of it as a natural mood-lifting prescription—without the side effects.

    3. Improves Focus and Attention

    Ever notice how you can think more clearly after a walk? Studies show that nature improves cognitive function and attention span, especially in those who struggle with anxiety, depression, or ADHD.

    4. Encourages Mindfulness

    Being outside helps anchor us in the present moment. Whether you’re watching a bird build a nest or feeling sand under your toes, nature gently encourages mindfulness—a powerful antidote to overthinking and anxiety.

    5. Promotes Better Sleep

    Light exposure during the day (especially morning sunlight) helps regulate your body’s natural sleep rhythms. Plus, being physically active outdoors can help you sleep more deeply at night.


    Simple Ways to Get Out into Nature

    You don’t have to climb a mountain or book a wilderness retreat to benefit from the outdoors. Here are some of the easy, accessible ways I’ve incorporated nature into my life—many of which can be done with little time or money.

    1. Local Forest Walks

    This is my go-to. There’s something incredibly calming about walking through tall trees, hearing the leaves rustle, and feeling the cool air. Forest parks often have clear trails, making it easy to wander safely—even if you’re alone.

    Tip: Try a mindful walk. No music, no podcasts. Just you, your breath, and the natural sounds around you.

    2. Beach Time

    Even in colder weather, I love sitting by the sea. The sound of waves is like a meditation track. I take a flask of tea, wrap up warm, and just… be. It’s the perfect place to journal, reflect, or let your mind drift.

    Beach walks to relax the mind
    Beach walks to relax the mind

    3. Bird Watching

    Bird watching is surprisingly soothing. I started by noticing the robins and blackbirds in my garden, then picked up a simple pair of binoculars and a bird guide. The act of quietly watching, listening, and identifying birds helps distract my anxious thoughts.

    Beginner birdwatching tip: Head to a local park or nature reserve in the early morning when birds are most active.

    4. Gardening and Outdoor Pottering

    If you’ve got a garden, balcony, or even a few pots on a windowsill, gardening can be a therapeutic outdoor activity. There’s something grounding about putting your hands in the soil and watching something grow.

    5. Nature Photography

    You don’t need a fancy camera—your phone will do. Try snapping close-ups of leaves, insects, clouds, or sunsets. It helps you notice details you might otherwise miss and encourages present-moment awareness.

    6. Picnics and Forest Coffee Breaks

    Pack a blanket, some snacks, or a flask of coffee and find a scenic spot. Even if you only have 20 minutes, sitting in nature with a warm drink can reset your whole mindset.

    7. Wildlife Spotting Walks with the Kids or Dog

    Spending time in nature doesn’t have to be solo. I often take the family (and the dog!) on nature treasure hunts—looking for pinecones, unusual leaves, or spotting butterflies. It’s a great way to bond and get everyone off screens for a bit.

    Goose and Duck swimming across a lake
    Goose and Duck swimming across a lake

    Why It’s Okay to Start Small

    If you’re struggling with your mental health, the idea of going out can sometimes feel too big. I get it. There were days when I couldn’t face the world, let alone a woodland trail. That’s why I always remind people: start small.

    • Open a window and listen to birdsong.
    • Step outside for 5 minutes and feel the breeze.
    • Sit on your doorstep with a cuppa and watch the clouds.

    These tiny acts still count. They’re little reminders that the outside world is there when you’re ready—and that it wants to hold space for you.


    Long-Term Benefits of a Nature Habit

    Over time, spending more time outdoors can create a snowball effect of benefits:

    ✅ More energy and motivation

    That sluggish, anxious feeling often fades after even a brief walk outside.

    ✅ Stronger resilience

    I’ve found that I bounce back from difficult days quicker when I’ve been regularly connecting with nature.

    ✅ Improved relationships

    Spending time outdoors with loved ones—whether on a walk, at the beach, or exploring somewhere new—has helped deepen my family bonds.

    ✅ Better mental clarity

    Some of my best ideas and biggest personal breakthroughs have come while out walking among the trees.


    Nature and Self-Care: It’s Not a Luxury, It’s a Necessity

    In our fast-paced world, we often treat self-care like a luxury. But here’s the truth: connecting with nature is one of the most essential forms of self-care there is. It’s not about being perfect or outdoorsy or Instagram-worthy. It’s about reconnecting with something ancient and powerful—something that’s been healing humans for thousands of years.

    So next time you’re feeling the tension build, or the anxious thoughts start spiraling, try stepping outside. Head to your nearest park, forest, or beach—even if it’s just for 15 minutes.

    Let the world hold you for a while.

    You might be surprised at how much lighter you feel.

    Sunsets at Annaginney
    Sunsets at Annaginney

    Final Thoughts: Nature as a Lifeline, Not Just a Hobby

    For me, nature isn’t just a nice way to pass the time. It’s been a vital part of my mental health journey. It’s helped me through panic attacks, burnout, low moods, and overwhelming days. It’s where I’ve cried, breathed, healed, and started over—again and again.

    And the best part? It’s always there.

    Waiting.

    Welcoming.

    So if you’re feeling the pressure of life, if your mind is racing and your chest feels tight—step outside. Into the trees. Onto the sand. Beside the birds.

    Let nature meet you where you are.

  • How to prep your caravan for a storm

    How to prep your caravan for a storm

    Storm-Ready: How to Prepare Your Caravan for Strong Winds (And Our Costly Lesson from a Stormy Night)

    There’s nothing quite like the sound of rain gently hitting your caravan roof while you’re snuggled inside, warm and dry. But when the wind starts howling and your awning flaps like a sail, things can quickly shift from cozy to chaotic.

    If you’re a fellow caravan lover like us—touring through all seasons, wind, rain, or shine—you’ll know that storms are an unavoidable part of life on the road (or even when you’re pitched up at home). We learned this the hard way a couple of years ago, when a freak storm hit and the neighbor’s shed roof came crashing down—straight onto our beloved caravan. We have also had some very hairy nights in Tollymore Forest Park in strong winds!

    That stormy night left us with dents, holes, and a serious lesson in storm preparedness.

    So today, I’m sharing everything we’ve learned about prepping your caravan for high winds, from awning safety to towing in storms, what to keep out of your “caravan garden,” and how to weatherproof your setup for peace of mind—whether you’re off-grid, on a site, or parked at home.


    Contents

    1. Why You Need a Storm Plan
    2. Real-Life Storm Damage: Our Caravan vs. The Flying Shed Roof
    3. Wind Ratings on Awnings (And When to Take Them Down)
    4. Securing Your Caravan Setup Before a Storm
    5. Storm-Proofing Your Caravan “Garden”
    6. Towing Your Caravan in Windy Conditions
    7. Staying Safe Inside the Caravan During a Storm
    8. Insurance Tips After a Storm
    9. The Emotional Toll of Caravan Damage
    10. Final Thoughts: What We Do Differently Now

    1. Why You Need a Storm Plan

    Caravans may be our little home-on-wheels, but let’s face it—they’re not built like brick houses. Wind can be incredibly destructive, especially to lightweight materials like caravan panels, roof vents, awnings, and outdoor accessories.

    Whether you’re touring full-time or simply use your caravan for holidays, having a storm plan is just as essential as your packing checklist. That includes:

    • Knowing your awning’s wind limits
    • Checking weather warnings before travel
    • Knowing when to pack up and move
    • Keeping your surroundings clear of hazards

    You never think it’ll happen to you—until it does.


    2. Real-Life Storm Damage: When a Shed Roof Hit Our Caravan

    Let’s rewind two years. We were at home with our caravan parked in the driveway, just back from a weekend away. There were strong winds forecast, but nothing out of the ordinary for Northern Ireland these days!

    That night, the wind got stronger and stronger then a gust caught our neighbor’s old garden shed roof panel, and the roof panel lifted off like a lid on a tin can. It flew across the wall and slammed into the side of our caravan with terrifying force.

    We heard the bang from inside the house, and ran out with torches. I’ll never forget the sinking feeling when we saw the side of our van—a panel of a shed roof stuck into the side of the van with several dents all over where the roof had hit. It dented part of the panel and put a hole in the side of the van.


    Storm Damage during the storm
    Storm Damage during the storm

    3. Wind Ratings on Awnings: Know Your Limits

    Awnings are one of the most vulnerable parts of a caravan setup during storms. Even premium air awnings have wind ratings, and once you exceed those, they become a liability—not a luxury.

    Here’s a rough guide:

    • Light wind (up to 15 mph / 24 km/h): Most awnings are fine
    • Moderate wind (15–25 mph / 24–40 km/h): Pegs and guy lines must be secure
    • Strong wind (25–35 mph / 40–56 km/h): Consider removing fabric panels
    • Gale force (35+ mph / 56+ km/h): TAKE DOWN your awning completely

    Even storm straps and heavy-duty poles can’t guarantee safety in a true storm. We now err on the side of caution—if winds are forecast above 30mph, the awning comes down.

    Tip: Use a wind speed app like Windy or the BBC/Met office Weather app to check your location forecasts daily when touring.


    4. Securing Your Caravan Setup Before a Storm

    Whether you’re pitched on a site, in your garden, or parked on a CL, you should always do a pre-storm check. It doesn’t have to be complicated, just thorough.

    Caravan Storm Checklist:

    Awning removed or properly storm-strapped
    All skylights and roof vents tightly shut
    TV aerial down and secured
    Chocks and steadies in place
    Windows and doors locked
    Loose outdoor items packed away
    Water containers and waste tanks emptied or secured
    Check caravan cover (if used) is tight and not flapping
    Solar panels secure

    Don’t forget your motor mover battery! If it’s loose or under strain, high winds can shift your van even when parked. We now have a battery monitor installed for extra peace of mind.

    Dents from roof panel hitting our van
    Dents from roof panel hitting our van

    5. Storm-Proofing Your Caravan “Garden”

    We all love setting up an outdoor space with chairs, rugs, plants, and little personal touches—but in a storm, these become flying projectiles.

    Two years ago, we had planters, a small gas BBQ, and a garden gnome out. Luckily, we brought them in. Our neighbor didn’t, and we ended up with a plastic garden table smashed against the fence too.

    Before a Storm, Secure or Store:

    • Garden furniture (especially lightweight plastic)
    • Plant pots or planters
    • Dog bowls and toys
    • Portable BBQs and gas bottles
    • Fairy lights or solar stakes
    • Bikes or scooters
    • Steps and storage boxes

    Everything should either be stowed inside the caravan or locked down tightly with ratchet straps or bungee cords.


    6. Towing in Windy Conditions: Yes or No?

    Towing a caravan in wind is not only difficult—it’s dangerous. Even the most experienced towers know that crosswinds are a serious threat on open roads and motorways.

    Avoid towing if possible when:

    • Wind speeds are over 30mph
    • Crosswinds are expected
    • The Met Office issues yellow or red warnings

    If you must tow:

    • Reduce speed
    • Keep both hands on the wheel
    • Ensure your caravan is loaded correctly (low and central)
    • Use towing mirrors like our trusty Emuk XLs
    • Avoid overtaking lorries in side winds

    We once towed in 30/40mph winds on a rural route and it was white-knuckle stuff. Never again. If in doubt—stay put.


    7. Staying Safe Inside the Caravan During a Storm

    If you’re already pitched and a storm hits unexpectedly, don’t panic—but do take precautions.

    Do:

    • Close all windows and rooflights
    • Secure blinds and curtains
    • Turn off gas appliances
    • Keep torches handy
    • Charge devices in case of power outage
    • If safe, move your car to block wind from the side of the van

    Don’t:

    • Don’t venture outside if you dont have to
    • Leave children or pets unattended
    • Use BBQs or gas heaters indoors (carbon monoxide risk)

    We now keep a storm box in the van: torch, batteries, phone charger, first aid kit, a blanket, and emergency snacks. Peace of mind in one crate.


    8. Insurance Tips After a Storm

    If your caravan suffers damage, the insurance process can feel daunting—but it’s easier if you’re prepared:

    After Storm Damage:

    1. Photograph everything immediately
    2. Note time/date/weather conditions
    3. Don’t move anything until you’ve documented it
    4. Call your insurance and ask about approved repairers
    5. Save receipts for any emergency fixes

    Make sure your caravan insurance includes storm cover and accidental damage, even when parked at home. Also make sure you have the caravan insured for the right amount to.


    9. The Emotional Toll of Caravan Damage

    As much as we focus on practical prep, there’s an emotional side to all of this, too. If you’re anything like us, your caravan is more than just a vehicle—it’s your getaway, your sanctuary, a space full of family memories.

    Seeing it damaged was honestly heartbreaking. We were angry, worried, and felt helpless. Although it was very much stressful it also taught us how resilient caravanners are, and how many lessons you only learn through experience.

    It’s OK to be shaken by storm damage. What matters is how you move forward.


    10. Final Thoughts: What We Do Differently Now

    That storm changed how we caravan—especially in winter and autumn. We’re now vigilant with forecasts, we never leave the awning up in windy conditions, and we regularly check our surroundings for anything that could turn airborne.

    Our New Must-Dos Before Any Storm:

    Take down the awning
    Store away anything light
    Double check rooflights, windows, vents
    Move the car to shield the van
    Set internal supports (especially for skylights)
    Charge devices and grab our storm box

    And every time a strong wind hits now, we’re grateful we learned our lesson the hard way—because we’ll never take the weather for granted again.

  • How to level a caravan

    How to level a caravan

    How to Level a Caravan for Beginners – A Complete Step-by-Step Guide (With Dos and Don’ts)

    Leveling your caravan is one of the most important tasks to master as a new caravanner. Whether you’re setting up on a touring pitch, a CL site, or wild camping for the night, making sure your caravan is perfectly level ensures your appliances work properly, water flows correctly, and—most importantly—you sleep comfortably.

    In this beginner-friendly guide, we’ll walk you through exactly how to level your caravan step by step, explain how to check if it’s level, and cover the common dos and don’ts to avoid mishaps. Let’s get you leveled up—literally!


    Why Is It Important to Level Your Caravan?

    Before diving into the how-to, let’s understand the “why.”

    A level caravan helps to:

    • Ensure your fridge works efficiently (especially absorption fridges)
    • Prevent shower trays and sinks from overflowing
    • Avoid strain on chassis and stabiliser legs
    • Improve sleep quality with a flat bed
    • Prevent doors from swinging open or closed
    • Keep cupboard items and water tanks in balance
    • Stop water pooling on flat surfaces

    Even a slight slope can be noticeable when you’re inside the van—especially at night or when cooking.


    What You’ll Need to Level Your Caravan

    Here’s a checklist of basic leveling tools:

    Essential Equipment:

    • Caravan spirit level (bubble or digital)
    • Wheel ramps/chocks
    • Levelling blocks or mats
    • Caravan jack (optional)
    • Corner steadies (already fitted on most caravans)
    • Winding handle or cordless drill with corner steady adaptor
    • Motor mover (optional but makes life easier)
    • Torque wrench (for re-tightening wheel nuts if needed)
    Milenco stacka jack pads
    Milenco stacka jack pads

    The ones we use are Milenco Stacka Jacks pads these work well with the Milenco Stacka Corner feet you can also get the Milenco Jockey wheel pad (Contains Affiliate links)


    Step-by-Step Guide to Leveling a Caravan

    Let’s break the process into three main phases:

    1. Side-to-side leveling
    2. Front-to-back leveling
    3. Final steadying

    Step 1: Choose Your Pitch

    When you arrive on-site, first choose a pitch. Some are naturally level, others are sloped or uneven.

    Top tips for choosing the right spot:

    • Walk around and visually assess the ground slope.
    • Choose a pitch with minimal gradient if you can.
    • Avoid soft or boggy ground.
    • Check access to electric hook-up and facilities.

    Step 2: Side-to-Side Leveling (Axle Axis)

    This is the first and most important step because it’s the hardest to adjust once the caravan is unhitched.

    Instructions:

    1. Place a spirit level on the caravan floor, ideally across the axle or kitchen worktop (width-wise).
    2. If the bubble isn’t centred, raise the lower side using a levelling ramp.
    3. Drive slowly onto the ramp (or use your motor mover) until the bubble is centered.
    4. Place chocks behind the wheel once level, to prevent rolling.

    Optional: If the ramp is too steep, use leveling blocks to raise in stages.

    Don’t use corner steadies to lift the caravan side-to-side—they’re not designed for this and can cause damage.

    Caravan Levelling Ramps ~ Affliate link


    Step 3: Chock Your Wheels

    Once you’re level side-to-side, place a wheel chock behind (and in front if needed) the wheels to prevent any movement.

    If you’re on a steep pitch or if the ground is loose (gravel, grass), double-chock both sides.


    Step 4: Unhitch the Caravan (If you didnt use motormover or pushed into place) Skip to step 5 if so.

    Now that you’ve secured the side-to-side leveling, it’s time to unhitch.

    Steps:

    1. Apply the caravan handbrake.
    2. Disconnect the electrics and breakaway cable.
    3. Lower the jockey wheel and wind it down until it touches the ground.
    4. Unhitch the tow ball and drive the car away.
    5. Use the jockey wheel to support the caravan front.

    Tip: Always double-check the handbrake is on before driving away.


    Step 5: Front-to-Back Leveling (Longitudinal Axis)

    Now use the jockey wheel to level the caravan front-to-back.

    Instructions:

    1. Place the spirit level lengthways on a flat surface (e.g. floor or worktop).
    2. Wind the jockey wheel up or down until the bubble is centered.
    3. When the front-to-back level is perfect, lock the jockey wheel into place.

    Pro Tip: A digital caravan leveller or phone app (like “Levelling Tool”) ~ Contains affiliate link, can help with precision.


    Step 6: Lower the Corner Steadies

    With the caravan now level, use the corner steadies to stabilise it.

    How to do it:

    1. Use a winding handle or cordless drill to wind each corner steady down until it contacts the ground.
    2. Apply light pressure to stabilise—do not lift the caravan with them!
    3. Use leveling pads or blocks underneath if the ground is soft or uneven.

    Don’t over-tighten steadies—it stresses the chassis and can twist the frame.

    The Drill we use is a Makita Cordless Drill with the Caravan leg winder socket (Contains Affiliate links)

    Makita Cordless drill with caravan steadies drill bit
    Makita Cordless drill with caravan steadies drill bit

    Step 7: Double-Check Everything

    Do a final walk-around:

    • Caravan is level both side-to-side and front-to-back
    • Wheels are chocked
    • Handbrake is applied (If your pitched on somewhere flat and no risk of it moving we keep the handbrake off to prevent it from seizing)
    • Corner steadies are down and secure
    • Jockey wheel is locked
    • Doors and windows open and close smoothly

    Common Mistakes to Avoid (Don’ts)

    New to caravanning? These are the most common leveling mistakes and how to avoid them:

    Don’t rely on corner steadies for lifting.
    They are for stability, not weight-bearing.

    Don’t skip leveling just because it “feels okay.”
    Your fridge and plumbing could be affected even with slight tilt.

    Don’t level on the jockey wheel first.
    Always level side-to-side before unhitching or use motormover.

    Don’t forget to chock the wheels.
    This can lead to rolling—dangerous and damaging!

    Don’t park nose-down on steep hills.
    It can overwork your handbrake and affect waste water drainage.


    Handy Leveling Tips (Dos)

    Use your spirit level before buying ramps.
    Every caravan is different—some need steeper or longer ramps.

    Label your ramps and chocks.
    Keep everything tidy in one box or bag marked “Leveling Kit.”

    Practice on your driveway or garden.
    Get familiar with your tools in a low-pressure setting.

    Upgrade to a motor mover.
    Leveling becomes much easier when you can fine-tune wheel positions without driving the tow car.

    Use a digital leveller app.
    Modern tools like Bluetooth levels or phone apps can give real-time guidance.

    Recheck your levels after a day.
    Weather and weight movement (e.g. water tanks filling) can affect balance.

    Invest in wide steadies if you camp off-grid.
    They’re better for grass and gravel pitches.

    Single axel motor mover caravan
    Single axel motor mover caravan

    Optional Tools That Make Leveling Easier

    If you find manual leveling tricky or time-consuming, here are some gadgets to consider:

    Motor movers – Allow you to drive the caravan onto ramps remotely.

    Digital leveling sensors – Sync with your phone to show real-time leveling data.

    Auto-levelling systems – High-end systems that electronically level your caravan at the push of a button.

    Spirit levels with magnets – Handy for sticking to the A-frame or inside door for a quick glance.


    Final Thoughts – Make Leveling Part of Your Routine

    Once you’ve done it a few times, leveling your caravan becomes second nature. It’s a vital part of setting up, and doing it right will improve your comfort, keep your appliances happy, and extend the lifespan of your caravan chassis and legs.

    Just remember: side-to-side first, chock securely, then front-to-back with the jockey wheel, and finally lower the steadies for stability. And never use the steadies to level the van!

  • Choosing your caravan layout

    Choosing your caravan layout

    Choosing the Right Caravan Layout: Types, Sizes, Berths & Real-World Pros and Cons

    When it comes to caravanning, one of the most exciting—but also most overwhelming—decisions is choosing the right caravan layout. Whether you’re a couple looking for quiet weekend escapes, a young family craving spontaneous adventures, or seasoned tourers upgrading to something more luxurious, your caravan’s layout can make or break your experience on the road.

    In this blog, we’re diving into the different types of caravan layouts, sizes, and berth options available on the market today. We’ll share what works well, what can feel cramped, and what we’ve learned from owning both a traditional layout with a make-up bed and an upgraded model with a fixed island bed. From practical use of space to bedtime routines and storage hacks, this guide blends technical insight with real-world experience to help you pick your perfect pitch.


    Table of Contents

    1. Understanding Caravan Berths & Layouts
    2. Popular Caravan Layout Types
      • Front Lounge Layouts
      • Fixed Bed Layouts
      • Bunk Bed Family Layouts
      • Twin Single Bed Layouts
      • End Bathroom Layouts
      • L-Shaped Lounges
    3. Caravan Sizes Explained
    4. Pros and Cons of Different Layouts
    5. Our First Caravan: The Elddis Typhoon GT
    6. Our Upgrade: The Elddis Crusader Aurora
    7. What We’ve Learned from Both
    8. How to Choose the Right Layout for You
    9. Final Thoughts

    1. Understanding Caravan Berths & Layouts

    Before diving into specific layouts, it’s important to understand what “berth” means. A berth is simply the number of people a caravan can sleep. Common sizes include:

    • 2-Berth: Ideal for couples.
    • 4-Berth: Great for families or couples who want guest space.
    • 5-6 Berth: Often has bunk beds and larger seating areas—suited for families with children.

    Layout, on the other hand, refers to the interior design and arrangement of beds, seating, bathrooms, and kitchens. While berths give you capacity, layout determines comfort and usability.


    2. Popular Caravan Layout Types

    2.1 Front Lounge Layouts

    This classic layout features a U-shaped or parallel front seating area that converts into a double bed or two singles at night. It’s often paired with:

    • A central kitchen and washroom
    • An end bathroom or fixed bed

    Best for: Couples or smaller families who don’t mind making up the bed.

    2.2 Fixed Bed Layouts

    Fixed beds come in various styles: French beds (sideways), transverse island beds, or rear island beds. They offer a ready-made sleeping space, which is incredibly convenient.

    Best for: Couples who want comfort and less hassle.

    2.3 Bunk Bed Family Layouts

    Designed for families with kids, these layouts often feature:

    • A fixed double or lounge bed at one end
    • Stacked bunks at the opposite end
    • A central washroom and kitchen

    Best for: Families who need multiple permanent beds.

    2.4 Twin Single Bed Layouts

    This layout features two single beds, often in the rear, with a central washroom and kitchen. Some people prefer this over a double bed for ease of access.

    Best for: Friends touring together or couples who prefer separate sleeping.

    2.5 End Bathroom Layouts

    An end bathroom spans the width of the caravan at the rear and usually includes a generous shower, wardrobe, and toilet.

    Best for: Tourers who want a bigger bathroom and extra changing space.

    2.6 L-Shaped Lounges

    This layout maximizes the seating area at the front, creating a more social and “open-plan” feel. Some versions include a rear dinette or fixed bed.

    Best for: People who value open space and comfort in the lounge.

    Swift L Shape Lounge caravan
    Swift L Shape Lounge

    3. Caravan Sizes Explained

    Caravans range from compact 2-berth models under 6m to full-size twin axles stretching 8m or more. Size affects:

    • Weight: Heavier vans need a more powerful tow car.
    • Manoeuvrability: Shorter vans are easier to tow and pitch.
    • Storage: More space means more comfort—but harder storage logistics.

    4. Pros and Cons of Different Layouts

    Let’s break down the real pros and cons of each layout:

    Layout TypeProsCons
    Front LoungeFlexible, airy, great viewsMaking up bed daily can be a chore
    Fixed BedAlways ready to sleep, comfortTakes up space during the day
    Bunk BedsIdeal for kids, quick bedtime setupMay sacrifice adult seating/storage
    End BathroomSpacious, private changing areaCan limit storage at rear of van
    Twin Single BedsNo bed sharing, easy to accessNo “cosy” double bed feel
    L-Shaped LoungeMore social seatingOften reduces front window size

    5. Our First Caravan: The Elddis Typhoon GT

    Our first ever caravan was the Elddis Typhoon GT, and honestly, it was the perfect introduction to touring life.

    Key Features:

    • Front lounge that converted into a double bed or two singles
    • Bunk beds midway for our child
    • A spacious end bathroom with a decent-sized shower and wardrobe

    What we loved most was the generous storage, especially in the rear washroom. Having the bunks meant our child had a dedicated space, and we could unwind in the front seating area once they were asleep. However, we won’t sugarcoat it: making up the bed every night did get a little tiring, especially after a long day of adventures.

    Elddis gt end bathroom
    Elddis gt end bathroom

    6. Our Upgrade: The Elddis Crusader Aurora

    A few years later, we upgraded to a 4-berth Elddis Crusader Aurora, and wow—it felt like luxury compared to the Typhoon.

    Key Features:

    • Fixed island bed at the rear
    • Separate shower and bathroom in the middle
    • Front lounge that converts into a bed

    The fixed bed was a game-changer. Not having to wrestle with cushions and bedding every evening felt like a real treat. It also gave our mornings a slower, more relaxed pace.

    However, there are some compromises:

    • The front seating area is slightly shorter, so it doesn’t feel as roomy.
    • While it’s a 4-berth van, it can feel tight with two adults and an 8-year-old.
    • You lose a bit of floor space to the fixed bed and middle washroom layout.

    That said, we love it and have happily toured in it year-round, including over Christmas holidays.

    Fixed end bed caravan
    Fixed end bed caravan

    7. What We’ve Learned from Both

    Comfort vs Space

    Having a fixed bed equals comfort, but you’ll lose some space—especially in the front lounge. If you’re touring with kids, consider how much room you’ll need for daytime living.

    Bedtime Routines Matter

    In the Typhoon, one of us had to wait until the bed was made to relax. In the Aurora, we just crawl in when we’re ready, no fuss.

    Storage is Everything

    Layouts with end bathrooms tend to give you more wardrobe and cupboard space. The Aurora, while plush, has less room to tuck things away.

    Every Layout Is a Compromise

    There is no one-size-fits-all layout. You’re always trading one benefit for another—be it a bigger kitchen, a fixed bed, or extra floor space.


    8. How to Choose the Right Layout for You

    When picking your caravan layout, ask yourself:

    1. How many people will be sleeping in it regularly?
    2. Do you mind making up the bed each night?
    3. How important is storage space?
    4. Are you touring in winter (extra space indoors matters)?
    5. Do you need privacy or open-plan living?

    If you’re a couple who value comfort and travel often, a fixed island bed will feel like a luxury hotel room on wheels. Families with younger children might benefit more from bunk beds and a flexible front lounge.


    9. Final Thoughts

    There’s something uniquely personal about choosing your caravan layout. It’s not just about features—it’s about how you live on the road. We’ve been lucky to experience both ends of the spectrum: a traditional family-friendly layout in our Elddis Typhoon GT, and now a more luxurious fixed bed setup in the Crusader Aurora.

    Both had their strengths, and both helped create incredible memories.

    So whether you’re looking for more sleeping space, a permanent bed, or the biggest bathroom you can get, we hope this guide helps you narrow down the layout that’s right for you.

    Remember: try before you buy if you can, and picture your typical day in the van. That’s where the magic lies.


    🚐 Have a layout you love (or hate)? Share your experiences with us at Pick and Pitch Adventures—we’d love to hear from you!

  • Quick healthy family caravan dinners

    Quick healthy family caravan dinners

    10 Quick and Healthy Family Dinners to Cook in Your Caravan

    When you’re away in your caravan, the last thing you want is to spend hours cooking or rely too much on takeaways. With limited space and equipment, the key is to keep meals simple, healthy, and family-friendly. Whether you’re feeding kids or adults, these quick recipes are perfect for your compact kitchen, portable hob, or even a BBQ.

    Here are 10 easy and wholesome caravan dinner ideas that will keep everyone full and happy after a day of adventuring!


    • 1. One-Pan Chicken Fajitas

    Why we love it: Minimal washing up, bursting with flavour, and everyone can build their own wrap.

    Ingredients (serves 4):

    • 2 chicken breasts, sliced
    • 2 bell peppers, sliced
    • 1 red onion, sliced
    • 1 tbsp olive oil
    • 1 tsp smoked paprika
    • 1 tsp cumin
    • Salt and pepper to taste
    • 4 wholemeal tortillas
    • Optional: sour cream, grated cheese, salsa

    How to make:

    1. Heat the oil in a large frying pan.
    2. Add chicken, paprika, cumin, salt, and pepper. Cook until browned.
    3. Add peppers and onions. Sauté for 5–7 minutes until softened.
    4. Serve in tortillas with your choice of toppings.

    • 2. Tuna Pasta with Sweetcorn & Greek Yogurt Sauce

    Why we love it: No cream needed! Greek yogurt makes it creamy and protein-packed.

    Ingredients:

    • 300g pasta (wholewheat if possible)
    • 1 tin of tuna in spring water, drained
    • 1 tin sweetcorn, drained
    • 4 tbsp Greek yogurt
    • 1 tsp mustard
    • Salt and pepper
    • Optional: grated cheese or parsley

    How to make:

    1. Boil pasta, then drain and return to the pot.
    2. Stir in tuna, sweetcorn, yogurt, mustard, and season.
    3. Mix well and heat gently (don’t boil, or yogurt may curdle).
    4. Serve with a sprinkle of cheese or parsley.

    • 3. Sausage & Veg Tray Bake (Oven or BBQ)

    Why we love it: One tray, loads of flavour. Works great in a caravan oven or foil-wrapped on a BBQ.

    Ingredients:

    • 6 chicken or turkey sausages
    • 3 carrots, chopped
    • 2 sweet potatoes, cubed
    • 1 red onion, quartered
    • 1 tbsp olive oil
    • 1 tsp dried rosemary or thyme
    • Salt and pepper

    How to make:

    1. Toss all ingredients in oil and seasoning.
    2. Lay on a tray or wrap in foil.
    3. Bake at 200°C for 30–35 mins or BBQ in foil for about 25 mins, turning halfway.

    • 4. Stuffed Pita Pockets with Hummus & Falafel

    Why we love it: No cooking needed if using pre-made falafel—just assemble!

    Ingredients:

    • 4 wholemeal pitas
    • 8 pre-cooked falafel balls
    • Hummus
    • Grated carrot
    • Cucumber slices
    • Lettuce
    • Greek yogurt (optional)

    How to make:

    1. Warm pitas lightly on the hob or BBQ.
    2. Cut open and spread hummus inside.
    3. Add falafel, grated veg, and a spoon of yogurt if you like.
    4. Wrap in foil for an easy on-the-go dinner.

    Quick BBQ on a recent trip
    Quick BBQ on a recent trip
    • 5. Caravan Veggie Stir-Fry with Noodles

    Why we love it: Uses up leftover veg and cooks in under 10 minutes.

    Ingredients:

    • 1 pack egg noodles or rice noodles
    • 2 tbsp soy sauce
    • 1 tbsp sesame oil (or olive oil)
    • 1 garlic clove, chopped
    • 1 red pepper, sliced
    • 1 courgette, julienned
    • 1 carrot, grated or sliced
    • Optional: cooked chicken or prawns

    How to make:

    1. Boil noodles, then drain.
    2. Heat oil in a wok or frying pan. Sauté garlic, then veg.
    3. Add noodles and soy sauce. Stir-fry for 2–3 mins.
    4. Add protein if using. Serve hot.

    • 6. BBQ Chicken & Corn Foil Packs

    Why we love it: No pans needed—everything cooks in one foil wrap!

    Ingredients:

    • 2 chicken breasts, diced
    • 2 corn on the cobs, halved
    • 1 red pepper, sliced
    • 1 tbsp BBQ sauce per pack
    • Olive oil, salt, and pepper

    How to make:

    1. Mix all ingredients with seasoning and BBQ sauce.
    2. Divide between two large foil sheets and wrap tightly.
    3. Cook on BBQ or in oven at 200°C for 25–30 mins.
    4. Open carefully and serve with crusty bread.

    • 7. Lentil & Tomato Curry

    Why we love it: A warming veggie meal that’s full of protein and super cheap!

    Ingredients:

    • 1 cup red lentils, rinsed
    • 1 tin chopped tomatoes
    • 1 onion, diced
    • 2 garlic cloves, minced
    • 1 tsp curry powder
    • ½ tsp turmeric
    • 500ml water or stock
    • Optional: spinach or peas

    How to make:

    1. Sauté onion and garlic until soft.
    2. Add spices, lentils, tomatoes, and water.
    3. Simmer for 20–25 mins until thick.
    4. Add spinach or peas in the last 5 mins. Serve with naan or rice.

    • 8. Egg Fried Rice with Veggies

    Why we love it: Great way to use up leftover rice. Ready in 10 minutes.

    Ingredients:

    • 2 cups cooked rice (chilled)
    • 2 eggs, beaten
    • 1 cup mixed frozen veg or chopped fresh veg
    • 1 tbsp soy sauce
    • 1 tsp sesame oil or olive oil
    • Optional: cooked chicken or prawns

    How to make:

    1. Heat oil in a pan. Add eggs, scramble quickly, then push to the side.
    2. Add veg and stir-fry for 3–4 mins.
    3. Add rice and soy sauce, stir everything together.
    4. Heat through and serve hot.

    • 9. Mini Tortilla Pizzas

    Why we love it: Fun for kids to help make! No oven? Use a frying pan or BBQ.

    Ingredients:

    • 4 tortilla wraps
    • 4 tbsp tomato purée or pizza sauce
    • Grated cheese
    • Toppings: ham, mushrooms, sweetcorn, olives, etc.

    How to make:

    1. Spread sauce over wraps.
    2. Add cheese and toppings.
    3. Cook on a dry frying pan over low heat or foil-lined BBQ tray for 5–7 mins until cheese melts and base is crisp.
    Lidls Gas Pizza oven connected to the BBQ point on the caravan
    Lidls Gas Pizza oven connected to the BBQ point on the caravan

    • 10. Caravan Chilli Con Carne

    Why we love it: A hearty one-pot meal that’s perfect for cool evenings.

    Ingredients:

    • 500g lean mince (beef or turkey)
    • 1 tin kidney beans, drained
    • 1 tin chopped tomatoes
    • 1 onion, diced
    • 1 garlic clove, minced
    • 1 tsp chilli powder or paprika
    • Salt and pepper
    • Optional: rice or tortilla chips

    How to make:

    1. Brown mince in a large pan, then add onion and garlic.
    2. Stir in spices, tomatoes, and beans.
    3. Simmer for 20 mins. Add water if needed.
    4. Serve with rice or over tortilla chips for chilli nachos.

    Final Tips for Caravan Cooking

    • Plan ahead: Pre-chop or pre-cook ingredients before your trip if possible.
    • Use minimal pans: Choose recipes that need one pot or foil wraps.
    • Stock up on staples: Tinned goods, pasta, rice, wraps, and spices go a long way.
    • Portable BBQs or induction hobs: These make cooking outdoors easier and more enjoyable.
    • Make it fun: Get the kids involved with pizza toppings, pita building, or wrapping foil packs.

    Wrapping It Up

    Caravan dinners don’t need to be boring or a hassle. With a few pantry staples, a little creativity, and some flexible ingredients, you can whip up healthy, tasty meals in no time—even in a small space.

    From one-pan wonders to BBQ favourites and no-cook meals, there’s something here for every family. These recipes are perfect for sunny evenings, busy days, or even those rainy nights when you’re tucked up inside playing board games or watching a movie.

    So, fire up the stove or BBQ, gather your ingredients, and enjoy stress-free family meals under the stars!

  • How to make sure your car is caravan ready

    How to make sure your car is caravan ready

    Is Your Car Caravan-Ready? The Ultimate Towing Prep Guide from Our Family Adventures

    Discover how to make sure your car is suitable for towing a caravan, with safety checks, legal requirements, and personal tips from our own experience towing with a Land Rover Freelander.

    There’s nothing quite like hitching up the caravan and hitting the open road. The freedom, the flexibility, and the fun of making your own adventures wherever the wind (or weather) takes you. But before the adventure begins, there’s one crucial step every caravanner must take seriously: making sure your car is safe and suitable to tow.

    From weight limits and towing capacities to legal requirements and simple safety checks, this guide has everything you need to prepare your tow vehicle—and we’ll even throw in some personal insights from our own towing journey with our Land Rover Freelander!

    Is Your Car Suitable for Towing a Caravan?

    Before you even consider hitching up, you need to make sure your car is physically and legally capable of towing a caravan. Not all cars are built to tow—and towing with a car that isn’t up to the job can be dangerous, illegal, and expensive.

    BMW M Sport
    This car is not a suitable tow car!

    Step 1: Check Your Vehicle’s Towing Capacity

    Your car’s towing capacity is the maximum weight it can safely pull. You’ll usually find this in the vehicle handbook or on the manufacturer’s plate (located inside the driver’s door frame or under the bonnet).

    There are two important terms to know:

    • Braked Towing Capacity: This is the maximum weight your car can tow if the caravan has its own braking system (which most do).
    • Unbraked Towing Capacity: The limit for trailers or caravans without brakes (usually much lower).

    Top Tip: Never exceed your car’s braked towing limit—it’s illegal and puts you and others at serious risk.

    Step 2: Understand Weight Terminology

    When it comes to matching your car and caravan safely, weight really matters. Here are the key terms you need to know:

    • MTPLM (Maximum Technically Permissible Laden Mass): The maximum weight your caravan can be when fully loaded.
    • MIRO (Mass in Running Order): The caravan’s weight as it leaves the factory, with no added gear or water.
    • Payload: The difference between MTPLM and MIRO—i.e., how much you can load into the caravan.
    • Kerb Weight: The weight of your car with all standard equipment, fluids, a full tank of fuel, and a driver.

    Use this info to calculate the caravan-to-car ratio. A good rule for beginners is the 85% rule: try not to tow a caravan that weighs more than 85% of your car’s kerb weight.

    Our Setup: Towing with a Land Rover Freelander

    When we first got our Land Rover Freelander, it didn’t have a tow bar. But we knew we’d be using it for towing our Elddis Crusader Aurora caravan, so we had a tow bar professionally fitted—specifically with an AL-KO tow ball, designed to work perfectly with AL-KO hitch stabilisers.

    And let me tell you—it made a world of difference! The added stability when towing was immediately noticeable, especially at higher speeds or in windier conditions. It gives us peace of mind knowing we’ve got the right gear for the job.

    Pre-Tow Car Checks: Is Your Vehicle Ready to Tow?

    Even if your car is suitable for towing, it still needs a bit of TLC and prep work before each trip. Here’s what we check before setting off on every caravan adventure:

    1. Tow Bar & Tow Ball

    • Ensure the tow bar is securely fitted and free from rust or damage.
    • Check the AL-KO tow ball is clean and grease-free (essential if you’re using an AL-KO hitch).
    • Inspect for any movement or loose bolts—everything should feel solid.
    Alko Towball on towbar
    Alko towball on towbar

    2. Electrics & Lights

    • Plug in your caravan’s 7-pin or 13-pin connector and do a light check.
    • Make sure brake lights, indicators, tail lights, fog lights, and reversing lights all work properly.
    • If your lights flicker or don’t work, check for corrosion or dirt in the socket.

    3. Towing Mirrors

    Using towing mirrors isn’t just helpful—it’s the law if your caravan is wider than your car.

    We personally use the Emuk XL universal towing mirrors (Affiliate link), and we absolutely love them. They’re super stable, easy to fit, and give us a clear, extended view down the side of the caravan. That extra visibility makes a huge difference when changing lanes, reversing, or checking for overtaking traffic.

    Legal Note: You must be able to see 20 metres behind and 4 metres to the side of your caravan. No excuses—mirrors matter!

    4. Tyre Checks

    • Check your car’s tyre pressure, including the spare.
    • Inspect tyre tread depth and look for any cracks or bulges.
    • Make sure your caravan tyres are also in good condition!

    5. Fluids & Brakes

    • Top up oil, coolant, and windscreen wash.
    • Ensure your brakes feel firm and responsive.
    • Remember—your car is working harder when towing, so everything needs to be in tip-top shape.

    Caravan Hitch-Up Safety Checks

    Once your car is ready, it’s time to hook up the caravan. Here’s our safety checklist that we do every single time before we drive off:

    1. Check the Hitch

    • Make sure the caravan is properly hitched onto the tow ball.
    • You should hear a satisfying “click” as the hitch engages.
    • Double-check by winding the jockey wheel down and confirming the hitch stays on.

    2. Breakaway Cable (Affiliate link)

    This vital safety cable engages the caravan brakes if it becomes detached from the tow car.

    • Clip it to a designated point on your tow bar (not just looped around).
    • Make sure it’s not dragging on the ground or overly taut.

    3. Jockey Wheel

    • Wind it fully up and clamp it securely out of the way.
    • Stow the handle so it won’t fall or get caught.

    4. Corner Steadies

    • Wind up all four caravan corner steadies.
    • Store the winding handle securely.

    5. Windows, Rooflights, & Doors

    • Make sure everything is shut, locked, and latched.
    • Don’t forget to lock any external lockers.

    6. Interior Prep

    • Secure all loose items inside the caravan.
    • Make sure cupboards, fridge, and oven doors are latched.
    • Turn off the gas at the bottle.

    🧠 Knowing the Law: Weight, Licences & Limits

    ⚖️ Towing Limits and the Law

    • Stay under your car’s braked towing capacity—no excuses.
    • Do not exceed your Gross Train Weight (GTW): this is the combined maximum weight of your car + loaded caravan.
    • If your caravan is over 750kg, it must have its own braking system.

    Driving Licence Categories

    Depending on when you passed your test, you may have restrictions on what you can tow:

    • If you passed your test before 1 Jan 1997, you can tow a combined weight up to 8.25 tonnes.
    • If you passed between 1 Jan 1997 and 18 Jan 2013, your combined weight limit was 3.5 tonnes—unless you took a B+E test.
    • After December 2021, Category B drivers can now tow trailers up to 3,500kg, but you should still check your own licence for confirmation.
    Pre Towing Checks on the Freelander
    Pre towing checks on the freelander

    Final Pre-Trip Checklist: Don’t Hit the Road Without It

    Before we leave for any trip, whether it’s a weekend escape or a full family holiday, we run through this final checklist:

    ✅ Task💡 Notes
    Check car & caravan tyre pressureIncluding spares
    Fit towing mirrorsWe love the Emuk XLs
    Confirm hitch & breakaway cableHear the “click”!
    Lights checkBrake, indicators, rear
    Corner steadies raisedHandle stowed
    Gas off at bottleFor safety while towing
    Windows & doors lockedInside & out
    Jockey wheel raisedFully up & clamped
    Number plate on caravanMatches the tow car
    Load weight checkStay under MTPLM and car’s capacity

    Why We Take Towing Prep Seriously

    Towing a caravan is a responsibility—not just to your passengers, but to other road users too. We’ve had a few hiccups along the way (who hasn’t?), but by sticking to our safety checklist and using the right gear, we’ve enjoyed years of smooth, stable towing across Northern Ireland and beyond.

    From getting the AL-KO tow ball fitted to upgrading our towing mirrors and learning the weight ratios inside out, we’ve built confidence trip by trip. And it’s all worth it when we pull into a new pitch, unhook, and start another adventure—whether it’s a peaceful countryside retreat or a Christmas holiday in our beloved Elddis Crusader Aurora.

    Gear We Use and Recommend

    Here are a few bits of kit we personally use and trust:

    • Land Rover Freelander – solid, stable, and a great match for our 4-berth caravan.
    • AL-KO Tow Ball – gives amazing stability with our AL-KO hitch.
    • Emuk XL Towing Mirrors – fantastic visibility and super sturdy.
    • Tyre Pressure Gauge – quick and easy to check before every trip.
    • LED Light Board Tester – helps us catch any electrical issues early.

    Ready for the Open Road?

    There’s no feeling like setting off with the caravan behind you, knowing you’ve done all your checks and prepped your gear. Safe towing starts with your car—but it ends with your attitude. Be thorough, be safe, and enjoy every mile of the journey.

    Whether you’re new to caravanning or a seasoned tourer, making sure your tow car is caravan-ready is the first step to stress-free adventures. Happy towing!

    Also check out our guide on caravan towing covers

  • How to keep dogs cool in a hot weather

    How to keep dogs cool in a hot weather

    How to Keep Dogs Safe and Cool in a Heatwave: Home & Caravan Tips for Pet Parents

    As temperatures rise during the summer months, our canine companions are at risk of overheating. Dogs don’t sweat like humans, making them more vulnerable to heatstroke, dehydration, and sunburn. Whether you’re enjoying the summer sun at home, heading off in your caravan for an adventure, or just out and about, it’s crucial to know how to keep your dog cool and comfortable during a heatwave.

    In this comprehensive guide, we’ll explore everything you need to know about protecting your dog from extreme heat—including practical tips for staying cool in the caravan, travel safety, and which cooling accessories are worth investing in.

    Why Dogs Struggle in the Heat

    Dogs regulate their body temperature mainly through panting and a small amount through the pads of their paws. This makes it much harder for them to cool down during a heatwave, especially in enclosed environments like cars and caravans.

    Key risks of heatwaves for dogs:

    • Heatstroke (life-threatening if not treated)
    • Dehydration
    • Sunburn (especially on noses and ears)
    • Burned paws (from hot tarmac or sand)
    • Lethargy and vomiting

    Flat-faced breeds (like Pugs or Bulldogs), elderly dogs, puppies, and those with thick coats or health conditions are at even greater risk.

    Heatwave Dog Safety Tips at Home

    Even if you’re staying at home during hot weather, your dog needs extra care and attention. Here’s how to keep them safe:

    1. Keep Your Dog Indoors During Peak Heat

    Avoid letting your dog outside during the hottest part of the day (usually between 11 am and 4 pm). Instead, walk them early in the morning or after sunset when the ground is cool and the sun isn’t blazing.

    2. Create a Cool Zone

    Set up a cool retreat in your house:

    • Close blinds and curtains to keep the sun out
    • Use fans or air conditioning
    • Lay down damp towels for your dog to lie on
    • Place their bed on tile or laminate flooring

    3. Hydration is Key

    Provide fresh, clean water at all times. Add ice cubes to their bowl for an extra chill or use a dog-friendly water fountain to encourage drinking.

    4. Cooling Treats & Toys

    Try homemade doggie ice lollies using low-sodium stock or plain water with their favourite treats frozen inside. Offer cooling chew toys from the fridge or freezer.

    5. Limit Exercise

    It’s tempting to maintain routines, but strenuous exercise can be dangerous. Keep walks short and gentle, avoiding hilly routes or running.

    6. Check the Pavement

    Before heading out, test the pavement with your hand. If it’s too hot to hold your palm on it for 5 seconds, it’s too hot for paws.

    Relaxing in the nice weather
    Relaxing in the nice weather

    Must-Have Accessories to Keep Dogs Cool

    Here are top-rated cooling accessories to invest in for home and travel:

    Product (Contains Affiliate Links below)Description
    Cooling MatsPressure-activated gel mats that cool down when your dog lies on them. No refrigeration needed.
    Cooling VestsLightweight and water-activated. Soak them in water and they cool your pup via evaporation.
    Portable Water BottlesIdeal for walks or road trips—bottles with attached bowls or flip-out troughs.
    Cool CoatsReflective or wet-to-wear jackets for walkies in hot weather.
    Pop-Up Shade TentsFor use in gardens, parks or campsites. Portable and breathable.
    Cooling BandanasTie around your dog’s neck for a refreshing and stylish heat-relief.

    Keeping Dogs Cool in a Caravan During a Heatwave

    Summer caravan trips with your dog can be unforgettable… but only if planned with their safety in mind. Caravans, like cars, can heat up quickly. Without proper precautions, they can become dangerous for pets in minutes.

    1. Never Leave Your Dog in the Caravan Unattended

    Just like in a car, a caravan can become an oven. Always take your dog with you or ensure the caravan is well ventilated, shaded, and monitored with a pet temperature alarm if you must leave them for a few minutes.

    2. Use Reflective Window Covers & Thermal Blinds

    Prevent heat from building up inside by fitting reflective blinds or blackout curtains. Roof light covers also help reduce sun exposure.

    3. Portable Fans & Cooling Systems

    Invest in 12V caravan fans or portable air conditioning units. Place them near your dog’s crate or favourite spot.

    4. Choose a Shaded Pitch

    When booking your campsite, request a pitch with natural shade or bring a caravan awning with UV protection to create a cool outdoor zone.

    5. Lay Cooling Mats Inside the Van

    Put them in your dog’s bed or where they usually sit. Some caravaners also use cold, damp towels refreshed throughout the day.

    6. Caravan Airflow Tips

    • Open roof vents and windows
    • Use flyscreens to keep bugs out
    • Keep interior doors open for better airflow

    7. Limit Midday Travel

    Plan your driving for cooler hours—early morning or evening. Use sunshades on the rear windows and ensure good ventilation in the tow car.

    Travel Tips for Dogs in Hot Weather

    Driving to your campsite? Here’s how to keep your pup comfy on the move:

    1. Pre-Cool the Car

    Start your air conditioning before loading your dog in. Never place your dog in a hot car that hasn’t been cooled down first.

    2. Harness and Secure Them Safely

    Use a car-safe harness, crate, or dog seatbelt to keep them secure and reduce stress.

    3. Offer Water Often

    Use spill-proof travel bowls or take regular stops to offer water. Hydration is vital during any road trip.

    4. Sunshades and Window Tints

    Cover side and back windows with sunshades or use tinted film to protect your dog from direct sunlight.

    Camping & Outdoor Activities with Dogs in a Heatwave

    If you love camping with your dog during summer, here are ways to enjoy it without risking their health.

    1. Stick to Early or Late Walks

    Cool morning strolls or evening adventures are best. Avoid strenuous hikes in peak heat.

    2. Bring a Travel Shade Tent

    Ideal for beach days or open field stops, a pop-up shade tent gives your dog a designated cool zone to rest.

    3. Check for Signs of Heatstroke

    Symptoms include:

    • Heavy panting
    • Excessive drooling
    • Lethargy
    • Vomiting
    • Confusion or wobbliness

    If your dog shows any of these signs, move them to a cool area, wet their coat, and contact a vet immediately.

    4. Cooling Towels on the Go

    Soak a towel in cool (not cold) water and drape it over your dog for instant relief.

    5. Paw Protection

    Use dog booties if you’re walking on hot sand or tarmac. Or stick to shaded paths and grass.

    Dog-Friendly Water Fun in the Heat

    Water activities are brilliant for helping your dog stay cool—and entertained.

    Ideas to try:

    • Paddling pools (even collapsible ones are great for travel)
    • Sprinkler play
    • Lake dips or river swims (check for strong currents or toxic blue-green algae)
    • Beach visits (choose dog-friendly shores, pack shade and plenty of water)

    Just remember: always supervise your dog around water, especially if they’re not a strong swimmer. We also recommend leaving these activities until it has cooled down a bit.

    Caravan Packing Checklist: Hot Weather Dog Essentials

    Here’s a quick list to help you pack smart for your furry friend:

    ✅ Fresh water & bowl (plus travel bottle)
    ✅ Cooling mat and/or vest
    ✅ Pop-up dog shade tent
    ✅ Towel for wetting
    ✅ Dog-safe sun cream (for light/short-haired dogs)
    ✅ Travel fan or portable A/C
    ✅ Dog first aid kit
    ✅ Non-slip travel crate or seatbelt harness
    ✅ Grooming brush (to remove excess fur)
    ✅ Spare leads and poop bags
    ✅ Dog booties (for hot ground)

    Final Thoughts: Staying Cool Is Caring

    Heatwaves can be scary when you’re a pet parent, but with preparation and care, you can ensure your dog stays happy, safe, and cool—whether you’re at home, on the road, or off-grid in your caravan.

    Never underestimate the dangers of heat, and remember: if you’re feeling hot, your dog is feeling hotter.

    By planning ahead, investing in the right cooling gear, and adjusting your routines, you’ll create unforgettable summer adventures that your dog will love just as much as you do.

    keeping dogs cool in heatwave
    keeping dogs cool in heatwave

  • Surviving a heatwave in a caravan

    Surviving a heatwave in a caravan

    How to Survive a Heatwave in a Caravan: Stay Cool with the Best Tips & Accessories

    As summer temperatures soar and heatwaves become more common, caravanning during hot spells can be challenging—especially when your home on wheels turns into a rolling oven. But don’t worry, we’ve got you covered with expert advice, practical tips, and essential accessories to help you stay cool, safe, and comfortable during even the hottest days and muggiest nights.

    Whether you’re pitching up in the middle of a sunny field or parked by the beach, this guide will help you beat the heat and enjoy your caravan adventure to the fullest.

    ☀️ Why Heatwaves Are Hard on Caravanners

    Caravans, especially older models or those without air conditioning, can heat up quickly due to poor insulation and limited airflow. Unlike a brick-and-mortar home, caravans absorb and retain heat from the sun, turning your relaxing getaway into a sweaty, sleepless experience if you’re not well prepared.

    Common problems include:

    • Overheating during the day
    • Struggling to sleep at night
    • Food spoilage
    • Pets or children becoming overheated
    • Battery and appliance strain due to excess heat

    That’s why planning ahead for a heatwave is crucial—not just for comfort, but for your health and safety too.

    Essential Accessories to Beat the Heat in Your Caravan

    Here are must-have accessories that will help you and your family stay cool during a heatwave:

    1. 12V or Rechargeable Fans

    Lightweight, quiet, and easy to move around, 12V fans are a lifesaver in a caravan. Look for oscillating or clip-on fans for airflow where it’s needed most. Rechargeable USB fans are ideal for wild camping or off-grid sites.

    Top Tip: Use multiple small fans instead of one large one to circulate air more efficiently.

    2. Portable Air Conditioner or Cooling Unit

    If you have the space and hook-up power, a compact portable air conditioner can dramatically drop the inside temperature. Alternatives include evaporative coolers, which work better in dry heat.

    Note: Make sure your caravan electrics can handle the wattage—check before buying!

    3. Reflective Thermal Blinds or Sun Shades

    Thermal blinds and reflective screens for your windows, roof lights, and skylights help block out the sun and reflect heat away from your caravan. They’re also excellent for privacy and insulation in winter!

    4. Awning or Sun Canopy

    Create a shaded outdoor space with a porch awning or sun canopy. This helps reduce heat buildup inside and gives you an area to relax outside without direct sun exposure.

    Bonus Tip: Open your caravan door and sit under the awning to let cooler air flow inside.

    5. Cool Gel Pillows & Mattress Toppers

    Heat rises—so it’s no surprise that sleeping can be a nightmare in a hot caravan. Cool gel-infused pillows or bamboo mattress toppers can help regulate body temperature at night.

    6. Cooling Towels or Neck Wraps

    Dip these in cold water and drape them around your neck or forehead. They’re reusable and perfect for instant relief during a walk or while chilling at your pitch.

    7. Low-Wattage Electric Fan Heater with Cool Mode

    Some small fan heaters have a cool air setting, doubling as fans in summer and heaters in winter.

    8. USB or Battery-Operated Mini Fridge

    Ideal for drinks, fruit, or skincare! A small tabletop fridge near your bed or seating area keeps essentials cool without overloading your main fridge.

    How to Choose the Right Pitch During a Heatwave

    Where you pitch your caravan can dramatically affect the internal temperature.

    • Seek shade when possible: Trees can provide natural cover—but be cautious of sap and bird droppings!
    • Face away from direct sun: Pitch so that your main windows and door are shaded during peak heat (usually afternoon).
    • Use wind to your advantage: Try to park where you’ll get natural airflow through vents and windows.
    Sunshine through the clouds
    Sunshine through the clouds

    Daytime Survival Tips for Staying Cool in a Caravan

    Here’s how to manage the heat hour by hour during scorching days:

    1. Open Early, Close Midday

    Open all windows, vents, and skylights early in the morning to flush out stale warm air. By midday, close blinds and windows on the sun-facing side to trap in cooler morning air.

    2. Stay Hydrated

    Always keep a supply of cold water in the fridge. Consider adding an extra container or collapsible water carrier. Rehydration salts or electrolyte tablets are great if you’ve been sweating a lot.

    3. Cook Outside

    Avoid using the caravan oven or hob—these pump out heat quickly. Use a gas BBQ, camping stove, or electric hotplate outside instead. Salads, wraps, or cold picnic-style meals are your friend in a heatwave!

    4. Dress for the Heat

    Wear loose, light-coloured, breathable clothing. Avoid tight-fitting outfits that trap heat. Breathable sandals or flip-flops will keep your feet cool and reduce swelling.

    5. Cold Foot Bath or Hand Soak

    A simple washing-up bowl of cool water under the table can help cool your whole body down—perfect for kids too!

    How to Stay Cool at Night in Your Caravan

    Nighttime is often the most uncomfortable part of a heatwave in a caravan, especially with limited airflow. Here’s how to beat the sweaty nights and sleep better:

    1. Create a Cross Breeze

    Open windows on opposite sides of the caravan to allow air to circulate. Use fans at the windows to draw in cooler night air and push hot air out.

    2. Freeze a Bottle

    Fill plastic bottles with water, freeze them, and place them in front of a fan or beside your bed. As they melt, they create a cooling effect.

    3. Cold Sheets Trick

    Place your sheets or pillowcase in a plastic bag and chill in the fridge for an hour before bedtime. It sounds odd, but it works!

    4. Sleep in Lightweight Cotton Bedding

    Avoid polyester or flannel. Opt for bamboo or cotton sheets which are breathable and wick away moisture.

    5. Use a Cooling Mattress Topper

    If you suffer from overheating at night, a gel-infused topper can make a world of difference.

    Staying Cool with Kids and Pets

    For Kids:

    • Use blackout blinds to keep bunks shaded
    • Let them play in water trays or paddling pools (never leave them unsupervised)
    • Offer frozen fruit snacks and lots of fluids
    • Use handheld fans or mist sprays

    For Dogs:

    • Never leave them in the caravan alone
    • Walk them early morning or late evening
    • Use cooling mats, bandanas, and lots of water bowls
    • Let them lie on tiled or laminate flooring for cooling effect

    We always carry our dog’s cooling mat and collapsible travel bowl during summer trips—our little dachshund/Jack Russell loves it!

    Safety Tips During a Heatwave

    Staying cool isn’t just about comfort—it’s about safety too. Heat-related illnesses like heatstroke or dehydration can creep up fast.

    Be Aware of Heat Exhaustion Symptoms:

    • Dizziness
    • Heavy sweating
    • Weakness
    • Nausea
    • Headaches

    If someone exhibits signs of heatstroke—stop all activity, move to a cooler place, hydrate, and seek medical help immediately.

    Electrical Safety Tip:

    High temperatures can strain your battery and appliances. If you use fans or cooling units, monitor your leisure battery with a battery monitor or voltage checker. We once had a battery overheat and it was dangerously hot to touch—avoid that mistake!

    Heatwave Caravan Essentials Shopping List

    Here’s a quick checklist to tick off:

    AccessoryUse
    Rechargeable FansCirculate air
    Reflective Thermal BlindsReflect sunlight
    Awning/CanopyProvide shade
    Cooling TowelsCool the body
    Mini FridgeKeep essentials chilled
    Cooling Gel PillowsSleep comfort
    USB FansNight cooling
    Water CarrierExtra hydration
    Portable AC/CoolerDrastic temp drop
    Mattress Topper (Bamboo/Gel)Sleep cool

    Planning Ahead: When to Travel & Where to Stay

    • Avoid midday arrival/departure: Set up early morning or late evening to avoid the sun.
    • Pick shaded or breezy sites: Check site maps or call ahead.
    • Travel during cooler months: Spring and early autumn offer sunshine without extreme heat.

    Real-Life Caravan Heatwave Experience

    We once took our Elddis Crusader Aurora on a July trip and got caught in a heatwave. The inside temperature shot up to over 30°C within hours. Thankfully, we’d packed our reflective window covers, cooling fan, and gel pillows—and took shelter under the awning with a cold drink. We avoided using the oven entirely and made it a BBQ week instead!

    The best thing we did was add a simple battery monitor to keep an eye on voltage and temperature. It’s now one of our favourite summer upgrades!

    Final Thoughts: You Can Caravan Comfortably in a Heatwave

    With the right planning, accessories, and common sense, caravanning during a heatwave doesn’t have to be a sweaty struggle. Use shade wisely, stay hydrated, invest in a few cooling gadgets, and take it slow. It’s all about adapting to the rhythm of the weather and making the most of those bright summer days.

    Even in the heat, your caravan can be a cool oasis—literally and figuratively.

    Elddis Crusader Aurora in the sun

  • Summer holiday travel essentials

    Summer holiday travel essentials

    Summer Essentials for Traveling: Handy Items to Pack for Your Family Holidays

    Summer family holidays are the perfect opportunity to create unforgettable memories, relax, and explore new destinations. But before you hit the road or catch that flight, packing smartly is essential to ensure a smooth and enjoyable trip. Whether you’re headed to the beach, a mountain retreat, or a bustling city, having the right summer essentials can make all the difference.

    In this blog post, we’ll guide you through the must-have items to pack for summer family holidays, helping you travel light while staying prepared for anything. From sun protection to entertainment for kids, here’s your ultimate summer travel packing list. (Contains Affiliate links below)

    Why Packing Smart for Summer Holidays Matters

    Traveling with family, especially during the busy summer season, can be both exciting and challenging. Overpacking can lead to heavy luggage and unnecessary stress, while forgetting key items might put a damper on your vacation fun. Smart packing focuses on bringing versatile, essential items that keep your family comfortable, entertained, and safe.

    By preparing well in advance, you can enjoy your vacation more fully, knowing you have everything you need without lugging around extra baggage.

    1. Clothing Essentials for Summer Travel

    Lightweight, Breathable Fabrics

    Summer heat calls for clothes made from breathable materials like cotton, linen, or moisture-wicking fabrics. These help keep everyone cool and comfortable.

    Versatile Clothing

    Pack clothing items that can mix and match easily. Think neutral-colored shorts, T-shirts, sundresses, and swimwear that dry quickly and don’t wrinkle easily.

    Sun Protection Clothing

    Long-sleeve UV-protective shirts and wide-brimmed hats can shield your family from harmful UV rays during outdoor activities.

    Footwear

    Comfortable sandals or flip-flops for the beach, plus sturdy walking shoes for exploring are must-haves. Don’t forget water shoes if you plan on hitting rocky shores or water parks.

    2. Sun Protection Must-Haves

    Sun Cream

    A broad-spectrum sunscreen with at least SPF 30 is a non-negotiable item. Choose one that’s water-resistant and safe for children’s sensitive skin.

    Sunglasses

    UV-protective sunglasses for both adults and kids help prevent eye damage and reduce glare. You can get fun looking ones for kids.

    Hats and Caps

    Pack hats with wide brims for maximum coverage, or caps for a sporty look that still protects your face and eyes.

    After-Sun Care

    A soothing aloe vera gel or moisturizing lotion will help calm sun-exposed skin after a day outside.

    3. Travel-Friendly Toiletries

    Miniature BottlesAffiliate Link

    Transfer your favourite shampoos, conditioners, and lotions into travel-sized bottles to save space and comply with airline regulations.

    Wet Wipes and Hand Sanitizer

    Great for quick clean-ups on the go, especially with little kids.

    Insect Repellent

    Depending on your destination, a DEET-free insect repellent can keep pesky bugs away during evening outings.

    Basic First-Aid KitAffiliate Link

    Include band-aids, antiseptic wipes, pain relief medication, and any prescription medications your family needs.

    4. Entertainment and Comfort for the Journey

    Portable Chargers

    Keep devices charged with portable power banks — perfect for long flights, car rides, or beach days.

    Tablets or E-Readers

    Load them with movies, games, or books to keep kids entertained during downtime.

    Travel Pillows and Blankets

    For naps on planes or in cars, these items add a layer of comfort that helps everyone arrive rested.

    Reusable Water Bottles

    Staying hydrated is key in summer heat. Refillable bottles help reduce waste and keep water handy.

    5. Handy Travel Accessories

    Packing CubesAffiliate Link

    These help organise clothing and gear, making unpacking and finding items easier.

    Waterproof BagsAffiliate Link

    Ideal for storing wet swimsuits or protecting electronics from sand and water.

    Travel-Sized Laundry Detergent

    For washing clothes on the go, especially useful on longer trips.

    Lightweight BackpackAffiliate Link

    Perfect for day trips, hikes, or carrying snacks and essentials during excursions.

    6. Food and Snacks for Family Travel

    Healthy Snacks

    Pack nuts, dried fruit, granola bars, or crackers to keep hunger at bay between meals.

    Cooler BagAffiliate Link

    A small insulated cooler bag is great for keeping drinks and perishable snacks fresh.

    Reusable Snack BagsAffiliate Link

    Eco-friendly and convenient, these can be refilled with favourite treats.

    7. Important Documents and Safety Items

    Travel Documents

    Keep passports, IDs, travel insurance, and reservation confirmations in a waterproof travel wallet.

    Emergency Contact Info

    Have printed copies of emergency contacts, local emergency numbers, and medical info for each family member.

    Child Safety Items

    If travelling with young kids, consider ID bracelets with contact info or GPS tracking devices.

    Bonus Tips for Stress-Free Summer Family Holidays

    • Plan Outfits Ahead: Lay out clothing by day or activity to avoid over packing.
    • Check Weather Forecast: Pack accordingly for unexpected rain or cooler evenings.
    • Bring a Portable Fan: Battery-operated fans can provide instant relief from heat.
    • Involve Kids in Packing: Letting children choose a favourite toy or book can keep them engaged and comfortable.

    Final Thoughts!

    Packing for a summer family holiday doesn’t have to be overwhelming. By focusing on versatile, essential items like sun protection, comfortable clothing, travel-friendly toiletries, and entertainment, you can ensure a fun and hassle-free vacation.

    Remember, the key is to prepare for both relaxation and adventure while keeping your luggage light and manageable. Use this summer essentials checklist to create your personalized packing list and get ready for an unforgettable family getaway under the sun!

    Summer Beach Vibes
    Summer Beach Vibes
  • Travel guide around Northern Ireland in a caravan with an itinerary

    Travel guide around Northern Ireland in a caravan with an itinerary

    Traveling by caravan in Northern Ireland is a fantastic way to explore its stunning landscapes, coastal drives, and historic sites at your own pace. Here’s a guide to help you plan a caravan trip in Northern Ireland:


    🚐 Why Caravan Travel in Northern Ireland?

    • Freedom and Flexibility: Explore the countryside, coasts, and towns without strict itineraries.
    • Scenic Routes: The Causeway Coastal Route is one of the most breathtaking drives in the world.
    • Compact Region: Northern Ireland is relatively small, making it ideal for road trips.

    🗺️ Top Caravan Routes & Destinations

    1. Causeway Coastal Route

    • Highlights: Giant’s Causeway, Carrick-a-Rede Rope Bridge, Dunluce Castle, Ballintoy.
    • Camping Spots:
      • Causeway Coast Holiday Park (near Ballycastle)
      • Glenmore Caravan & Camping Park

    2. Mourne Mountains & County Down

    • Highlights: Silent Valley, Tollymore Forest Park, Newcastle seaside town.
    • Camping Spots:
      • Tollymore Forest Park Caravan Site
      • Annalong Holiday Park
    Tollymore Forest Park Avenue
    Tollymore Co. Down

    3. Fermanagh Lakelands

    • Highlights: Lough Erne, Enniskillen Castle, Marble Arch Caves.
    • Camping Spots:
      • Blaney Caravan Park
      • Rushin House Caravan Park

    4. Derry~Londonderry & Sperrins

    • Highlights: Historic Derry walls, Sperrin Mountains, Beaghmore Stone Circles.
    • Camping Spots:
      • Drumaheglis Marina & Caravan Park
      • Dungiven Castle Campsite

    🏕️ Recommended Caravan Parks

    • Six Mile Water Caravan Park (Antrim)
    • Jordanstown Loughshore Caravan Park (Belfast area)
    • Castle Archdale Caravan Park (Fermanagh)
    Castle Archdale court yard
    Castlearchdale Co. Fermanagh

    💡 Tips for Caravaning in Northern Ireland

    • Driving: Left-hand side of the road; rural roads can be narrow.
    • Weather: Pack for all conditions — it can change rapidly.
    • Booking: Reserve popular sites in advance, especially in summer.
    • Wild Camping: Restricted in Northern Ireland. Stick to designated sites unless you get landowner permission.

    🚦 Need a Rental Caravan?

    There are several local rental services such as:

    • Bunk Campers (Belfast-based)
    • Causeway Campers
    • Go Explore NI

    🗓️ 7-Day Northern Ireland Caravan Itinerary

    Day 1: Belfast

    • Things to Do:
      • Titanic Belfast Museum
      • Crumlin Road Gaol
      • St. George’s Market
    • Stay:
      🏕 Jordanstown Loughshore Caravan Park (15 mins from city center with views over Belfast Lough)

    Day 2: Antrim Coast to Ballycastle (Causeway Coastal Route)

    • Drive: Roughly 1.5 hours via A2 (scenic) pending traffic or if any road works double check the route before setting off.
    • Stops:
      • Carrickfergus Castle
      • The Gobbins cliff path (advance booking needed)
      • Glenarm Castle Gardens
    • Stay:
      🏕 Causeway Coast Holiday Park (Ballycastle)

    Day 3: Giant’s Causeway & Surrounds

    • Explore:
      • Giant’s Causeway (UNESCO)
      • Dunluce Castle
      • Bushmills Distillery (optional tasting tour)
    • Stay:
      🏕 Glenmore Caravan and Camping Park (close to Ballintoy/Causeway)

    Day 4: Derry~Londonderry

    • Drive: ~1.5 hrs (Check route for any road closures etc before setting off. Timing pending on level of traffic and road conditions)
    • Explore:
      • Walk the historic Derry walls
      • Museum of Free Derry
      • Peace Bridge over the River Foyle
    • Stay:
      🏕 Drumaheglis Marina & Caravan Park or Benone Tourist Complex

    Day 5: Fermanagh Lakelands

    • Drive: 2–2.5 hrs (Check route for any road closures etc before setting off. Timing pending on level of traffic and road conditions)
    • Explore:
      • Marble Arch Caves
      • Boat trip on Lower Lough Erne
      • Enniskillen Castle
    • Stay:
      🏕 Castle Archdale Caravan Park (lakeside)
    Marble Arch Caves Fermanagh
    Marble Arch Caves

    Day 6: Mourne Mountains / Tollymore Forest

    • Drive: 2.5 hrs (Check route for any road closures etc before setting off. Timing pending on level of traffic and road conditions)
    • Explore:
      • Silent Valley Reservoir
      • Tollymore Forest Park (Game of Thrones filming location)
      • Newcastle town and beach
    • Stay:
      🏕 Tollymore Forest Park Caravan Site

    Day 7: Return to Belfast via Strangford Lough

    • Optional Stops:
      • Downpatrick (St. Patrick’s grave)
      • Mount Stewart House & Gardens (National Trust)
      • Scenic ferry across Strangford Lough
    • Return caravan (if rented) or overnight again at Jordanstown
    Strangford Ferry
    Strangford to Portaferry Boat

    📌 Notes:

    • All suggested sites are caravan-accessible or have parking nearby.
    • Fuel is widely available, but top up before long rural stretches.
    • Most caravan parks offer electric hook up, water, and waste disposal.
    • This is only a rough guide it can be extended or shortened or done which ever way you prefer.

    Here are some caravanning essentials:

    Blue chemical toilet fluid – (Click here)

    Rain Poncho – (Click here)

    Flash Light – (Click here)

  • Our Caravan Battery Disaster

    Our Caravan Battery Disaster

    When Routine Maintenance Goes Wrong

    Bringing your caravan in for its annual service should be a straightforward task — routine, even. You expect peace of mind, safety, and reassurance that everything is road- and site-ready. That’s exactly what we thought too. But what unfolded next turned into one of the most stressful — and potentially dangerous — caravan experiences we’ve ever had.

    In this post, we’re sharing our personal story of how a caravan battery overheated to the point of near-disaster after its annual service, what we learned about battery grades, and the essential safety steps we now take to avoid a repeat. Whether you’re new to caravanning or a seasoned explorer, we hope our experience helps you stay safer and more informed.


    The Setup: Post-Service and a Narrow Escape (Literally)

    We had just collected our caravan after its routine service — nothing seemed out of the ordinary. As usual, we brought it home and unhitched on the lane near our house. Our lane is narrow and slightly inclined, so we always use the motormover to straighten and reposition the van before hitching it back up to tow into our back garden.

    The plan was simple:

    • Unhitch
    • Use the motormover to line up the caravan
    • Reattach and tow it up to the gate and use the motor mover the remainder of the way (Cant be towed into place)

    Only, that didn’t happen.


    Warning Signs: A Beeping Alarm and a Stubborn Motormover

    As soon as we unhitched and engaged the motormover, it began beeping — loudly and repeatedly. We assumed it was just the remote battery needing a change. Swapped it. Same problem. The motormover would start for a few seconds, then cut out again. More beeping. We fought with it, manually adjusting, retrying again and again.

    Eventually — after a lot of sweat and stress, and more than a few puzzled looks from passersby on our narrow road — we managed to line the caravan up just enough to hitch back up and pull it into our garden. The sense of relief was short-lived.


    Part Two: The Caravan Refuses to Cooperate Again

    With the van in the garden, we had to unhitch again and use the motor mover one more time to get it into position. Same issue. A few seconds of movement, then cutting out. Constant alarm beeping.

    We checked the onboard control panel — low battery warning.

    That was odd. The caravan had just returned from its service. We were specifically told them to ensure the battery was charged before we brought it back home!

    We grabbed the electric hook-up cable and connected the caravan to mains power. After waiting a while, we tried the motor mover again. It lasted marginally longer but failed just the same. After about an hour of struggling, worrying we were blocking the lane too long, and unable to manually push due to the incline (and weight), we finally got it into its resting spot.

    We thought the worst was behind us.

    Partly stuck in the garden
    Partly stuck in the garden

    The Smell No One Could Ignore

    The next day, I went out to repack the caravan after emptying it for the service. I plugged in the electrics, tidied up, and went about my usual routine. Everything seemed fine.

    A short time later, my partner noticed the caravan’s alarm going off again. Curious, they went out and said there was a weird smell — blaming me for leaving something stinky inside. We aired it out and thought nothing more of it.

    Then came the rain.

    We closed the door, and after a while, I went out to grab something from the van. As soon as I opened the door, the smell hit me — like a punch in the face.

    It was the unmistakable stench of rotten eggs. The air inside was thick with it, and it was overwhelmingly hot. My stomach dropped. I knew something wasn’t right. I remembered hearing somewhere that overheating batteries can give off that smell due to hydrogen sulphide gas.

    I ran to unlock the battery locker.


    A Near-Disaster: The Overheating Battery

    As soon as I opened the battery compartment, I could feel the heat pouring out. The locker was boiling and the smell was horrific. I instantly shut everything down and rushed back inside to get my partner, shouting that the battery was about to explode.

    But we couldn’t remove it straight away — it was too hot to safely touch. We had to wait for it to cool down, constantly checking in the meantime, hoping it wouldn’t burst or catch fire.

    Eventually, the battery cooled enough to disconnect and safely remove it from the caravan. It was a terrifying experience and could have ended far worse than it did.


    Diagnosis: What Went Wrong?

    So what actually caused the battery to overheat to such a dangerous extent?

    • The service team told us the battery “read fine” during its check.
    • We knew it was working perfectly before it went in.
    • It hadn’t been drained on our end — we never let it run flat.

    We eventually got the old battery tested. The verdict? It had likely been allowed to drain completely at some point (possibly during the service), then recharged too quickly — a known cause of internal damage. This can lead to gassing, overheating, and irreversible chemical breakdown.

    But there was another revelation…


    The Hidden Issue: We Had the Wrong Battery Type All Along

    Our caravan had come with a leisure battery — as most do. But until now, we had no idea there were different grades of caravan batteries, each suited to specific uses.

    Our battery was a Grade C.

    These are generally budget leisure batteries designed for light use — not the kind of deep, repeated discharge required by a motormover. Running a motormover places a huge strain on the battery, requiring a more robust, deep-cycle solution.

    Let’s break this down:


    Understanding Caravan Battery Grades

    Caravan batteries are graded into three main categories:

    🔋 Grade A (Best for Heavy Use)

    • Deep cycle AGM or Gel batteries
    • High charge/discharge cycles
    • Withstand motormover use and off-grid living
    • Long life (often 5+ years)
    • Great for frequent touring and off-grid users

    🔋 Grade B (Medium Use)

    • For regular but lighter discharge
    • Good for short breaks or site with hook-ups
    • Decent lifespan and reliability

    🔋 Grade C (Light Use Only)

    • Best for site-only users with full EHU
    • Not designed for motormovers or off-grid power
    • Cheapest — but also most limited

    We realised our Grade C battery was never designed for the heavy strain we were putting on it. And somehow, it had lasted this long — until it didn’t.


    What We Did Next: Upgrades and Safety Measures

    After researching deeply, we purchased a high-quality Grade A AGM battery built to handle motormover demands and prevent deep discharge damage.

    But we didn’t stop there.

    We also installed a battery monitor — an absolute game-changer. It now shows us:

    Installing Battery Monitor
    Installing the Battery Monitor
    • 🔋 Charge level (%)
    • 🌡️ Temperature (a key overheating warning)
    • ⚡ Voltage (to detect drops or faults early)

    We can now track the battery’s condition in real-time. No more guessing. Here is the link to the one we purchased here. ~ Affiliate Link

    You can buy Bluetooth ones which connect to your phone via Bluetooth ~Affiliate Link

    Please do your research on your battery and its needs and which battery monitor is best suited or contact a proffesional for advice.


    What We Learned (So You Don’t Have To)

    1. Always double-check your battery grade.
      Just because your caravan came with it, doesn’t mean it’s suitable — especially if using a motormover.
    2. Low battery warnings should never be ignored.
      If your motormover is failing or alarms are going off, don’t assume it’s the remote — check the actual power supply.
    3. Rotten egg smell = danger.
      Hydrogen sulphide is highly flammable and toxic. If you ever smell this inside your caravan, switch off power immediately and ventilate.
    4. Battery monitors are worth every penny.
      Prevention is cheaper (and safer) than battery replacement — or worse.
    5. Even serviced caravans need a post-check.
      Just because a workshop says your battery is “fine” doesn’t mean it is. Check for yourself.
    6. Proper ventilation is crucial.
      Battery lockers should allow gasses to escape — make sure your venting is working.

    Conclusion: A Costly Lesson, But a Valuable One

    We ended up spending money on a new battery and monitor — but we’re grateful that’s all it cost us. A battery explosion could have set the caravan alight or worse, especially if it had happened overnight or while we were travelling.

    What started as a routine service turned into a serious safety scare — and a wake-up call about battery health, proper equipment, and caravan preparedness.

    New Battery and Battery Monitor
    New Battery and Battery Monitor

    Have You Checked Your Battery Lately?

    If this post has given you pause, do yourself a favour — open your battery locker and check:

    • What grade is your battery?
    • Is it warm to touch after charging?
    • Do you smell anything odd?
    • Do you know its voltage/charge level?

    Don’t wait until something goes wrong. See our post on Importance of servicing you caravan here.

  • Travel around Irelands Wild Atlantic Way

    Travel around Irelands Wild Atlantic Way

    Embarking on a caravan or campervan journey along Ireland’s Wild Atlantic Way offers an unparalleled adventure through some of the country’s most breathtaking landscapes. Spanning approximately 2,600 km (1,600 miles), this coastal route stretches from the Inishowen Peninsula in County Donegal to the charming town of Kinsale in County Cork, traversing nine counties and showcasing a diverse array of natural wonders, historic sites, and vibrant communities.


    🗺️ Suggested 14-Day Campervan Itinerary

    Day 1–2: Belfast to Donegal (via Causeway Coast)

    • Begin your journey in Belfast, exploring the Causeway Coastal Route with highlights like the Giant’s Causeway, Carrick-a-Rede Rope Bridge, and Dunluce Castle.
    • Cross into County Donegal, reaching Malin Head, the northernmost point of Ireland.
    • Overnight options: Campsites near Malin Head or in Buncrana.
    Wild Ireland
    Wild Ireland

    Day 3–4: Donegal to Sligo

    • Visit the stunning Slieve League Cliffs, among the highest sea cliffs in Europe.
    • Explore Glenveagh National Park and its castle.
    • Continue to Sligo, known for its surfing beaches and literary heritage.
    • Overnight options: Campsites near Strandhill or Rosses Point.

    Day 5–6: Sligo to Mayo

    • Drive through the scenic landscapes of County Mayo, stopping at Downpatrick Head and the Céide Fields.
    • Explore Achill Island, connected to the mainland by a bridge, offering dramatic coastal views.
    • Overnight options: Campsites on Achill Island or near Westport.

    Day 7–8: Mayo to Galway

    • Travel through Connemara, visiting Kylemore Abbey and the Twelve Bens mountain range.
    • Spend time in Galway City, enjoying its vibrant arts scene and historic sites.
    • Overnight options: Campsites near Clifden or Salthill.

    Day 9–10: Galway to Clare

    • Visit the Cliffs of Moher and the unique limestone landscape of the Burren.
    • Explore the traditional music village of Doolin.
    • Overnight options: Campsites in Doolin or Lahinch.

    Day 11–12: Clare to Kerry

    • Take the ferry from Killimer to Tarbert, entering County Kerry.
    • Drive the scenic Ring of Kerry, with stops at Killarney National Park and Muckross House.
    • Explore the Dingle Peninsula, known for its rugged beauty and Gaelic culture.
    • Overnight options: Campsites near Killarney or Dingle.

    Day 13–14: Kerry to Cork

    • Visit the Beara Peninsula and Mizen Head, the southwesternmost point of Ireland.
    • Conclude your journey in Kinsale, a historic port town with gourmet restaurants.
    • Overnight options: Campsites near Kinsale or Clonakilty.

    🏕️ Camping Tips & Resources

    • Campsites: Ireland offers numerous campsites along the Wild Atlantic Way, many equipped with facilities for campervans. It’s advisable to book in advance during peak seasons.
    • Wild Camping: While wild camping is technically not permitted, it’s often tolerated in remote areas if done respectfully. Always seek landowner permission and adhere to Leave No Trace principles.

    🚐 Campervan Hire Options

    • Bunk Campers: Offers a range of campervans suitable for couples, families, or groups, with depots in Dublin and Belfast.
    • Craic N Campers: Provides campervan rentals with detailed itineraries and travel advice.
    • Cookies Campers: Specializes in campervan hire with suggested 14-day itineraries covering the Wild Atlantic Way.

    📍 Highlights & Discovery Points

    • Malin Head: Ireland’s northernmost point, offering dramatic coastal views.
    • Slieve League Cliffs: Towering sea cliffs providing breathtaking panoramas.
    • Cliffs of Moher: Iconic cliffs rising 214 meters above the Atlantic Ocean.
    • Ring of Kerry: A scenic drive through mountains, lakes, and coastal villages.
    • Mizen Head: Home to a signal station and stunning sea views.

    Here is some handy car/camper travelling essentials and gadgets:

    Car seat tablet holder mount (Click here)

    Car Seat Organizer (Click here)

    Travel cushion for longer journeys (Click here)

    Thermal mug (Click here)

  • Grounding with Nature and Tree Bathing: Natural Ways to Improve Your Mental Wellbeing

    Grounding with Nature and Tree Bathing: Natural Ways to Improve Your Mental Wellbeing

    In today’s fast-paced, screen-dominated world, many people are rediscovering the profound healing power of nature. Grounding with nature and tree bathing, also known as forest bathing or Shinrin-yoku, are two natural practices that promote mental wellness, reduce stress, and reconnect us to the Earth. Whether you’re living in a bustling city or near scenic countryside, these nature-based rituals are accessible and profoundly transformative.

    You’ll be happy to know that nature is closer than you think—and it holds powerful tools to help restore your inner peace. A quick google search for your local area will help you find lots of peaceful places.

    What is Grounding with Nature?

    Grounding, or earthing, is a therapeutic technique that involves physically connecting your body to the Earth’s surface. The idea is simple: by walking barefoot on grass, soil, sand, or immersing yourself in a natural body of water, you allow your body to absorb the Earth’s natural electrons. This subtle energy exchange has been linked to a variety of health benefits, especially those related to mental clarityemotional balance, and stress relief.

    Key Grounding Practices:

    • Walking barefoot in the park or garden, or using a grounding mat.( This is the one I use )
    • Lying on the grass while meditating or reading
    • Touching trees, soil, or rocks with bare hands
    • Sitting quietly by a stream or on a natural surface

    What is Tree Bathing (Shinrin-yoku)?

    Originating in Japan, Shinrin-yoku translates to “forest bathing.” But it doesn’t involve actual water or baths—it’s about fully immersing yourself in the forest atmosphere, mindfully and without distraction.

    Unlike a hike or a run, tree bathing is slow and meditative. You intentionally engage all your senses—listen to the rustling leaves, inhale the earthy scents, observe the patterns of bark and light filtering through the canopy. It’s less about reaching a destination and more about being present in the experience.

    To Find Local Forest trails in your area search on google which will bring up a list of areas.

    Huge Tree Tollymore Forest Park
    Huge Tree Tollymore Forest Park

    6 Science-Backed Mental Health Benefits

    1. Reduces Stress and Cortisol Levels

    Numerous studies have shown that spending time in nature, especially through grounding or tree bathing, lowers levels of cortisol, the body’s primary stress hormone. Just 20 minutes of barefoot walking in a natural space can lead to significant stress relief.

    2. Improves Mood and Emotional Balance

    Connecting with nature enhances the production of serotonin, a feel-good neurotransmitter. It’s often recommended as a complementary therapy for anxiety, depression, and burnout.

    3. Boosts Mental Clarity and Focus

    Forest environments have been shown to improve attention span, reduce mental fatigue, and enhance creativity. Children with ADHD and adults working in high-stress environments benefit from regular time spent grounding or in green spaces.

    4. Supports Better Sleep

    Grounding has been linked to better regulation of the circadian rhythm, helping you fall asleep more easily and stay asleep longer. A simple barefoot walk in the evening can help calm your nervous system before bed.

    5. Promotes Mindfulness and Present-Moment Awareness

    Both grounding and tree bathing are inherently mindful. By focusing on sensory experiences—like the texture of bark or the sound of birds—you naturally become more present and centerd.

    6. Strengthens the Immune System

    According to Japanese researchers, tree bathing increases the body’s natural killer (NK) cell activity, which helps fight off illness and disease. Trees release phytoncides—natural chemicals that have antimicrobial properties and support immune health.

    How to Get Started with Grounding or Tree Bathing

    Getting started is easy—and best of all, it’s free.

    Forest and Lake Views
    Forest and Lake Views

    For Grounding:

    • Take your shoes off and walk on grass or soil for 15–30 minutes daily. You can also use a grounding mat. You can buy one on amazon by
    • Practice deep breathing while standing on a natural surface.
    • Sit directly on the ground during meditation, journaling, or reading time.

    For Tree Bathing:

    • Visit a local park or forest with the intention of slowing down.
    • Leave your phone behind or put it on airplane mode.
    • Take deep breaths, use all your senses, and stay quiet.
    • Spend at least 30–60 minutes immersing yourself in the natural surroundings.

    To find a local spot near you search “tree bathing near me” or “best grounding spots in your city to discover hidden gems in your area.

    Final Thoughts: Reconnect and Restore

    Grounding with nature and tree bathing offer a powerful antidote to modern life’s overwhelm. Whether you’re seeking calm, clarity, or simply a break from your daily routine, stepping into nature with intention can dramatically improve your mental wellbeing.

    In your City, Town, Village, nature is never far away. The more often you reconnect with the Earth, the more resilient, centered, and whole you’ll feel.

    So take your shoes off. Hug a tree. Breathe deeply. The natural world is waiting—and your mind will thank you for it.

    Discover how grounding with nature and tree bathing can reduce stress, improve mental clarity, and support overall wellness. Explore the science backed benefits and how to get started near you.

  • Our Day Trip to Rathlin Island

    Our Day Trip to Rathlin Island

    A Perfect Day Trip to Rathlin Island from Belfast: Puffins, Coastal Views & Island Charm


    Introduction: A Wild Island Escape from Belfast

    Looking for a unique and unforgettable day trip from Belfast that combines wildlife, dramatic coastal landscapes, and peace away from the city? Rathlin Island, just off the coast of County Antrim, offers the perfect blend of natural beauty, historical interest, and charming local character.

    Our family set off early on a sunny Saturday morning for a day packed with adventure, seabirds, sandy toes, and stunning views. Here’s everything we experienced, plus tips and local history to help you plan the ultimate Rathlin Island day trip.


    🌄 Setting Off from Belfast: Making It to Ballycastle in Time

    We left Belfast at 7:00 AM sharp, excited for the day ahead. The drive to Ballycastle takes roughly 1 hour and 15 minutes, but we gave ourselves extra time to find parking and enjoy the scenic journey along the Causeway Coastal Route. With its winding roads, cliffside views, and glimpses of the sea, the drive alone is worth the early start.

    Ballycastle itself is a charming coastal town in County Antrim. It’s the gateway to Rathlin Island, and the harbour has a friendly, laid-back feel. There’s paid parking available nearby – be aware charges apply, so have change or a payment app handy.


    🛳️ The Ferry Spirit of Rathlin

    We had pre-booked our ferry tickets (essential in peak season!) and boarded the Spirit of Rathlin at 10:00 AM. The ferry is foot-passenger only, so cars stay on the mainland – something that really adds to the calm, nature-first feel of the island.

    The journey took about 40 minutes, and we were blessed with calm seas and glorious sunshine. As we sailed northward, we took in the breathtaking views of the Antrim coastline, including dramatic cliffs and wide ocean vistas. Dolphins and seals are sometimes spotted en route, so keep your camera ready!

    Ballycastle Harbour
    Ballycastle Harbour

    🐦 All Aboard the Puffin Bus to the RSPB Seabird Centre

    Once we docked at Rathlin’s small harbour, we headed straight for the Puffin Bus – a quirky minibus that winds up the island’s narrow roads to the RSPB Seabird Sanctuary at the western tip. The return trip cost us roughly £20 for two adults and one child (Cant Remember exactly head like a siv!) – cash only, so be prepared.

    The bus journey takes about 15 minutes, and along the way, you’ll pass fields of wildflowers, local sheep, and views of distant coastlines. On the way back, the bus plays an audio guide featuring the island’s history and stories about local landmarks – a lovely bonus!

    📝 Tip: If you’re feeling adventurous, you can walk the route instead of taking the bus (approx. 4 miles each way) or hire a bike near the harbour. Just know it’s all uphill to the sanctuary, so be prepared for a workout!

    Seabirds Gather on the cliffs below to nest
    Seabirds Gather on the cliffs below to nest

    🐧 The Puffins and the Upside-Down Lighthouse

    At the RSPB Seabird Sanctuary, we were met by friendly volunteers and handed binoculars for seabird spotting. The real stars? Thousands of puffins, razorbills, kittiwakes, and guillemots nesting on the cliffs during breeding season (April to July). It was a magical sight – puffins waddling about, soaring birds, and crashing waves below.

    Just beside the sanctuary lies Rathlin’s quirky “Upside-Down Lighthouse”, which actually has its light below the keepers’ house – a rare feature only found in two lighthouses worldwide! There’s a small museum inside with historical artefacts and stories of shipwrecks, lighthouse keepers, and island life.

    Upside Down Light house
    Upside Down Light house

    Refuel & Relax: Snacks, Views and a Stroll Back

    After our hour at the cliffs, we popped into the small café/shop at the sanctuary for some light refreshments. It’s always a good idea to bring extra snacks, especially for little ones or picky eaters, as food options on the island are limited. If your child is prone to motion sickness, tummy troubles, or minor falls, pack some Calpol or a small first-aid kit – there are no pharmacies on the island.

    Back on the Puffin Bus, we enjoyed the scenic ride back down to the harbour while learning more about Rathlin’s past. The narrated history tour really brought the landscape to life. It was full of interesting history of the island and how the island has changed over the years.

    Views from the puffin bus
    Views from the puffin bus

    Harbour Time: Museums, Shops & Beach Bliss

    With time before our return ferry, we explored the harbour area. Rathlin’s few shops are small but full of charm, selling local crafts, prints, and souvenirs. One of our favourites was the Rathlin Visitor Centre & Museum, filled with intriguing stories of Viking raids, shipwrecks, and the island’s once-thriving kelp industry.

    We then made our way down to the beach, where we unpacked our picnic lunch and just soaked in the day. The clear shallow waters were teeming with shoals of fish – perfect for a little paddle and some fun in the sand. It felt like we had the whole beach to ourselves. We bought a bucket and spade from one of the wee shops and the child was in his element playing with it and found a few little crab shells along the beach.


    A Quick Coffee Stop & Church Wander

    Before heading back to the boat, we popped into the Rathlin Island Hotel for a much-needed coffee and some downtime. The staff were friendly, the views were lovely, and it left us dreaming of a future overnight stay – especially with glamping pods available on the island too.

    We also discovered a beautiful old church and graveyard, just a short walk from the harbour. Quiet and peaceful, it’s a great spot to reflect on the slower pace of life Rathlin offers.

    Rathlin Island Church
    Rathlin Island Church

    Back to Ballycastle by 3 PM

    At 3:00 PM, we boarded the Spirit of Rathlin back to Ballycastle, tired but smiling from ear to ear. The boat ride was just as smooth, and we couldn’t help but chat about when we’d return – maybe for an overnight trip next time.

    Boat from Rathlin Island

    Rathlin Island Day Trip Tips

    If you’re planning your own Rathlin Island adventure, here are our top tips:

    • Pre-book your ferry – Especially during summer or weekends.
    • 🧴 Sun cream is a must – There’s little shade, and the sea breeze can be deceptive.
    • 🥪 Pack a picnic and snacks – Food options are limited.
    • 💊 Bring essentials like Calpol or plasters – There’s no chemist.
    • 💷 Carry cash – The Puffin Bus and some shops don’t accept cards.
    • ♻️ Take your rubbish home – Help protect the local wildlife.
    • 🚶‍♀️ Be ready to walk – The island is foot-traffic only.
    • 🏕️ Consider staying overnight – There are glamping pods and a small hotel.

    A Brief History of Rathlin Island

    Rathlin is steeped in Irish myth, Norse raids, and shipwreck tales. It’s the only inhabited offshore island in Northern Ireland, with a population of around 150 people.

    Some highlights of its rich past:

    • 🪖 In 1306, Robert the Bruce of Scotland famously took refuge in a cave on Rathlin, watching a spider persistently spin its web – a moment said to have inspired him to continue his fight.
    • ⚓ The island’s location made it a key spot for both Vikings and smugglers, as well as a strategic lighthouse point for shipping routes.
    • 🔬 In 1898, the island became one of the first locations for Marconi’s wireless experiments, helping shape modern communication.
    • 💀 Sadly, Rathlin also bears scars of tragedy – including the 1575 massacre by English troops, when hundreds of Scots were killed in the caves.

    Today, the island is a peaceful haven for wildlife, artists, nature lovers, and anyone seeking a break from the modern rush.

    History and seaviews
    History and seaviews

    📍 How to Get There

    • From Belfast: Drive 1hr 15mins to Ballycastle Harbour.
    • Ferry: Book in advance with Rathlin Island Ferry Ltd.
    • Parking: Paid lots available near the harbour.
    • Ferry Time: ~40 mins each way.
    • Foot Passenger Only: No cars allowed on Rathlin ferries.

    💬 Final Thoughts: Why You’ll Love Rathlin Island

    Rathlin Island offers something that’s increasingly rare – true tranquillity. With no cars, no chain stores, and very limited Wi-Fi, it’s a step back in time and a deep breath for the soul.

    Whether you’re there to spot puffins, paddle at the beach, explore its Viking past, or just unplug for a few hours, a day trip (or overnight stay!) on Rathlin Island will leave you recharged, inspired, and wanting more.

    To see our other day trip adventure, Check out our day to Royal Hillsborough Castle Winnie the Pooh Honey Hunt

  • The Ultimate UK Guide to Fly Fishing: Benefits, How-To, and Types of Fly Fishing

    The Ultimate UK Guide to Fly Fishing: Benefits, How-To, and Types of Fly Fishing

    Fly fishing is one of the most revered outdoor pursuits in the UK, offering not only a connection to nature but also a rich cultural tradition rooted in the rivers and lochs of England, Scotland, and Wales. Whether you’re casting a dry fly on the River Test or chasing sea trout in the Welsh estuaries, the UK provides a wealth of opportunities for anglers of all skill levels. In this guide, we’ll explore the benefits of fly fishing, how to get started in the UK, and the different types of fly fishing you can enjoy across the British Isles.

    Benefits of Fly Fishing in the UK

    1. Stress Relief and Mindfulness
    The peaceful rhythm of casting, the gentle sound of a river, and the focused presence required to fish effectively make fly fishing an excellent antidote to modern life. It encourages mindfulness and offers a digital detox.

    2. Light Exercise and Fresh Air
    Fly fishing gets you moving, whether it’s walking the banks of the River Tweed or wading through a chalk stream in Hampshire. It offers low-impact physical activity that promotes cardiovascular health and mental well-being.

    3. Connection to Nature and Heritage
    From the crystal-clear chalk streams of southern England to the rugged highland lochs of Scotland, fly fishing fosters a deep connection to nature and the UK’s angling heritage. It promotes conservation and respect for the natural environment.

    4. Community and Camaraderie
    The UK has a thriving fly fishing community. Clubs, fisheries, and guided services offer social opportunities and shared learning experiences, from local fly-tying nights to competitions and charity events.

    5. Personal Challenge and Skill Development
    Mastering fly fishing takes time and practice. Casting techniques, entomology, water reading, and knot-tying are just a few of the skills you’ll develop.

    Getting Started with Fly Fishing in the UK

    Step 1: Know the Rules
    Fishing in the UK requires proper licences. In England and Wales, you’ll need an Environment Agency rod licence for freshwater fishing. Scotland has different rules—most rivers require permits or day tickets issued by local estates or angling clubs.

    Step 2: Choose the Right Equipment

    • Rod and Reel: A 9-foot 5-weight rod is a good all-rounder for UK trout. For salmon, consider a double-handed spey rod.
    • Fly Line: A floating line works well for most UK waters. Consider intermediate or sinking lines for stillwaters.
    • Leaders and Tippet: Match the tippet size to the fly and target species.
    • Flies: For UK rivers, classics like the Pheasant Tail Nymph, Greenwell’s Glory, and the Parachute Adams are popular. Stillwaters often call for buzzers, blobs, and damsel nymphs.
    Fly Tying Materials
    Fly Tying Equipment

    Step 3: Learn Basic Casting Techniques
    Book a lesson with a qualified instructor through organisations like the Game Angling Instructors’ Association (GAIA). You’ll learn key casts such as the overhead and roll cast.

    Step 4: Practice Watercraft
    Understanding where fish hold and feed is essential. Look for glides, seams, riffles, and undercut banks. Use polarised sunglasses to see fish and reduce glare.

    Step 5: Respect the Environment
    Catch and release is widely practised in UK rivers. Always handle fish with wet hands, use barbless hooks, and follow local fishery guidelines.

    Types of Fly Fishing in the UK

    1. River Fly Fishing

    • Chalk Streams: Southern England’s chalk streams (e.g., River Test, River Itchen) are globally renowned for dry fly fishing. Crystal-clear waters demand delicate presentation.
    • Freestone Rivers: Found in Wales, northern England, and Scotland. Rivers like the Usk, Wharfe, and Dee offer challenging but rewarding trout and grayling fishing.
    • Salmon and Sea Trout Fishing: Rivers like the Spey, Tay, and Tweed are famous for Atlantic salmon. Sea trout (sewin) fishing is a speciality in Welsh rivers such as the Towy and Dovey.

    2. Stillwater Fly Fishing

    • Reservoirs and Lakes: Large waters like Rutland Water, Grafham Water, and Draycote Water are stocked with rainbow trout and offer boat and bank fishing.
    • Small Stillwaters: Numerous stocked fisheries across the UK provide accessible fishing for beginners and seasoned anglers alike. These include fisheries such as Lechlade, Elinor, and Jubilee Lakes.

    3. Loch Fishing in Scotland
    Remote lochs in the Highlands and Islands offer wild brown trout fishing. Many lochs are free or require only modest day tickets. Loch-style boat fishing is a traditional and exciting method.

    4. Urban Fly Fishing
    Yes, you can fly fish in cities! Rivers like the Wandle in London or the Kelvin in Glasgow have made a comeback thanks to conservation efforts.

    5. Coastal and Saltwater Fly Fishing
    Saltwater fly fishing is gaining popularity in the UK. Bass, mullet, and pollack can be caught on the fly in estuaries, surf zones, and rocky coastlines, particularly in Cornwall, Northumberland, and Wales.

    Fly Rod lake fishing
    Fly Rod lake fishing

    Conclusion

    Fly fishing in the UK offers a rich tapestry of experiences, from the historic chalk streams of Hampshire to the wild lochs of the Scottish Highlands. It is both a personal journey and a link to a centuries-old tradition of angling excellence. By learning the basics, respecting the environment, and exploring the diverse waters of the UK, you can enjoy fly fishing at its finest. Whether you’re tying your first fly or casting on your hundredth river, the pursuit is as rewarding as the catch.

    Get started today by visiting a local fishery, joining an angling club, or booking a day with a certified guide. The UK’s rivers, lochs, and coastlines are calling—tight lines!

    Handling Fish When Fly Fishing: A Responsible Angler’s Guide

    Whether you practise catch and release or occasionally retain a fish for the table, responsible fish handling is essential to preserving the health of aquatic ecosystems and ensuring the survival of fish after capture. In the UK, where wild trout, grayling, and Atlantic salmon stocks are increasingly under pressure, good handling practices are not just encouraged—they’re a necessity.

    Why Fish Handling Matters

    Poor handling can stress or injure fish, reducing their chances of survival even if released. Proper technique helps minimise harm, protect fish populations, and maintain the quality of angling for future generations.

    Best Practices for Handling Fish

    1. Wet Your Hands
    Always wet your hands before touching a fish. Dry hands can remove the protective mucus layer, increasing the risk of disease and infection.

    2. Use Barbless Hooks
    Barbless or de-barbed hooks make unhooking quicker and less traumatic for the fish. Many UK rivers and fisheries require them.

    Hand Tied Barbless Flies
    Hand Tied Barbless Flies

    3. Minimise Air Exposure
    Keep the fish in the water as much as possible. Limit air exposure to no more than 5–10 seconds if you must lift it for a photo.

    4. Support the Fish Properly
    Use both hands: one under the belly, the other gently supporting the tail. Avoid squeezing or putting pressure on the gills or internal organs.

    5. Avoid Hot Weather Handling
    Fish are more stressed in warm water with low oxygen. During summer heatwaves, consider fishing early in the morning or not at all.

    6. Use Rubber Landing Nets
    Soft, knotless rubber nets reduce fin and scale damage. Avoid abrasive mesh or string nets.

    7. Unhook Quickly and Safely
    Keep tools like forceps or a disgorger on hand to quickly remove the hook. If a fish is deeply hooked, cut the line rather than cause further damage.

    8. Revive Before Releasing
    Gently hold the fish in the current facing upstream. Allow it to regain strength and swim off under its own power.

    9. Don’t Lay Fish on the Bank
    Avoid placing fish on dry ground or grass. If you must set it down, use a wetted unhooking mat or keep it partially submerged.

    Additional Tips for Specific UK Species

    • Trout and Grayling: Very sensitive to handling—especially in small river systems. Keep handling to an absolute minimum.
    • Atlantic Salmon: Protected in many areas. Most rivers require mandatory catch and release. Use extra care with these iconic migratory fish.
    • Pike and Other Predators: Use long forceps and consider jaw spreaders. Handle with caution to protect both fish and angler.

    Legal and Ethical Considerations

    • Always check local fishery or club rules. Some UK waters have strict regulations on tackle, unhooking, and handling.
    • Respect closed seasons and protected species.
    • Promote best practice by sharing knowledge with other anglers.

    Here are some Fly Fishing essentials –

    Fly Fishing Box With Flies – (Click here)

    Fly Gink – (Click here)

    Check out everything Fishing equipment relate (Here)

  • 10 Family-Friendly Places to Visit in Northern Ireland This Summer

    10 Family-Friendly Places to Visit in Northern Ireland This Summer

    Northern Ireland is a treasure trove of natural beauty, rich heritage, and exciting attractions that make it a perfect summer destination for families. Whether you’re seeking outdoor adventures, educational experiences, or relaxing days by the coast, there’s something for everyone. Here’s a guide to 10 family-friendly places to visit in Northern Ireland this summer.

    1. Giant’s Causeway – County Antrim

    No visit to Northern Ireland is complete without a trip to the Giant’s Causeway, a UNESCO World Heritage Site and one of the most iconic natural landmarks in the UK. Families will love exploring the 40,000 interlocking basalt columns formed by volcanic activity millions of years ago. The interactive visitor centre offers engaging exhibits and audio guides designed for children.

    Tip: Visit early in the morning to avoid the crowds and enjoy a scenic picnic along the nearby trails.

    2. Carrick-a-Rede Rope Bridge – Ballintoy, County Antrim rp

    For a thrilling family adventure, head to the Carrick-a-Rede Rope Bridge, suspended 30 meters above the Atlantic Ocean. Managed by the National Trust, the bridge connects the mainland to a tiny island once used by salmon fishermen. Children aged 5 and above will love the excitement and views, while safety measures ensure a worry-free experience.

    Nearby: Don’t miss the charming Ballintoy Harbour, also a filming location for Game of Thrones.

    3. Titanic Belfast – Belfast City

    The award-winning Titanic Belfast museum is a must-visit for families. Located in the heart of Belfast’s Titanic Quarter, it tells the story of the ill-fated ship through nine interactive galleries. Kids will enjoy hands-on exhibits, replica cabins, and the thrilling Shipyard Ride.

    Family Bonus: Children under 5 go free, and there are family ticket bundles available.

    4. Portrush & East Strand Beach – County Antrim

    During the summer months, Portrush becomes a family hotspot, thanks to its golden beaches, amusements, and restaurants. East Strand Beach is perfect for sandcastle-building, surfing lessons, and seaside picnics. The nearby Barry’s Amusements (now Curry’s Fun Park) provides fun rides and arcade games for all ages. Nearby there is also local boat tour operators that take you out on trips to see local marine life.

    Dining Tip: Head to Ramore Wine Bar for family-friendly meals with stunning ocean views.

    5. Fermanagh Lakelands – County Fermanagh

    Escape into nature with a trip to the Fermanagh Lakelands, a paradise for families who love boating, fishing, and watersports. Rent a canoe or take a guided cruise on Lough Erne. Explore Enniskillen Castle, or go underground at the Marble Arch Caves Global Geopark, one of the most fascinating geological attractions in Europe.

    Stay Recommendation: Book a lakeside lodge or go glamping for a memorable overnight experience.

    6. Dunluce Castle – County Antrim

    Perched dramatically on a cliff edge, Dunluce Castle is one of Northern Ireland’s most picturesque ruins. Kids can roam the ancient site and imagine life as a knight or princess. The castle’s history and legends—like the kitchen that collapsed into the sea—make it a fascinating visit for curious minds.

    Nearby Treat: Stop by The Bushmills Inn for lunch or try the local ice cream shop in Bushmills village.

    7. Ulster Folk Museum – Cultra, County Down

    Step back in time at the Ulster Folk Museum, where families can experience life in 1900s rural Ireland. Children can see traditional thatched cottages, watch costumed actors perform crafts, and even participate in butter-churning or blacksmithing demonstrations.

    Pro Tip: Combine your visit with a stop at the adjacent Ulster Transport Museum for an entire day of educational fun.

    8. Castlewellan Forest Park – County Down

    Perfect for an active family day out, Castlewellan Forest Park offers stunning trails, mountain biking paths, and one of Europe’s largest permanent hedge mazes. The tranquil lake is ideal for paddle boating, while the modern play area caters to younger children.

    Don’t Miss: The panoramic views from Slieve Croob, just a short drive away.

    9. W5 Interactive Discovery Centre – Belfast City

    Located in the Odyssey Complex, W5 (WhoWhatWhereWhenWhy) is an interactive science centre perfect for curious kids. With over 250 exhibits covering topics from space to robotics, W5 blends education and fun. There’s also a toddler area, climbing structures, and seasonal events during the summer holidays.

    Access Tip: Bundle your visit with Titanic Belfast and other nearby attractions for a full day in the city.

    10. Tollymore Forest Park – Newcastle, County Down

    Nestled at the foot of the Mourne Mountains, Tollymore Forest Park is a family paradise with ancient woodlands, stone bridges, rivers, and caves. It’s a great spot for hiking, picnicking, or simply letting the kids explore nature. Game of Thrones fans may recognize the landscape from several early scenes.

    Camping Option: The park offers family-friendly campsites with excellent facilities for summer stays.

    Tollymore Forest Park Co Down Newcastle
    Tollymore Forest Park, Co.Down

    Final Thoughts: Why Northern Ireland is Ideal for Summer Family Holidays

    Northern Ireland is a dream destination for families during the summer months. With its mild weather, stunning coastal scenery, and family-focused attractions, it offers a balanced blend of outdoor adventures and educational experiences. Whether you’re exploring castles on the Antrim Coast or paddling through the Fermanagh Lakelands, Northern Ireland delivers memorable moments for every a

  • 10 Outdoor Dog friendly places Northern Ireland

    10 Outdoor Dog friendly places Northern Ireland

    10 Best Outdoor Dog & Family-Friendly Places to Visit in Northern Ireland This Summer
    A Personal Guide from a Family of Three and Our Adventurous Dachshund-Jack Russell Mix


    There’s nothing better than packing up the car, throwing on our walking shoes, and setting off to explore a new corner of Northern Ireland — especially when we get to bring our beloved wee dog along with us. We’re a family of three, and our little four-legged friend (a lively dachshund/Jack Russell cross) is just as much part of the crew as any of us. She might have short legs, but don’t let that fool you — She is 11 years old and got the energy of ten dogs and the curiosity of twenty!

    Over the years, we’ve explored a lot of Northern Ireland looking for the best outdoor adventures that welcome both dogs and families. From forest walks and coastal views to hidden gems and open green spaces, we’ve compiled our personal top 10 must-visit dog-friendly places in Northern Ireland to enjoy this summer. Whether you’ve got a bouncy puppy, a sleepy senior dog, or kids with boundless energy, this list has something for everyone.


    1. Tollymore Forest Park, County Down

    📍Near Newcastle, BT33 0PW

    Tollymore holds a special place in our hearts if you have read our our post (Tollymore Forest Park) you will know why!. With its majestic trees, river walks, and beautiful stone bridges, it’s like walking through a fairytale. Dogs are welcome as long as they’re on a lead, and there are plenty of shady spots for resting, especially during warmer days.

    The kids love splashing in the shallow streams, and our wee dog loves chasing leaves along the riverside paths. There’s also a brilliant natural play area for children made from wooden climbing frames, and picnic areas scattered throughout.

    🦴 Dog Tip: Bring a portable water bowl and a long line for forest play — your dog will love sniffing every corner of this magical woodland.

    Two Dogs at Tollymore Forest Park
    Two Dogs at Tollymore Forest Park

    2. Castle Ward, County Down

    📍Strangford, BT30 7LS

    A National Trust gem! Castle Ward is a historical estate with over 820 acres of parkland, woodlands, and trails. It’s also a Game of Thrones filming location, which makes it a hit with older kids and adults too.

    Dogs are welcome throughout the grounds and even inside the café’s outdoor seating area. Our wee rascal always gets lots of attention here — She thinks She owns the place. There’s also a lovely shoreline walk with views over Strangford Lough and plenty of quiet spaces to enjoy a peaceful picnic.

    Castle Ward also have a lovely caravan site to stay at with your touring van so its perfect for weekends away with dogs and kids or even just adults and furbabies!

    🦴 Dog Tip: Watch for sheep in the fields and keep dogs on lead when near livestock.


    3. Pomeroy Forest Park, Pomeroy, Dungannon BT70 3DS

    A great day out for both kids and dogs! Follow the story lined paths and trails! From Humpty Dumpty, The giants, Zip line, The three billy goats and much much more!

    There is three trails around Pomeroy Forest Park:

    The Renardine trail made up of a Nursery Trail (1km)

     Fairytale Trail (2.2km)

    The Grace Drennan Eco Trail (2.4km)

    The Trails are well kept and fun for all the family! There is a Cafe located on site, Picnic area and toilets.

    Pomeroy Forest Park
    Play Park at Pomeroy Forest

    4. Murlough National Nature Reserve, County Down

    📍Dundrum, BT33 0LW

    This one’s a winner for beach lovers! Murlough is a stunning blue-flag beach with a protected dune system. There’s a boardwalk through the dunes and a wide, long beach that’s perfect for dogs and kids to burn off energy. Although there is free roaming cattle along the paths to the beach so advisable to keep dogs under control and on leads.

    It’s one of the few places where our dog zooms around in absolute bliss while our child builds sandcastles and we all enjoy a flask of tea. You can walk the whole stretch of beach to Newcastle town and grab a bite from one of the dog-friendly cafés.

    🦴 Dog Tip: Bring a towel — your dog will get sandy and probably wet!


    5. Portglenone Forest, County Antrim

    📍Portglenone, BT44 8AX

    Not as well known, but that’s what makes it special. Portglenone Forest is tranquil, peaceful, and an ideal escape from busy tourist trails. It’s perfect for families who like a slower pace and dogs who love sniffing every bush and tree.

    Our little dog loves the meandering trails here, and we always feel completely immersed in nature. It’s also an ideal spot for spotting bluebells in spring and early summer. There’s plenty of flat terrain for buggies too.

    🦴 Dog Tip: This is tick territory in warmer months — check your dog afterwards.


    6. Glenariff Forest Park, County Antrim

    📍Cushendall, BT44 0QX

    Known as the “Queen of the Glens,” Glenariff is breathtaking. The forest park features stunning waterfalls, shaded walks, and well-maintained paths. The Waterfall Walkway is especially beautiful, with bridges, steps, and streams.

    It can be steep in parts, so it’s better suited for older children and active dogs. Our pup absolutely loves the sound of rushing water and never fails to dip her paws in the stream.

    🦴 Dog Tip: Keep dogs on a short lead on the waterfall trails – the drops can be steep.


    7. Crawfordsburn Country Park, County Down

    📍Helen’s Bay, BT19 1JT

    This one ticks all the boxes — sandy beach, forest trails, a waterfall, picnic benches, and a café. It’s one of our top choices when we’re after a full family day out without too much driving.

    The beach is dog-friendly all year round (though some areas have seasonal restrictions), and there are woodland trails that loop back to the car park. We often bring a ball launcher here and tire out both the child and the dog before grabbing an ice cream.

    🦴 Dog Tip: Great place to practice recall in quieter areas — but always bring a lead for the busier spots.


    8. Silent Valley Reservoir, County Down

    📍Kilkeel, BT34 4PU

    Nestled in the Mournes, Silent Valley is exactly what the name suggests — peaceful, quiet, and incredibly scenic. The walk around the reservoir is gentle and suitable for prams, older relatives, and energetic pups alike.

    We love to bring a packed lunch and spend a few hours here, watching the clouds roll across the mountains. Dogs must be kept on leads, but there’s plenty of space and sensory exploration to keep them entertained.

    🦴 Dog Tip: Dogs aren’t allowed in the reservoir, but there are little streams for splashing on the outskirts.


    9. Castlewellan Forest Park, County Down

    📍Castlewellan, BT31 9BU

    This park is a dream for families. You’ve got a massive lake, an arboretum, and even a Peace Maze — one of the largest in the world — which is great fun for the kids. The walking and biking trails are excellent, with plenty of dog bins along the way.

    We’ve spent entire days here, wandering the lakeside with our dog, enjoying ice cream by the water’s edge, and letting our son climb trees and explore. You can even book camping or glamping nearby for an overnight adventure.

    🦴 Dog Tip: Bring a long lead and make use of the open meadow areas for play.

    Lake at Castlewellan Forest park
    Castlewellan forest park lake

    10. Benone Strand & Mussenden Temple, County Londonderry

    📍Benone, BT49 0LQ

    Few places are as iconic as Mussenden Temple and the surrounding coastline. Start with a walk along Benone Strand — one of the most dog-friendly beaches in Northern Ireland — and then head up the cliff path to Mussenden for those incredible views.

    On a clear day, it feels like you’re on the edge of the world. The path is well-maintained, and you’ll find lots of dogs out enjoying the salty breeze. Just keep an eye on kids and dogs near cliff edges.

    🦴 Dog Tip: Ideal for a summer sunset walk with your dog and camera in tow.


    Final Thoughts

    Every family’s idea of adventure is different, but for us — a couple, a child, and a fearless little dachshund-Jack Russell — Northern Ireland is a true playground. Whether it’s a spontaneous Sunday beach trip or a full day of forest exploring, these places let us reconnect, relax, and enjoy the simple things together.

    Wherever you go this summer, remember to pack:

    • Water and treats for you and your dog
    • Dog waste bags, Ran out? Buy these ones here ~ Affiliate Link
    • A lead and harness
    • Towels (you’ll thank yourself later!)
    • A spirit of adventure
    • Portable water Bottle Here is the one we use (Click here) ~Affiliate Link

    Northern Ireland truly is one of the most dog-welcoming regions in the UK, and we’re proud to call it our home for adventures big and small. Happy exploring, and if you see a little dog bounding around with ears flapping like helicopter blades — that’s probably us!

  • Guide to buying your first caravan

    Guide to buying your first caravan

    Thinking about buying your first caravan? 🚐 Whether you’re dreaming of weekend escapes or full-time travel, choosing the right caravan can feel overwhelming for first-time buyers. In this complete beginner’s guide to buying a caravan, we’ll walk you through everything you need to know—from setting a budget and choosing between 2 berth or 6 berth caravans, to understanding key features, towing requirements, and ownership costs. Avoid costly mistakes and make a confident, informed decision with this easy-to-follow guide built for first-time caravan buyers in the UK.

    🛻 Guide to Buying Your First Caravan

    1. 🎯 Define Your Needs

    Start with the essentials:

    • How many people will use it? Couples may only need a 2-berth, while families may need 4–6 berths.
    • How often will you use it? Occasional trips vs. full-time travel can impact what type of caravan is suitable.
    • Where will you travel? On-road or off-road? International or domestic?
    • Towing vehicle? Ensure your car is suitable (see below).

    2. 🚙 Check Your Towing Capacity

    Your vehicle’s towing capacity is critical.

    • Check the Gross Vehicle Mass (GVM) and Tare weight of the caravan.
    • Match it to your car’s Maximum Braked Towing Capacity.
    • Remember the Gross Combination Mass (GCM) if loading both the vehicle and caravan.
    • Make sure you have a suitble tow bar that takes the correct nose weight, you can test your caravans nose weight with this device

    💡 Pro tip: Stay under 85% of your car’s kerb weight for safer towing if you’re a beginner.

    Land Rover Freelander Tow car and Elddis crusader caravan
    Elddis Touring caravan

    3. 🏕️ New vs. Used Caravans

    New Caravan Pros:

    • Warranty and latest tech.
    • No hidden damage.

    Used Caravan Pros:

    • More affordable.
    • Slower depreciation.

    🔍 When buying used, inspect:

    • Damp, mold, and water damage. You can buy a damp meter tester.
    • Chassis and tires.
    • Appliances and electrics.
    • Service history.
    Old Elddis Typhoon GT 4 berth EB Caravan
    Elddis Typhoon GT 1997

    4. 🛏️ Layout and Features

    Popular layouts vary—visit dealerships or expos to explore:

    • Fixed bed vs. convertible seating
    • Separate shower/toilet or combined wet room
    • Kitchen space and cooking appliances
    • Storage options

    🔧 Must-have features for many:

    • Heating/AC
    • Solar or battery setup
    • Awning –
    • Security devices (tracker, wheel lock) for the one that we use.

    5. 💰 Budget and Hidden Costs

    Besides the purchase price, consider:

    • Insurance
    • Storage (if not kept at home)
    • Maintenance and servicing
    • Towing mirrors and hitch locks. Towing mirror
    • Site fees and club memberships (like Caravan and Motorhome Club)

    6. 🧾 Legal & Safety Requirements (UK Example)

    • Valid driving licence for the weight (Check your Category B license limits)
    • Number plate on the caravan
    • Properly rated towbar and electrics Example Alko system requires this tow hitch
    • Working brake lights and indicators
    • Ensure caravan brakes and breakaway cable are functional. Buy a replacement (Click here)

    7. 📍 Where to Buy

    • Dealerships – Safer, with consumer protections
    • Online marketplaces (e.g., Autotrader, Facebook marketplace)
    • Caravan shows – Try multiple models in one place
    • Private sellers – Cheaper but riskier

    8. 🧪 Try Before You Buy

    If unsure, rent a caravan for a weekend. This gives you a real sense of what layout and size works for you.


    9. 🛠️ Plan for Servicing and Storage

    • Annual servicing is recommended (chassis, gas, electrics).
    • Store under cover if possible to reduce wear. You can buy one

    10. 🧭 Join a Caravan Community

    Great for advice, buying tips, campsite recommendations:

    • Caravan and Motorhome Club
    • Online forums or Facebook groups
    • YouTube channels (many do walkarounds and reviews)

    For all your caravan needs or to browse (Click here)

    We have other useful reading if you wish to read more, other things we think you might like..

    (Why is it important to have a towing cover)

    (Quick guide on caravan awning accessories)

    Here you can find a full list of everything we have on our website. ( Click Here )

  • Quick guide on caravan awning accessories

    Quick guide on caravan awning accessories

    Here’s a list of common caravan awning accessories, organized by category, to help you equip and enhance your setup:


    🛠️ Installation & Setup Accessories

    • Awning pegs/stakes – Standard or heavy-duty depending on ground conditions. (Click here)
    • Guy ropes & tensioners – For securing in windy conditions.
    • Pole sets or air beams – Replacement or upgrade kits for frame support.
    • Awning rail lubricant – Makes it easier to slide awning into the rail.(Click here)
    • Draft skirt – Fills the gap under the caravan to reduce wind and drafts.(Click here)
    • Wheel arch cover – Blocks drafts around the wheel arch area.(Click here)

    🧼 Protection & Maintenance

    • Awning cleaner – For removing dirt, algae, and mildew.(Click here)
    • Waterproofing spray – Restores or enhances water resistance.(Click here)
    • Awning storage bags – Keeps it clean and organized when not in use.
    • Groundsheet or footprint – Protects the awning floor and improves comfort.(Click here)

    💡 Comfort & Living Accessories

    • Awning carpet/mat – Adds insulation and comfort underfoot.(Click here)
    • Lighting – LED strip lights, lanterns, or solar-powered options.
    • Heating/cooling fans – Electric or gas heaters, portable fans for airflow.
    • Furniture – Foldable tables, chairs, storage units, and cupboards.(Click here)
    • Curtains or blinds – For extra privacy and light control.

    🔌 Power & Connectivity

    • 12V and 240V power adapters – For lights, appliances, or chargers.
    • Extension leads & cable tidy – For safe, flexible power setups.
    • USB charging hubs – For phones, tablets, etc.

    🛑 Security & Safety

    • Awning tie-down kits – For added storm protection.
    • Awning windbreaks – Provides privacy and wind shelter. (Click here)
    • Bug screens or mesh doors – Keep insects out.
    • Carbon monoxide/smoke detectors – Especially if using gas heaters inside.

    ⛺ Add-ons & Expansions

    • Annexes or extensions – Add sleeping space or storage.
    • Sun canopies or verandas – For shade without full enclosure.(Click here)
    • Side panels/front panels – Customize based on wind/weather direction.
    • Porch awnings – Smaller, quicker to erect than full awnings.(Click here)

    Why not check out our other post on Caravan porch awnings? Click Here

  • Caravan Porch Awnings

    Caravan Porch Awnings

    A porch awning for caravans offers a range of practical and lifestyle benefits, especially for travelers looking to extend their living space and comfort while on the road. Here’s a breakdown of the main advantages:


    1. Extra Living Space

    • Increases usable area for relaxing, dining, or storage.
    • Provides a semi-enclosed space ideal for chairs, tables, or even an extra sleeping area (with certain models).

    2. Weather Protection

    • Shelters from sun, rain, and wind, making outdoor activities more comfortable in varying conditions.
    • Helps keep the caravan cleaner by offering a transition area where you can remove muddy shoes or wet clothes.

    3. Better Storage Options

    • Awnings are ideal for storing bikes, boots, outdoor gear, or pets without cluttering the inside of your caravan.
    • Some models come with built-in storage compartments or options to add them.

    4. Privacy and Security

    • Creates a more private space in crowded caravan parks or campsites.
    • Can deter theft by obscuring access to the main entrance and offering a place to store valuables discreetly.

    5. Energy Efficiency

    • By shading windows and doors, awnings can reduce heat build-up inside the caravan, helping to keep it cooler in summer and reducing the need for air conditioning.

    6. Enhanced Comfort & Lifestyle

    • Makes it easier to entertain guests, enjoy meals outside, or just relax with more room to spread out.
    • Adds a homely, comfortable feel to your camping setup.

    7. Easy Setup & Versatility

    • Modern porch awnings (especially inflatable types) are quick to pitch and dismantle.
    • Available in various styles (full, porch, inflatable, drive-away) to suit different needs and caravan models.
    Elddis Typhoon with pole porch awning
    Elddis Typhoon with pole porch awning

    Types of Caravan Porch Awnings

    1. Traditional Pole Awnings

    • Structure: Metal or fiberglass poles with fabric.
    • Pros: Strong, stable, usually cheaper.
    • Cons: Takes longer to set up, heavier.

    2. Inflatable (Air) Awnings

    • Structure: Inflatable air tubes instead of poles.
    • Pros: Very quick and easy to set up, lighter to carry.
    • Cons: Typically more expensive; punctures (though rare) can be an issue.

    3. Drive-Away Awnings (for campervans or motorhomes)

    • Pros: Can detach and remain standing if you drive away.
    • Best for: Touring and staying mobile.

    4. Seasonal Awnings

    • Designed for: Long-term setups or seasonal pitches.
    • Features: Heavier-duty materials, better weather resistance.
    • Cons: Heavier and more complex to set up.

    5. Touring Awnings

    • Designed for: Frequent setup and take-down.
    • Features: Lightweight, compact, quick-pitch designs.

    Our view on the best awning?

    Air awning, So much easier to set up! We found the pole awnings to be what most people in the caravan world call divorce in a bag! Here is a list of some awnings:

    Streetwize Accessories Leisurewize LWPP2C Ontario Porch Awning 390 Charcoal (Click here)

    Sunncamp Swift 325 Air Caravan Awning Free Pump & Gauge Free Storm Straps (Click here)

    OLPRO View 420 Inflatable Caravan Porch Awning with Extension (Click here)

    Why not check out our quick guide to caravan awning accessories? (click here)

  • Why is it important to have a towing cover on your caravan?

    Why is it important to have a towing cover on your caravan?

    A caravan towing cover is an essential accessory for protecting your caravan during transit. Here’s why it’s important:

    1. Protection from Debris: While towing, your caravan’s front panel is vulnerable to stones, bugs, mud, and other road debris. A towing cover acts as a shield, preventing chips, scratches, and stains.

    2. Preserves Appearance: By minimizing damage from road grime and UV exposure, it helps maintain the caravan’s exterior, reducing the need for frequent cleaning and touch-ups.

    3. Prevents Window Damage: Many caravans have large front windows made of acrylic or plastic, which are prone to cracking or scratching. A towing cover helps keep them intact.

    4. Improves Resale Value: A well-maintained exterior suggests careful ownership, making your caravan more attractive to buyers.

    5. Custom Fit and Visibility: Most covers are tailored to fit specific caravan models and include reflective strips or lights for better visibility and safety while on the road. In short, a towing cover is a smart investment that extends the life and looks of your caravan.

    Here are 5 of the most recommended caravan tow cover brands, known for their durability, fit, and protection:

    1. Specialised Covers Why it’s recommended: UK-based, high-quality, custom-fit towing covers tailored to specific caravan models. Easy to fit, with clear window options and reflective strips.

    Popular product: Tow Pro Elite

    2. Protec Covers Why it’s recommended: Known for bespoke, made-to-order towing covers. Strong build with padded protection and optional window access.

    Popular product: Protec Towing Jacket

    3. Purple Line (FullStop) Why it’s recommended: Offers durable and universal-fit tow covers. Less expensive than custom-fit brands but still reliable.

    Popular product: FullStop Towing Jacket

    4. Tow-Guard Why it’s recommended: Focuses on universal and semi-custom covers. Well-praised for ease of installation and robust materials.

    Popular product: Tow-Guard Front Cover

    5. Maypole Why it’s recommended: Budget-friendly, decent protection. Offers adjustable, universal designs that fit a wide range of caravans.

    Caravan with towing cover protecting front from road debris and weather during transit
    Universal-fit caravan towing covers for superior front-end protection while towing. Shop waterproof, breathable designs for all caravan sizes

    Popular product: Maypole Universal Caravan Towing Cover (Click here)

    For the best results, choose a brand that offers a cover tailored to your specific caravan make and model.

    The one we are currently using on our ow

  • Tollymore Forest Park

    Tollymore Forest Park

    Your Mournes Adventure Starts Here: Tollymore Forest Park & Caravan Site!

    Welcome, fellow adventurer! If you’re anything like me, the call of the wild, a cozy caravan, and the promise of breathtaking scenery are an irresistible combination. And let me tell you, there’s no better place to answer that call than Tollymore Forest Park, nestled at the foot of the magnificent Mourne Mountains. As a local (well, just down the road outside Belfast), I’m thrilled to share some insider tips to make your Tollymore stay truly unforgettable.

    A Walk Through Time: The Rich History of Tollymore

    Before we dive into the present-day delights, let’s take a moment to appreciate the fascinating past of Tollymore. This isn’t just any forest; it was the first state forest park in Northern Ireland, established in 1955. But its history stretches back much further. The land was originally part of the extensive Roden Estate.

    You’ll quickly notice the incredible architectural follies scattered throughout the park, like the Shimna River bridges, the Hermitage, and the Clanbrassil Barn. These weren’t just decorative; they were part of a grand landscaping vision from the 18th century, designed by the then-owner, Lord Clanbrassil. He was a keen botanist and introduced many exotic tree species that still thrive here today, making Tollymore a truly unique arboretum. Imagine walking the same paths where generations have admired these ancient trees and whimsical structures – it’s like stepping into a living history book!

    More Than Just a Park: Tollymore feels more like home

    For me, Tollymore isn’t just a destination; it feels like home. Countless childhood memories are woven into the very fabric of this place. I can still vividly recall the thrill of spotting shy wildlife amongst the trees, or the friendly chats with George, one of the kind-hearted rangers who always had a story or a tip to share. Many that know of George will always speak highly of him he was a lovely gentleman.

    Some of my happiest early memories are of staying here with my grandparents. The excitement of us all being away together, with our beloved Doberman, Penny, by our side, was just magical. There is plenty of stories of my childhood in Tollymore. They used to hold an event for the kids getting the conkers off the big oud conker tree that is outside the toilets it brought all us kids so much joy competing to collect the most conkers! And who could forget visiting Pat, who lived in that sweet little cottage by the exit gate of Tollymore – a familiar face always there to greet us. Today Pats cottage can be rented out.

    Tollymore has truly been a constant throughout my life’s journey. From those carefree childhood days, it evolved into our first romantic getaway in our very first caravan with my partner. Then, a new chapter began when we brought our son here for the very first time, a tiny three-month-old experiencing the magic of the forest. And now, as a cherished family tradition, we find ourselves spending every Boxing Day to New Year’s Day here, creating new memories and reliving old ones year after year.

    That feeling when your packing the caravan and car knowing your heading to somewhere that feels like home is just magical and driving through the stone entrance and down the tree lined avenue to the park just feels so special.

    Your Caravan Hub: Exploring Beyond the Park Gates

    While Tollymore Forest Park itself offers endless exploration, your caravan here is the perfect launchpad for discovering the wider Mournes region.

    Local Attractions & Places to Go:

    • Newcastle: Just a stone’s throw away, the vibrant seaside town of Newcastle beckons. Stroll along the promenade, try your hand at some arcade games, or simply soak up the traditional seaside atmosphere.
    • Mourne Mountains Scenic Drive: Take a leisurely drive around the famous Mourne Coastal Route. Every bend offers another postcard-perfect view, from rugged peaks to sparkling seascapes. Don’t forget your camera!
    • Castlewellan Forest Park: Another fantastic forest park nearby, Castlewellan boasts a stunning lake, a peace maze, and a truly impressive arboretum. The lake is fantastic for paddleboarding, Kayaking and Fishing. There is also several different Bike trail suitable for the whole family! It’s a great alternative for a day out if you fancy a change of scenery.
    • Mourne Wall: For those interested in a more challenging hike (which we’ll get to!), glimpsing sections of the iconic Mourne Wall, a 22-mile dry-stone wall snaking over the highest peaks, is a must-see feat of engineering.

    Fueling Your Adventures: Local Eats & Treats

    After all that exploring, you’ll have worked up an appetite! Luckily, the area around Tollymore offers some fantastic spots to refuel.

    Maghera Inn Pub Restaurant near tollymore forest park
    Maghera Inn Pub/Restaurant
    • The Maghera Inn: A personal favourite, the Maghera Inn pub/restaurant is a true gem. Tucked away in Bryansford, this traditional pub offers delicious, hearty food in a welcoming atmosphere. Their carvery is legendary, and their menu is packed with comforting classics. It’s the perfect spot for a satisfying meal after a long walk. If you have young children with you they do a great baby bowl for kids and other various items on the menu. We love the décor in this pub/restaurant it gives it a lot of character
    • Mourne Seafood Bar (Newcastle): If you’re a fan of fresh seafood, you absolutely have to visit the Mourne Seafood Bar in Newcastle. Their commitment to local, sustainable produce means you’re in for a real treat.
    • Local Cafes & Bakeries: Keep an eye out for charming independent cafes and bakeries in Newcastle and Bryansford, perfect for a coffee and a scone. We personally love Fish & Farm shop Café located on the main street of Newcastle.

    Conquering the Peaks: Walks in the Mournes

    And now, for the main event for many outdoor enthusiasts: the Mourne Mountains! Whether you’re a seasoned hiker or prefer a gentler stroll, there’s a walk for everyone.

    Tollymore Forest Park River
    River Walk Tollymore Forest Park
    • Gentle River Walks (Tollymore): Within Tollymore Forest Park itself, you’ll find numerous well-marked trails along the Shimna River, perfect for a leisurely walk with stunning views of cascades and ancient trees. Our favourite parts of the river walks are stopping off at the wee seating area by Foleys bridge (Which is featured in the new How to train your dragon live action movie!)
    • Slieve Donard (for the ambitious!): If you’re feeling adventurous and the weather is good, tackling Slieve Donard, Northern Ireland’s highest peak, is an incredible achievement. The views from the summit are simply breathtaking.
    • Newcastle to Bloody Bridge Coastal Path: A fantastic walk that combines stunning coastal scenery with views of the mountains. It’s relatively flat in sections, making it accessible for many. We absolutely love this walk the views from the coastal bit are stunning!
    • Spelga Dam: Drive up to Spelga Dam for some incredible panoramic views and shorter walks around the reservoir.

    Remember to always check the weather forecast before heading into the mountains, wear appropriate footwear, and bring plenty of water and snacks.

    The Perfect End: Ice Cream by the Beach

    No trip to the Mournes, especially after an invigorating walk, is complete without one essential treat: ice cream by the beach! Head into Newcastle, find your favourite ice cream parlour (there are plenty to choose from!), grab a cone piled high with your chosen flavours, and enjoy it as you watch the waves roll in. It’s the perfect way to cool down, relax, and reflect on a day well spent amidst the beauty of County Down.

    So pack your bags, hook up your caravan, and get ready for an unforgettable adventure at Tollymore Forest Park. The history, the scenery, the food, and the sheer joy of the outdoors await you. Enjoy every moment – you might just find it becomes your second home too!

    Child Walking Dog Through Tollymore Forest Park
    Peaceful walk through Tollymore Forest Park

    Here is the distance from Belfast and Dublin to Tollymore Forest Park although Google maps is the best for finding your best route and shortest route.

    🚗 Belfast → Tollymore Forest Park

    • Distance: ~30 miles (48 km) by road
    • Typical drive time: around 40–45 minutes
    • Route overview: Head south on the A24 from Belfast toward Clough, then join the A2/Newcastle Road before turning off into Tollymore Forest Park

    🚗 Dublin → Tollymore Forest Park

    • Distance: ~88 miles (142 km) by road
    • Typical drive time: about 1 hour 45 minutes (up to ~2 hours)