Category: Caravanning

  • How to winterize your caravan guide

    How to winterize your caravan guide

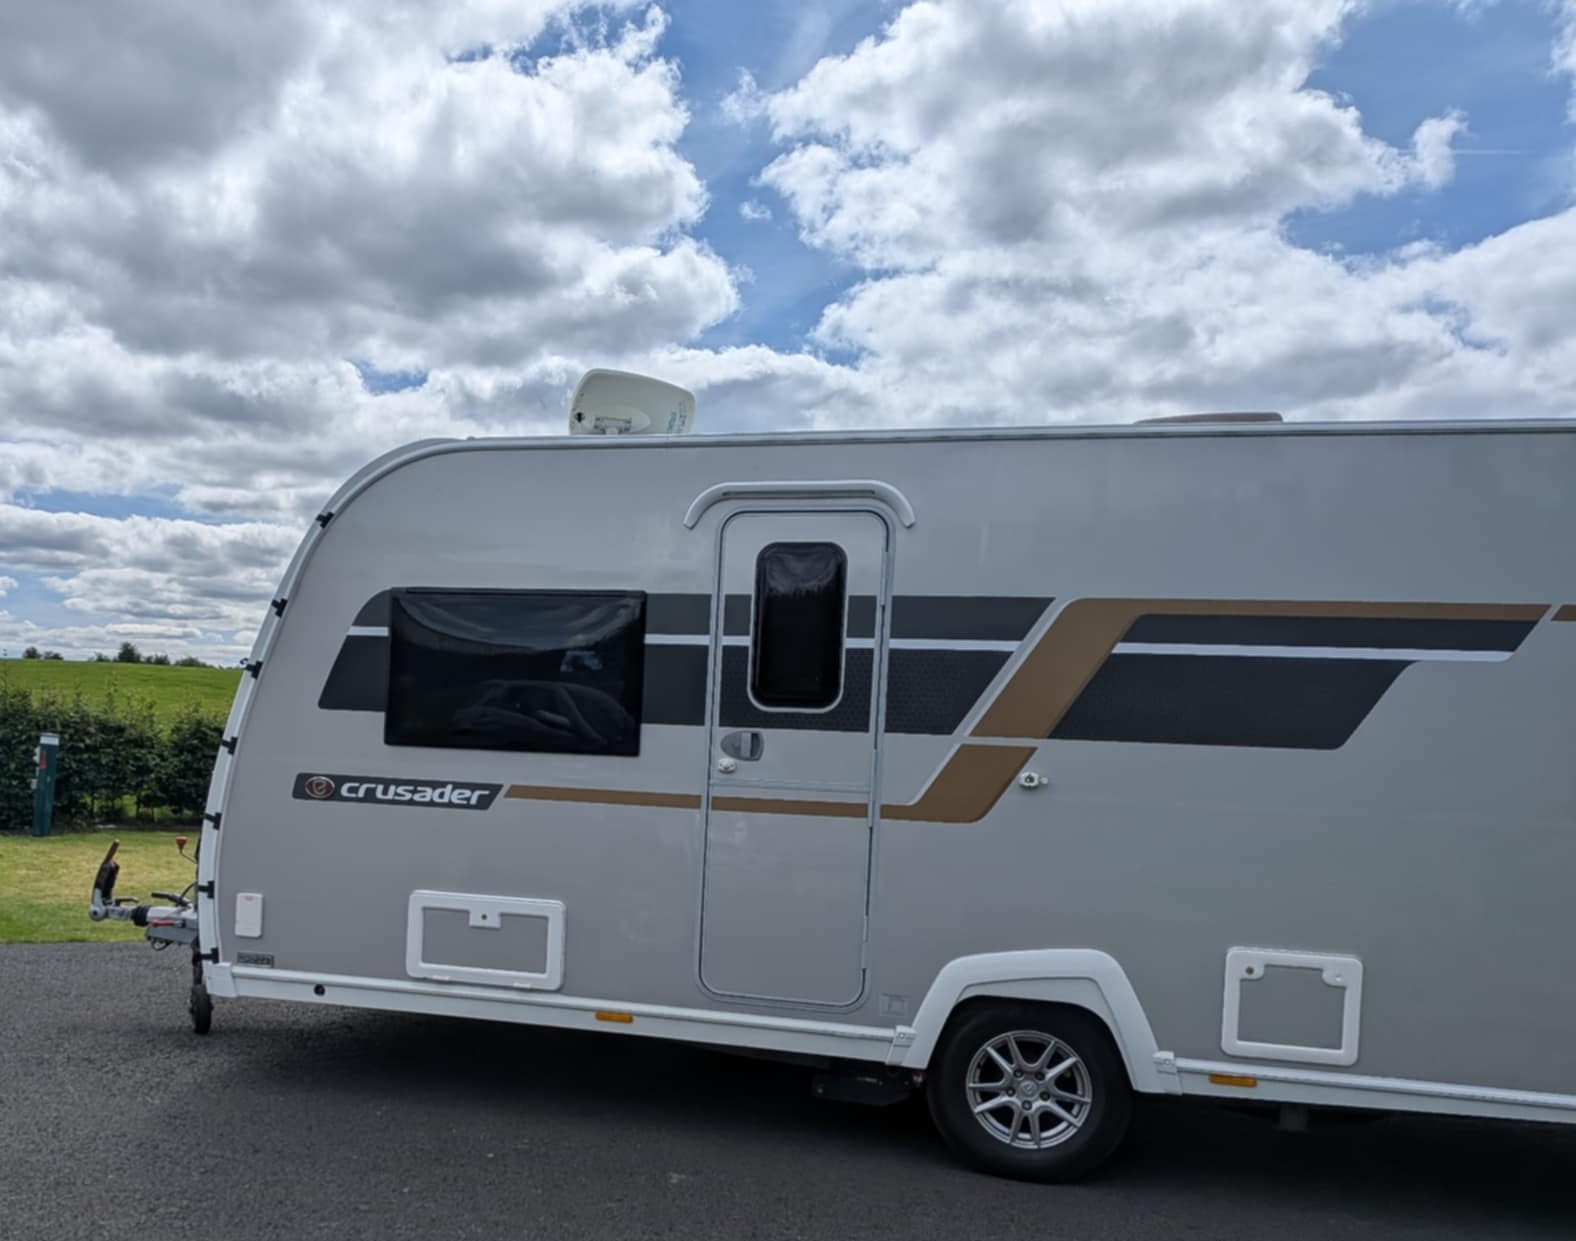
    How to Winterize Your Caravan: A Complete Step-by-Step Guide for Beginners

    If you’re a proud caravan owner, you know it brings endless freedom and joy throughout the spring and summer months. But when colder weather rolls in, winterizing your caravan is essential to protect it from frost damage, damp, mould, and wear caused by long periods of storage.

    Whether you’re storing your caravan on your drive, in a storage facility, or even using it occasionally through winter, this step-by-step beginner’s guide will walk you through exactly how to winterize your caravan—safely and confidently.


    Why Winterizing Your Caravan Is Essential

    Before diving into the practical steps, let’s quickly cover why winterizing matters:

    • Prevents frozen and burst water pipes
    • Avoids damage to pumps, boilers, and water systems
    • Stops build-up of mould, mildew, and bad smells
    • Prolongs battery life and prevents electrical faults
    • Saves costly repairs come springtime

    Even if you’re planning a few winter trips, these steps will help keep your caravan in tip-top condition in between outings.


    What You’ll Need

    Contains Affiliate links below

    Here are the tools and materials you might want to gather before starting:

    • Towels and cloths
    • Water container for draining
    • Caravan water pump and plug removal tools
    • Caravan antifreeze (non-toxic for use in waste systems—not for drinking water!)
    • Moisture absorbers or dehumidifiers
    • WD-40 or silicone spray
    • Vacuum and cleaning products
    • Battery charger/monitor
    • Insulated covers for vents/chimneys (if storing outside)
    A snow covered Elddis Crusader Aurora caravan parked behind a wall in winter
    Elddis Crusader Aurora caravan dusted with snow on a cold winter’s day

    Step-by-Step Guide to Winterizing Your Caravan


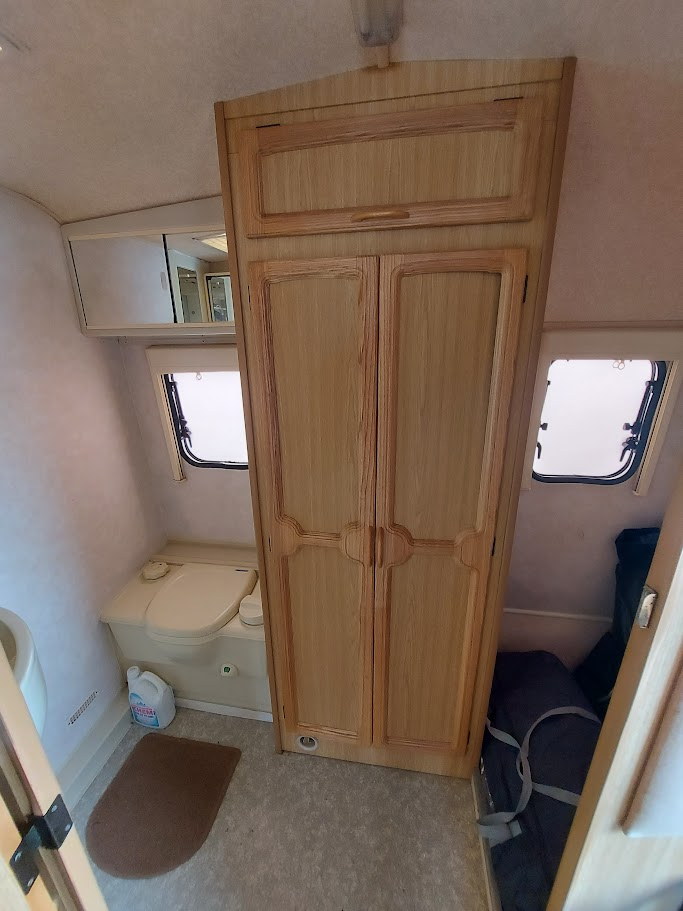
    Step 1: Deep Clean the Interior

    Before shutting up your caravan for weeks or months, give it a good clean.

    • Empty all cupboards and remove food: Even sealed packets can attract pests.
    • Wipe down all surfaces, including kitchen units, table tops, and bathroom fixtures.
    • Vacuum thoroughly: Especially around beds and seating where crumbs gather.
    • Clean the fridge/freezer: Leave the door ajar and place a cloth inside to absorb moisture.
    • Empty and clean bins and toilet cassette.

    Tip: Add a dish of bicarbonate of soda inside the fridge to absorb smells.


    Step 2: Drain Down the Water System

    One of the most important steps. Water left in pipes, tanks, or appliances can freeze and cause serious damage.

    How to Drain the Water System:

    1. Turn off the water pump and heater:
      • Ensure both are off and disconnected from power.
      • Let the boiler cool if it was recently used.
    2. Open all taps and shower heads:
      • Open both hot and cold sides of the mixer taps.
      • Remove any showerheads and leave the hoses hanging down.
    3. Open the drain valve (usually found near the onboard water tank or under the floor):
      • This allows the water to run out completely.
      • You may want to place a bucket or container underneath if you’re not on a service pitch.
    4. Blow out remaining water (optional but recommended):
      • You can use a low-pressure air pump or specialist device to force air through the pipes.
      • Alternatively, lift and lower the tap heads to help any water droplets run down.
    5. Empty and clean the toilet flush system:
      • Remove flush water from the header tank if separate.
      • Drain the cassette completely and clean it using a cassette cleaner.
    6. Use non-toxic caravan antifreeze (only for waste tanks or traps):
      • Pour a little into each plughole, shower trap, and the toilet to prevent seals drying out and freezing.
      • Do not use antifreeze in drinking water tanks or pipes.

    Tip: Leave all drain valves open until spring and remove water filters if installed.


    Step 3: Ventilation Is Key

    Contrary to instinct, sealing your caravan too tightly can cause condensation and damp.

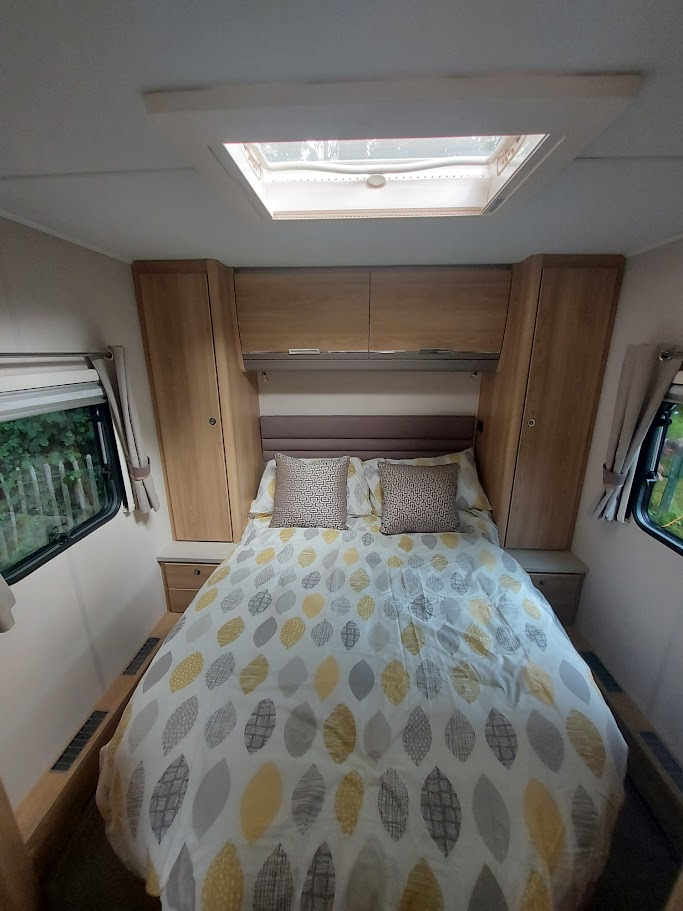
    • Leave internal doors and cupboards open to allow air flow.
    • Lift up cushions and mattresses and store them on their sides or at an angle.
    • Use moisture traps or dehumidifiers (silica crystal types are good for winter).
    • Keep roof vents slightly open with vent covers to prevent snow/rain ingress.

    Tip: If storing your caravan indoors or undercover, consider removing soft furnishings entirely.


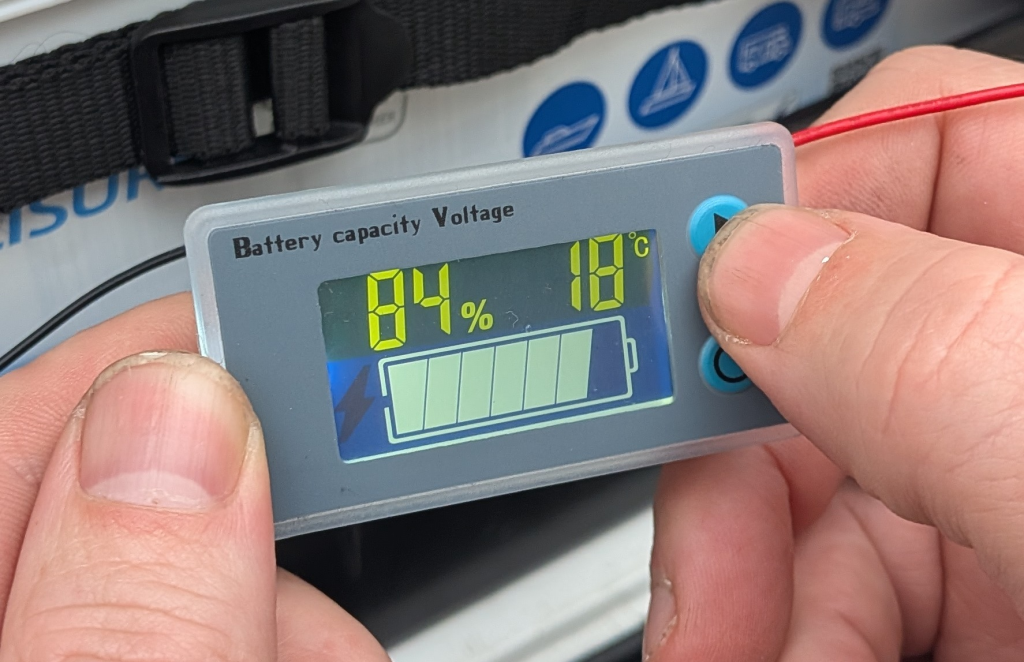
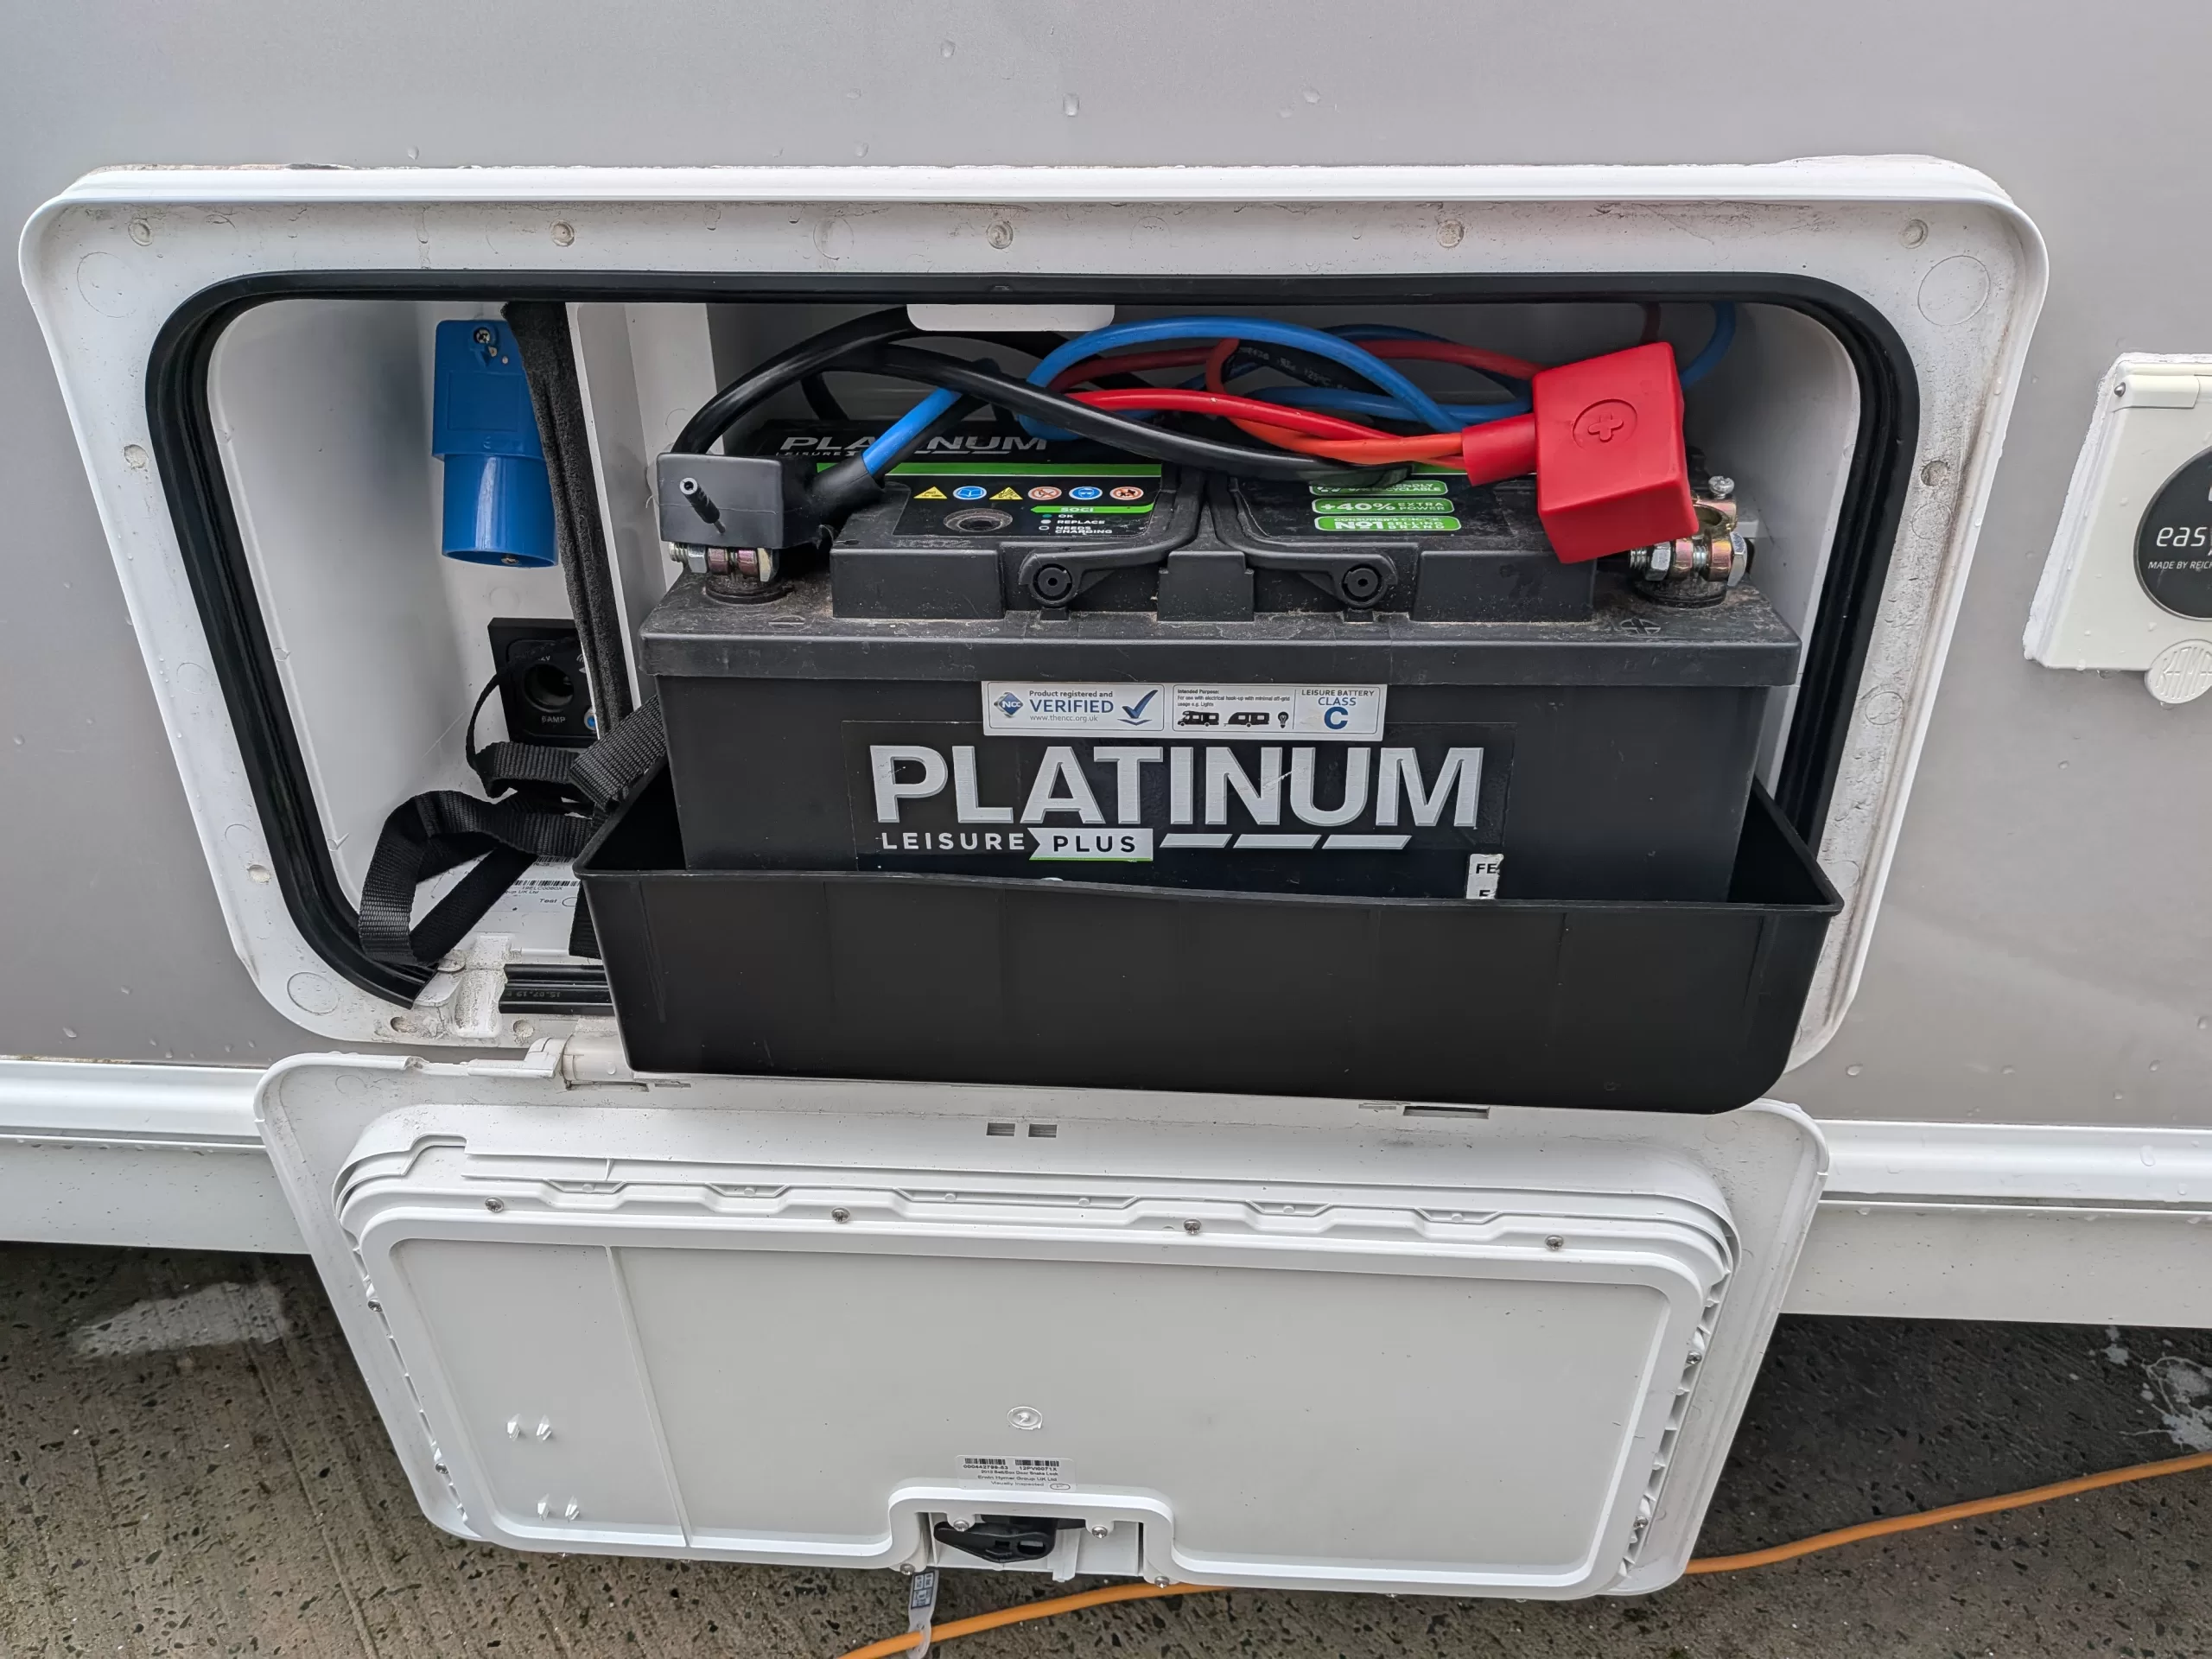
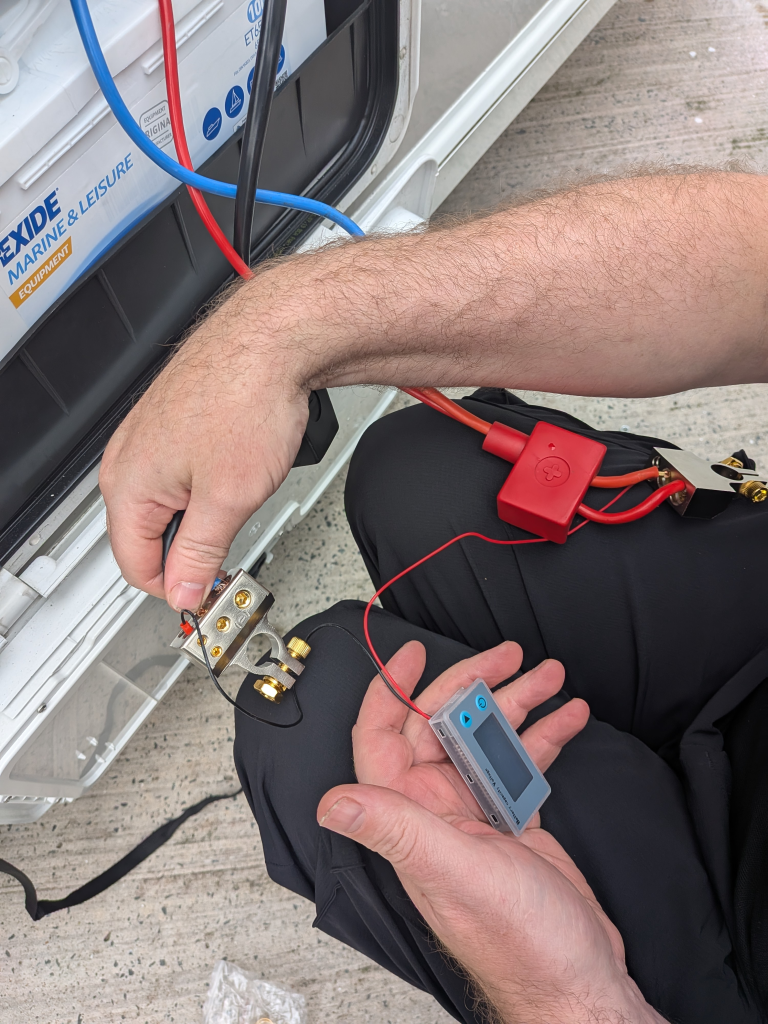
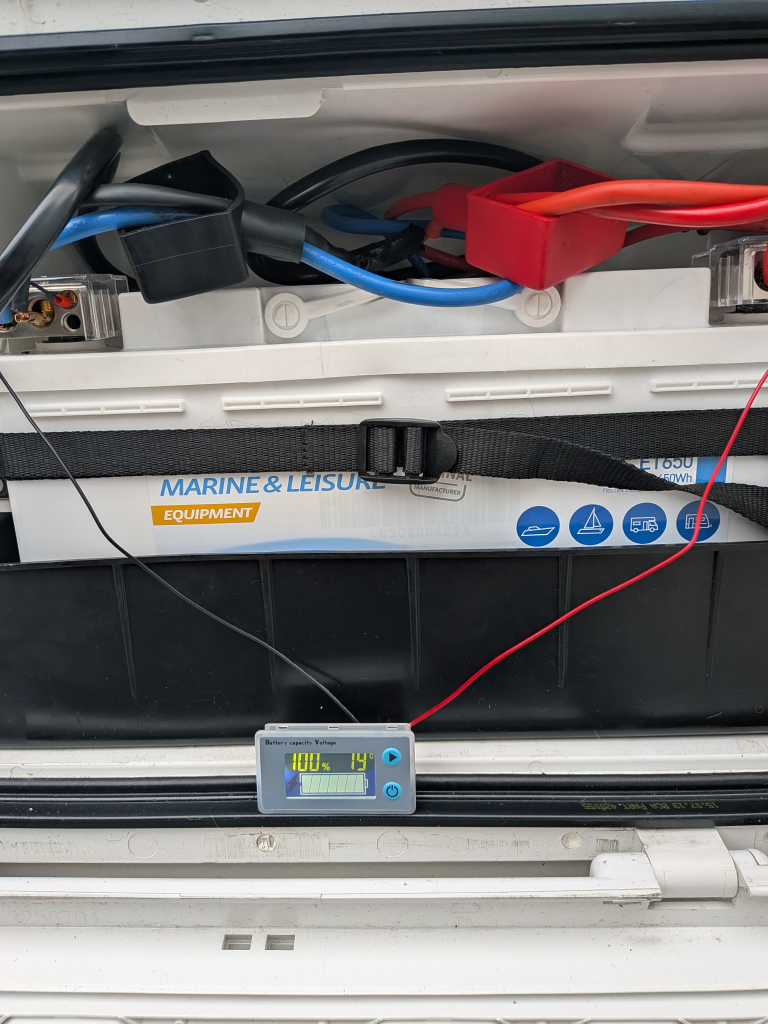
    🔌 Step 4: Disconnect and Maintain the Battery

    Caravan leisure batteries hate cold and inactivity. Here’s how to protect yours:

    1. Disconnect the battery from the caravan entirely.
    2. Store it indoors or in a dry, frost-free location.
    3. Charge every 4–6 weeks or use a smart charger with a maintenance mode.
    4. Check voltage regularly using a battery monitor or voltmeter (keep above 12.4V ideally).

    Tip: Never leave a discharged battery through winter—it shortens lifespan significantly.


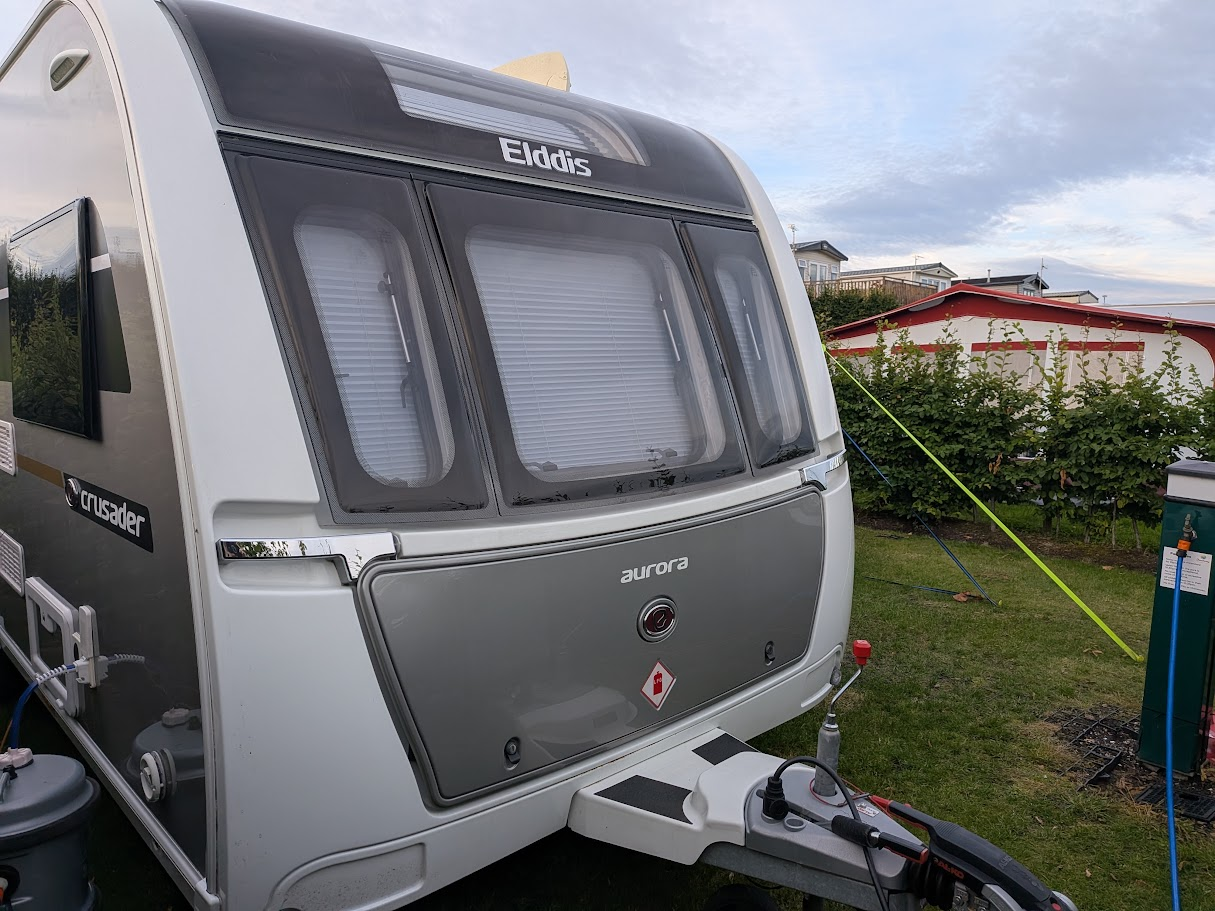
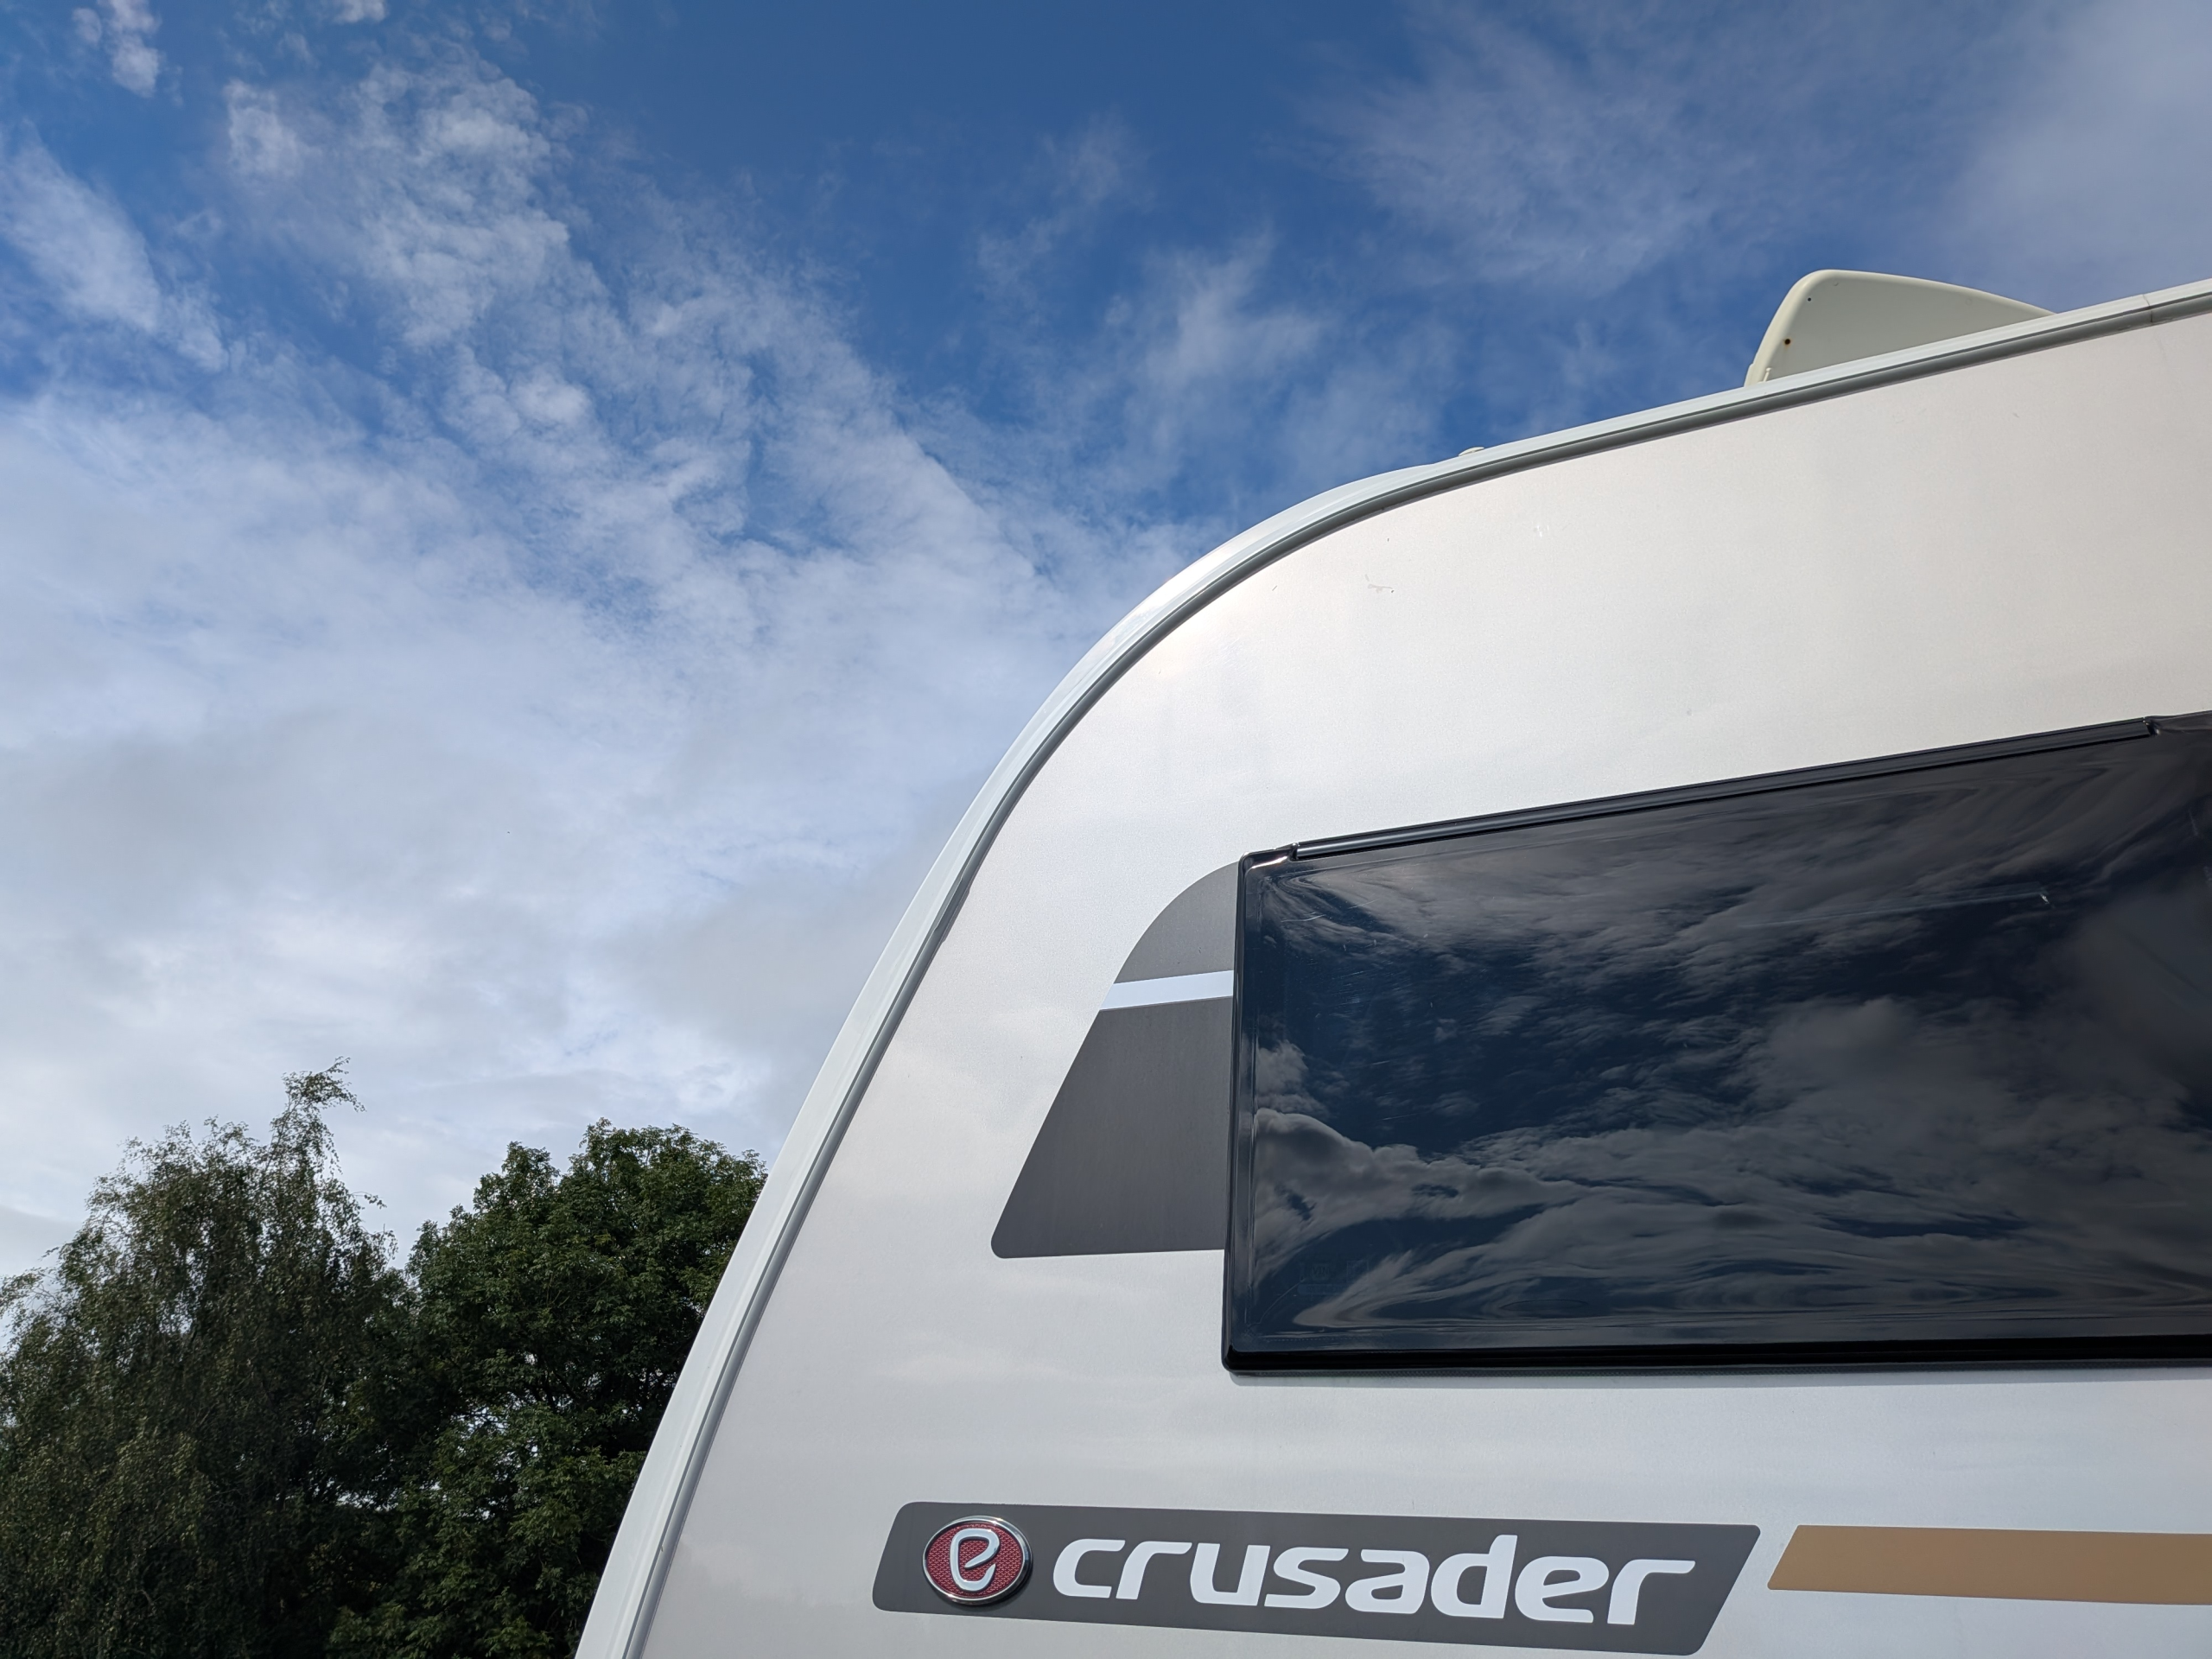
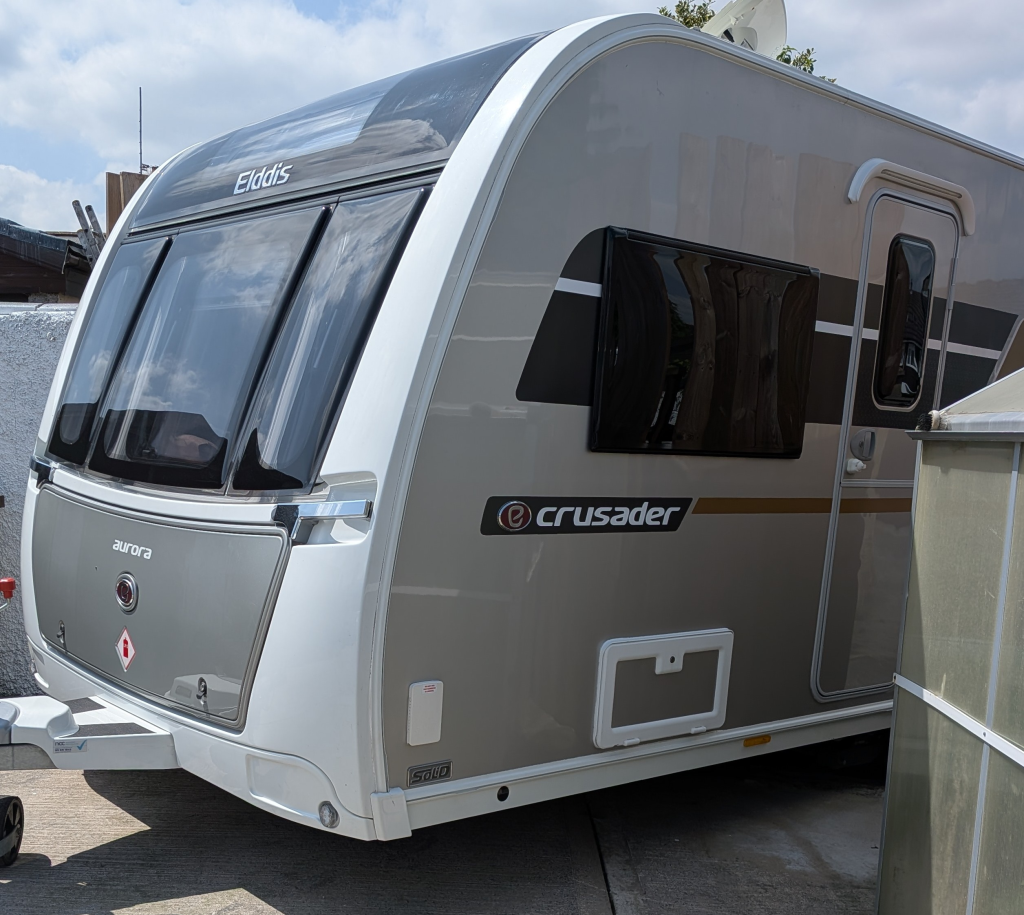
    Step 5: Exterior Protection and Sealing

    Your caravan’s bodywork, seals, and exterior fittings also need winter protection:

    1. Wash and wax the exterior:
      • Remove grime, algae, and black streaks.
      • Use a quality caravan-safe wax to repel moisture.
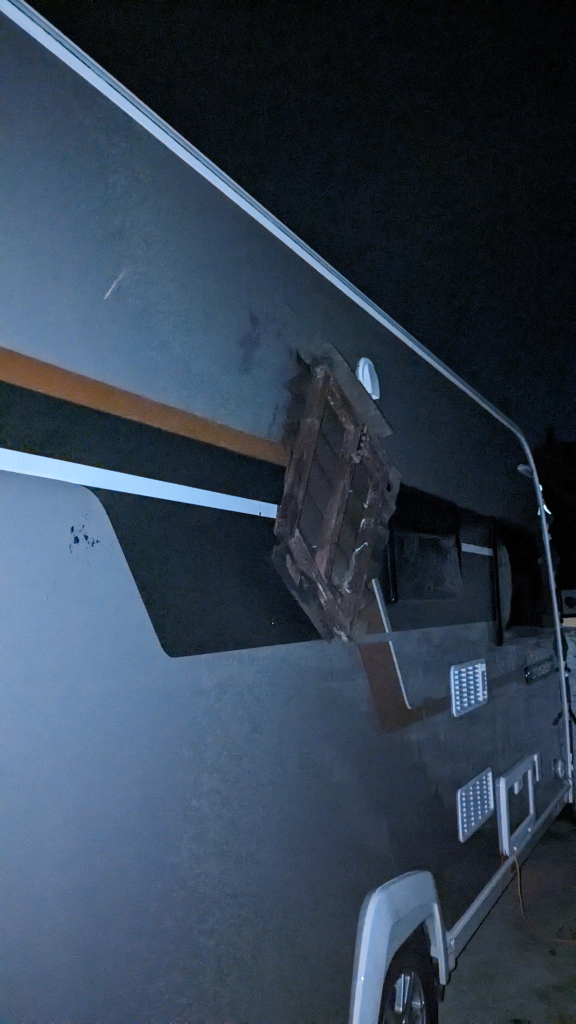
    2. Inspect all seals around windows, doors, skylights, and vents:
      • Apply a silicone lubricant or rubber seal conditioner if needed.
    3. Lubricate locks, hinges, and corner steadies:
      • Use WD-40 or specialist spray to prevent seizing up.
    4. Fit wheel covers and levelling blocks:
      • Helps avoid flat spots on tyres.
      • If possible, rotate wheels monthly or move the van slightly.
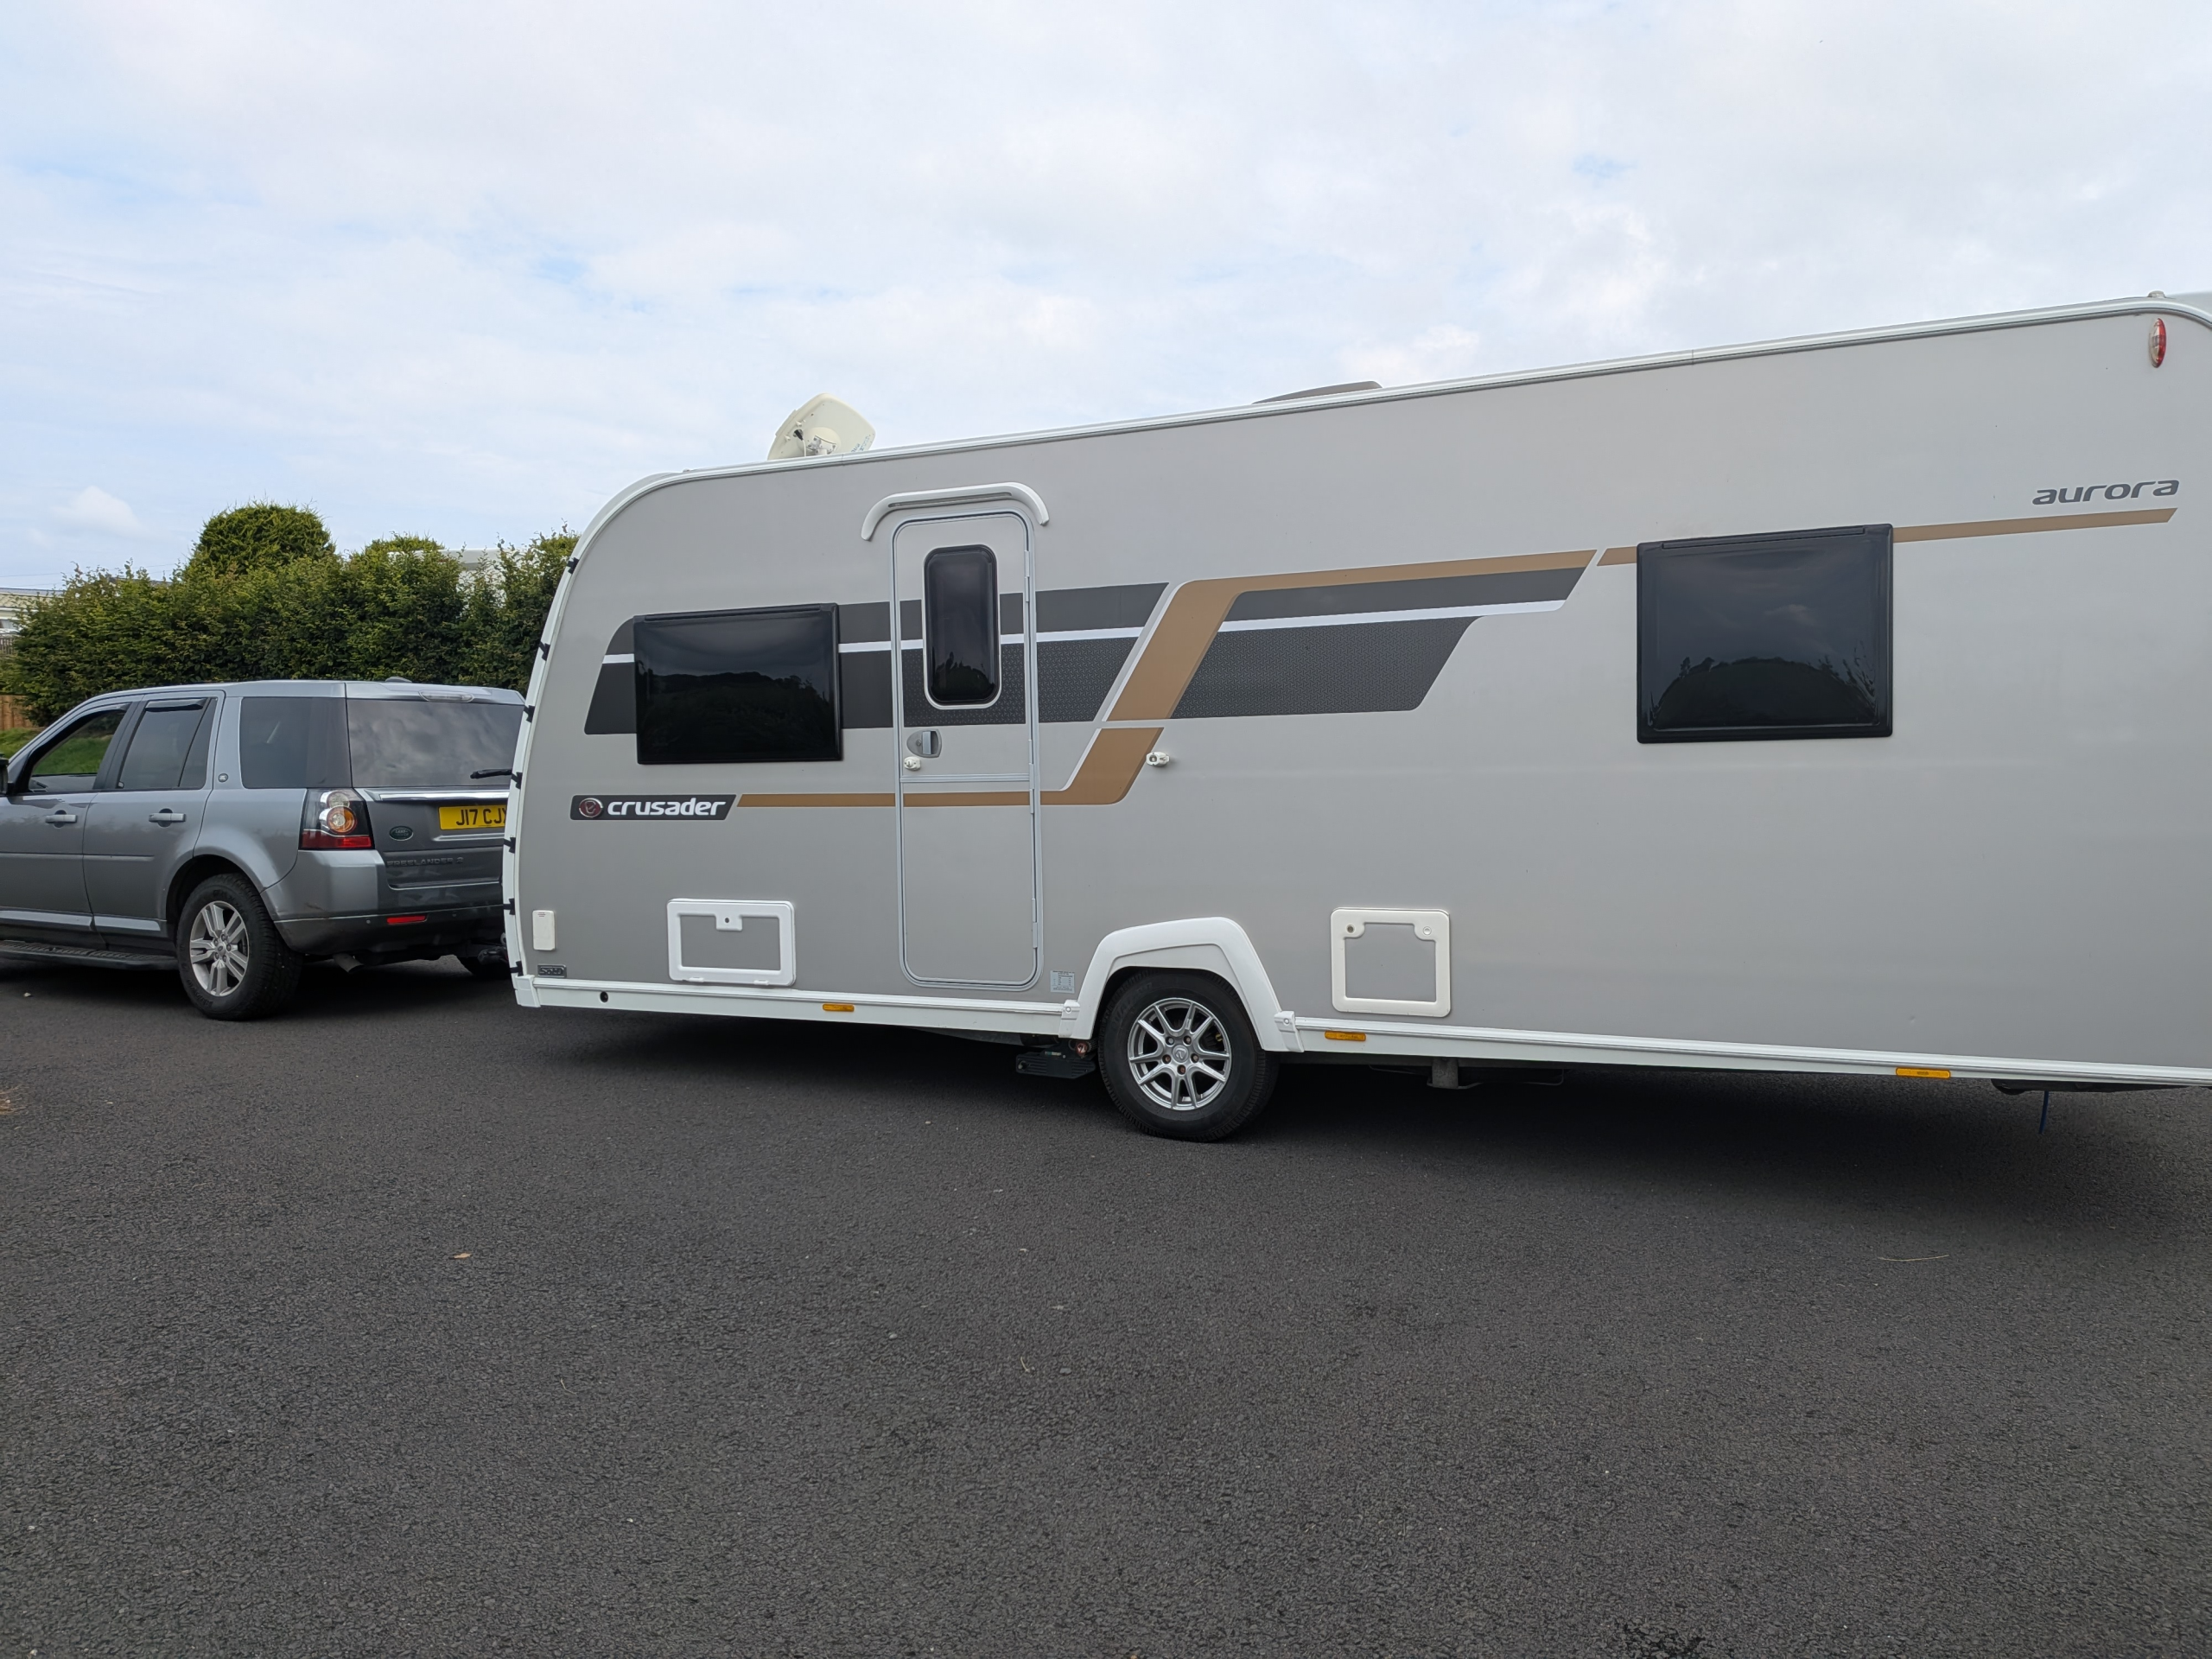
    5. Use a breathable caravan cover:
      • Don’t use tarps or plastic sheeting—they trap moisture.
      • Ensure cover fits well and allows for airflow.

    Tip: If on a seasonal pitch, raise your jockey wheel and stabilisers slightly to keep the chassis from sitting in wet ground.


    Step 6: Clean and Protect the Toilet System

    Often forgotten—but crucial!

    • Empty the toilet cassette completely.
    • Rinse with a toilet tank cleaner to remove limescale and sludge.
    • Lubricate the seals using silicone spray.
    • Leave the blade slightly open to prevent it sticking over winter.

    Tip: Never use domestic bleach—it damages seals.


    Step 7: Secure and Store Safely

    When your caravan’s ready for storage, don’t forget these final steps:

    • Remove all valuables including electronics, TVs, and satellite dishes.
    • Close blinds/curtains halfway to prevent sun fading but allow visibility (to show it’s empty).
    • Lock all windows and doors and double-check security devices.
    • Engage wheel clamps, hitch locks, and alarms.
    • Check insurance requirements for winter storage.

    Tip: If you store your caravan at home, consider motion-sensor lights or a tracker for added security.

    A narrow country road covered in snow, with hedgerows and a bare tree under a clear blue sky
    Snow covered country lane glistening beneath bright winter sunshine

    What NOT to Do When Winterizing

    Let’s cover a few common mistakes to avoid:

    Mistake Better Option
    Leaving food or crumbs insideRemove all food and clean thoroughly
    Sealing every vent and windowMaintain airflow with covers and dehumidifiers
    Leaving the battery in place and flatRemove and maintain charge monthly
    Forgetting to open taps when drainingOpen all taps, showers, and drain valves
    Using domestic antifreezeUse only non-toxic caravan-safe antifreeze
    Covering with a plastic tarpUse a breathable caravan cover

    Optional Extras for Winterizing Like a Pro

    If you want to go a step further, here are some winter accessories that make life easier:

    • Caravan breathable winter cover
    • Tyre savers and levellers
    • Solar trickle charger for battery
    • Portable dehumidifier or crystal traps
    • Tow hitch and wheel lock covers
    • Ventilation chimney cowls
    • Smart battery monitor (Bluetooth enabled)

    When Should You Winterize Your Caravan?

    Most people winterize their caravan between late October and early December, depending on when you stop touring. If you’re planning winter getaways (Christmas trips or New Year), simply repeat the draining steps between uses.


    Reversing the Process in Spring

    When you’re ready to hit the road again in spring:

    • Close all drain valves
    • Reconnect the water system
    • Sanitize the fresh water tank
    • Check for signs of damp or rodent entry
    • Reinstall the battery
    • Run checks on gas, electrics, and heating
    • Air out all soft furnishings

    Tip: A spring caravan service is well worth booking ahead!


    Final Thoughts: Protect Your Investment All Year Round

    Winterizing your caravan isn’t just for peace of mind—it protects your investment, ensures a long-lasting lifespan, and sets you up for stress-free touring come springtime.

    While the first time can feel a bit intimidating, following this simple guide makes the process easy. Once you’ve done it once, it becomes a routine task each year.

    So grab a hot drink, set aside an afternoon, and give your caravan the winter prep it deserves!

  • Top 20 Caravan Hacks That Make Caravanning Easier

    Top 20 Caravan Hacks That Make Caravanning Easier

    Top 20 Caravan Hacks You Wish You Knew Sooner

    Caravanning is one of life’s great joys. There’s nothing quite like hitting the open road, setting up on a peaceful site, and enjoying the freedom of home comforts wherever you go. Although if you’ve ever travelled in a caravan, you’ll know it’s not always smooth sailing. From running out of fridge space to fighting with awning pegs, the little frustrations can sometimes overshadow the fun.

    Over time, though, you pick up clever tricks that make life so much easier. Some we’ve learned through trial and error (like discovering our leisure battery wasn’t the right grade for the motor mover and nearly exploding leaving us stuck getting the caravan into the garden). Others we’ve picked up from fellow caravanners over coffee (or Beer) in a campsite. These are the hacks you wish you knew sooner—the ones that save time, money, and stress.

    So here’s my roundup of the top 20 caravan hacks every caravanner should know. Whether you’re brand new to caravanning or have been towing for years, you’ll find something here to make your next trip smoother.


    1. Use Collapsible and Stackable Kitchenware

    Caravan kitchens are notoriously small, and cupboard space fills up fast. That’s why collapsible and stackable kitchenware is a lifesaver. (Contains Affiliate Amazon links below)

    Personal hack: We store ours in fabric baskets inside the cupboard. It stops rattling when towing and keeps everything in one place.


    2. Invest in a Caravan Battery Monitor

    Your leisure battery is the heart of your caravan. Without it, your motor mover, lights, fridge, and even alarms stop working. We learned the hard way when our caravan battery overheated and failed, it turned out it wasn’t the right grade to power our mover.

    Since then, we’ve installed a battery monitor that tracks:

    • Voltage
    • Charge percentage
    • Temperature

    This little gadget gives us peace of mind and helps us avoid costly breakdowns.

    Hack Tip: Pair it with a Grade A leisure battery if you use a motor mover.

    Caravan Battery Monitor that helps track your batteries health
    Caravan Battery Monitor that helps track your batteries health

    3. Magnetic or Stick onHooks for Extra Storage

    If you’re constantly losing keys, tea towels, or cables, magnetic hooks will change your life. Stick them to your fridge, cooker hood, or door for instant storage without drilling holes.

    They’re also great in the awning for hanging lanterns or dog leads.


    4. Levelling Made Easy with a Spirit Level App

    No one enjoys sleeping on a slant, and a fridge won’t run properly if your caravan isn’t level. Forget the guesswork—download a free spirit level app on your phone.

    1. Park up roughly where you want.
    2. Place your phone on the worktop or floor.
    3. Adjust your levelling ramps until the app reads zero.

    Personal note: We once tried “eyeballing it” and ended up with the kettle sliding across the counter. Never again!


    5. Shoe Organisers = Hidden Storage

    Over-the-door shoe organisers aren’t just for shoes—they’re the ultimate multi-purpose caravan storage hack.

    • Hang one on the bathroom door for toiletries.
    • Use one in the wardrobe for socks, underwear, or rolled t-shirts.
    • Keep one in the awning for toys, dog leads, or snacks.

    They’re lightweight, fold flat when not in use, and make everything easy to find.

    6. Use Pool Noodles to Protect Awning Poles and Edges

    Pool noodles are more than just swimming aids. Cut them lengthways and slide them over awning poles or sharp furniture edges inside your caravan.

    • Kid-friendly: Stops little heads from painful bumps.
    • Pet-friendly: Prevents injuries to dogs running around.
    • Budget-friendly: You can buy them for pennies in summer.

    7. Keep a Head Torch Handy

    A head torch might not sound glamorous, but once you use one you’ll never go back. It’s perfect for:

    • Late-night toilet block trips
    • Emergency awning repairs in the dark
    • Setting up on a pitch after sunset

    Personal hack: We keep one by the door so it’s always within reach.


    8. Frozen Water Bottles as Fridge Boosters

    Caravan fridges can be slow to cool, especially in summer. A frozen water bottle doubles up as an ice pack to keep your fridge cold while travelling.

    By the time it thaws, you’ve got a chilled drink ready to go. Win-win!


    9. Command Hooks and Strips for Damage-Free Hanging

    Caravan walls are delicate—screws or nails can cause expensive damage. Command hooks and strips give you extra hanging space for lights, utensils, or even artwork.

    The best part? They peel off without leaving marks when you’re ready to change things up.


    10. Caravan-Friendly Slow Cooker or Air Fryer

    Cooking in a small caravan kitchen isn’t always fun. That’s where a compact slow cooker or air fryer comes in.

    • Slow cooker: Prep dinner in the morning and let it cook while you’re out exploring.
    • Air fryer: Quick meals with minimal oil and washing up.

    Personal hack: Overnight oats in the slow cooker make the perfect grab-and-go breakfast before a long hike.


    11. Carry Spare Fuses, Bulbs, and Hose Connectors

    It’s amazing how such tiny items can cause such big problems. A blown fuse, dead bulb, or missing hose connector can ruin your setup.

    Keep a small tackle box filled with spares. It barely takes up space but could save your trip.

    In our old Elddis we got caught out by a fuse blowing so had to go on a hunt to local shops to find some!


    12. Use Reflective Thermal Blinds

    Thermal blinds are one of the best caravan hacks for comfort.

    • In summer, they reflect sunlight and keep your caravan cool.
    • In winter, they insulate your windows to retain heat.

    Ideal for older vans or vans that dont have great heating systems


    13. Caravan Levelling Ramps with Marked Points

    Levelling ramps can be tricky—how far should you pull forward? One hack is to paint lines or stick reflective tape at different heights.

    That way, you’ll know exactly where to stop every time. No more guesswork!

    Levelling Ramps – (Amazon Affiliate Link)

    Check out or post on How to level your caravan here.

    14. Portable Washing Line or Retractable Reel

    Caravans don’t come with much drying space, but a retractable washing line fixes that.

    • Attach it between two trees or posts.
    • Use it inside the awning on wet days.
    • Fold it away when not in use.

    Personal hack: We use ours for everything from swimsuits to muddy dog towels.

    15. Create a Pre-Trip Checklist

    A laminated checklist will save you countless headaches. Before towing, tick off things like:

    • Cupboards locked
    • Windows shut
    • Gas turned off
    • Tyres checked
    • Awning packed away

    We once forgot to secure a cupboard, and half our food ended up on the floor by the time we arrived. Lesson learned!

    16. Awning Carpet Peg Hack

    Awning carpets often come with flimsy pegs that bend easily. Swap them for heavy-duty metal pegs or plastic ones with handles.

    And don’t forget a rubber mallet—it’ll save your hands from blisters.

    Top Tip! Or really a tip to save time, your back and sanity! We have recently discovered Peggy Pegs or the cheaper alternatives! Absolute game changer!! Just use the the drill instead of beating the pegs in with a mallet! I will link affilate links below for them!

    Peggy Pegs – (Amazon Affilate Link)

    12 Pack Heavy Duty Metal Tent Pegs – (Amazon Affilate Link)

    17. Keep Moisture at Bay with Dehumidifier Bags

    Caravans are prone to damp, especially if stored over winter. Hanging moisture traps or dehumidifier bags help absorb excess condensation.

    They’re cheap, lightweight, and easy to replace every few months.

    Hanging Moisture Bags (Amazon Affilate Link)


    18. Use Stackable Storage Crates in Lockers

    Lockers quickly become cluttered. Stackable plastic crates keep everything neat and easy to access.

    Label them for tools, hoses, outdoor chairs, or kids’ toys so you can grab what you need without rummaging.

    19. Dog-Friendly Hacks for Pet Owners

    Travelling with a dog? A few hacks make it stress-free:

    • Collapsible water bowls for walks.
    • Cooling mats to keep dogs safe in summer.
    • A spare set of leads and towels in the caravan.

    Our dachshund/Jack Russell mix loves caravan trips, but he overheats easily. His cooling mat is a lifesaver on hot days.


    20. Keep a Spare Set of Keys Somewhere Safe

    It might sound obvious, but many caravanners only bring one set of keys. Getting locked out is a nightmare, especially if you’re far from home.

    Keep a spare in your tow vehicle or with a trusted family member. You’ll thank yourself one day.

  • How to prep your caravan for a storm

    How to prep your caravan for a storm

    Storm-Ready: How to Prepare Your Caravan for Strong Winds (And Our Costly Lesson from a Stormy Night)

    There’s nothing quite like the sound of rain gently hitting your caravan roof while you’re snuggled inside, warm and dry. But when the wind starts howling and your awning flaps like a sail, things can quickly shift from cozy to chaotic.

    If you’re a fellow caravan lover like us—touring through all seasons, wind, rain, or shine—you’ll know that storms are an unavoidable part of life on the road (or even when you’re pitched up at home). We learned this the hard way a couple of years ago, when a freak storm hit and the neighbor’s shed roof came crashing down—straight onto our beloved caravan. We have also had some very hairy nights in Tollymore Forest Park in strong winds!

    That stormy night left us with dents, holes, and a serious lesson in storm preparedness.

    So today, I’m sharing everything we’ve learned about prepping your caravan for high winds, from awning safety to towing in storms, what to keep out of your “caravan garden,” and how to weatherproof your setup for peace of mind—whether you’re off-grid, on a site, or parked at home.


    Contents

    1. Why You Need a Storm Plan
    2. Real-Life Storm Damage: Our Caravan vs. The Flying Shed Roof
    3. Wind Ratings on Awnings (And When to Take Them Down)
    4. Securing Your Caravan Setup Before a Storm
    5. Storm-Proofing Your Caravan “Garden”
    6. Towing Your Caravan in Windy Conditions
    7. Staying Safe Inside the Caravan During a Storm
    8. Insurance Tips After a Storm
    9. The Emotional Toll of Caravan Damage
    10. Final Thoughts: What We Do Differently Now

    1. Why You Need a Storm Plan

    Caravans may be our little home-on-wheels, but let’s face it—they’re not built like brick houses. Wind can be incredibly destructive, especially to lightweight materials like caravan panels, roof vents, awnings, and outdoor accessories.

    Whether you’re touring full-time or simply use your caravan for holidays, having a storm plan is just as essential as your packing checklist. That includes:

    • Knowing your awning’s wind limits
    • Checking weather warnings before travel
    • Knowing when to pack up and move
    • Keeping your surroundings clear of hazards

    You never think it’ll happen to you—until it does.


    2. Real-Life Storm Damage: When a Shed Roof Hit Our Caravan

    Let’s rewind two years. We were at home with our caravan parked in the driveway, just back from a weekend away. There were strong winds forecast, but nothing out of the ordinary for Northern Ireland these days!

    That night, the wind got stronger and stronger then a gust caught our neighbor’s old garden shed roof panel, and the roof panel lifted off like a lid on a tin can. It flew across the wall and slammed into the side of our caravan with terrifying force.

    We heard the bang from inside the house, and ran out with torches. I’ll never forget the sinking feeling when we saw the side of our van—a panel of a shed roof stuck into the side of the van with several dents all over where the roof had hit. It dented part of the panel and put a hole in the side of the van.


    Storm Damage during the storm
    Storm Damage during the storm

    3. Wind Ratings on Awnings: Know Your Limits

    Awnings are one of the most vulnerable parts of a caravan setup during storms. Even premium air awnings have wind ratings, and once you exceed those, they become a liability—not a luxury.

    Here’s a rough guide:

    • Light wind (up to 15 mph / 24 km/h): Most awnings are fine
    • Moderate wind (15–25 mph / 24–40 km/h): Pegs and guy lines must be secure
    • Strong wind (25–35 mph / 40–56 km/h): Consider removing fabric panels
    • Gale force (35+ mph / 56+ km/h): TAKE DOWN your awning completely

    Even storm straps and heavy-duty poles can’t guarantee safety in a true storm. We now err on the side of caution—if winds are forecast above 30mph, the awning comes down.

    Tip: Use a wind speed app like Windy or the BBC/Met office Weather app to check your location forecasts daily when touring.


    4. Securing Your Caravan Setup Before a Storm

    Whether you’re pitched on a site, in your garden, or parked on a CL, you should always do a pre-storm check. It doesn’t have to be complicated, just thorough.

    Caravan Storm Checklist:

    Awning removed or properly storm-strapped
    All skylights and roof vents tightly shut
    TV aerial down and secured
    Chocks and steadies in place
    Windows and doors locked
    Loose outdoor items packed away
    Water containers and waste tanks emptied or secured
    Check caravan cover (if used) is tight and not flapping
    Solar panels secure

    Don’t forget your motor mover battery! If it’s loose or under strain, high winds can shift your van even when parked. We now have a battery monitor installed for extra peace of mind.

    Dents from roof panel hitting our van
    Dents from roof panel hitting our van

    5. Storm-Proofing Your Caravan “Garden”

    We all love setting up an outdoor space with chairs, rugs, plants, and little personal touches—but in a storm, these become flying projectiles.

    Two years ago, we had planters, a small gas BBQ, and a garden gnome out. Luckily, we brought them in. Our neighbor didn’t, and we ended up with a plastic garden table smashed against the fence too.

    Before a Storm, Secure or Store:

    • Garden furniture (especially lightweight plastic)
    • Plant pots or planters
    • Dog bowls and toys
    • Portable BBQs and gas bottles
    • Fairy lights or solar stakes
    • Bikes or scooters
    • Steps and storage boxes

    Everything should either be stowed inside the caravan or locked down tightly with ratchet straps or bungee cords.


    6. Towing in Windy Conditions: Yes or No?

    Towing a caravan in wind is not only difficult—it’s dangerous. Even the most experienced towers know that crosswinds are a serious threat on open roads and motorways.

    Avoid towing if possible when:

    • Wind speeds are over 30mph
    • Crosswinds are expected
    • The Met Office issues yellow or red warnings

    If you must tow:

    • Reduce speed
    • Keep both hands on the wheel
    • Ensure your caravan is loaded correctly (low and central)
    • Use towing mirrors like our trusty Emuk XLs
    • Avoid overtaking lorries in side winds

    We once towed in 30/40mph winds on a rural route and it was white-knuckle stuff. Never again. If in doubt—stay put.


    7. Staying Safe Inside the Caravan During a Storm

    If you’re already pitched and a storm hits unexpectedly, don’t panic—but do take precautions.

    Do:

    • Close all windows and rooflights
    • Secure blinds and curtains
    • Turn off gas appliances
    • Keep torches handy
    • Charge devices in case of power outage
    • If safe, move your car to block wind from the side of the van

    Don’t:

    • Don’t venture outside if you dont have to
    • Leave children or pets unattended
    • Use BBQs or gas heaters indoors (carbon monoxide risk)

    We now keep a storm box in the van: torch, batteries, phone charger, first aid kit, a blanket, and emergency snacks. Peace of mind in one crate.


    8. Insurance Tips After a Storm

    If your caravan suffers damage, the insurance process can feel daunting—but it’s easier if you’re prepared:

    After Storm Damage:

    1. Photograph everything immediately
    2. Note time/date/weather conditions
    3. Don’t move anything until you’ve documented it
    4. Call your insurance and ask about approved repairers
    5. Save receipts for any emergency fixes

    Make sure your caravan insurance includes storm cover and accidental damage, even when parked at home. Also make sure you have the caravan insured for the right amount to.


    9. The Emotional Toll of Caravan Damage

    As much as we focus on practical prep, there’s an emotional side to all of this, too. If you’re anything like us, your caravan is more than just a vehicle—it’s your getaway, your sanctuary, a space full of family memories.

    Seeing it damaged was honestly heartbreaking. We were angry, worried, and felt helpless. Although it was very much stressful it also taught us how resilient caravanners are, and how many lessons you only learn through experience.

    It’s OK to be shaken by storm damage. What matters is how you move forward.


    10. Final Thoughts: What We Do Differently Now

    That storm changed how we caravan—especially in winter and autumn. We’re now vigilant with forecasts, we never leave the awning up in windy conditions, and we regularly check our surroundings for anything that could turn airborne.

    Our New Must-Dos Before Any Storm:

    Take down the awning
    Store away anything light
    Double check rooflights, windows, vents
    Move the car to shield the van
    Set internal supports (especially for skylights)
    Charge devices and grab our storm box

    And every time a strong wind hits now, we’re grateful we learned our lesson the hard way—because we’ll never take the weather for granted again.

  • How to level a caravan

    How to level a caravan

    How to Level a Caravan for Beginners – A Complete Step-by-Step Guide (With Dos and Don’ts)

    Leveling your caravan is one of the most important tasks to master as a new caravanner. Whether you’re setting up on a touring pitch, a CL site, or wild camping for the night, making sure your caravan is perfectly level ensures your appliances work properly, water flows correctly, and—most importantly—you sleep comfortably.

    In this beginner-friendly guide, we’ll walk you through exactly how to level your caravan step by step, explain how to check if it’s level, and cover the common dos and don’ts to avoid mishaps. Let’s get you leveled up—literally!


    Why Is It Important to Level Your Caravan?

    Before diving into the how-to, let’s understand the “why.”

    A level caravan helps to:

    • Ensure your fridge works efficiently (especially absorption fridges)
    • Prevent shower trays and sinks from overflowing
    • Avoid strain on chassis and stabiliser legs
    • Improve sleep quality with a flat bed
    • Prevent doors from swinging open or closed
    • Keep cupboard items and water tanks in balance
    • Stop water pooling on flat surfaces

    Even a slight slope can be noticeable when you’re inside the van—especially at night or when cooking.


    What You’ll Need to Level Your Caravan

    Here’s a checklist of basic leveling tools:

    Essential Equipment:

    • Caravan spirit level (bubble or digital)
    • Wheel ramps/chocks
    • Levelling blocks or mats
    • Caravan jack (optional)
    • Corner steadies (already fitted on most caravans)
    • Winding handle or cordless drill with corner steady adaptor
    • Motor mover (optional but makes life easier)
    • Torque wrench (for re-tightening wheel nuts if needed)
    Milenco stacka jack pads
    Milenco stacka jack pads

    The ones we use are Milenco Stacka Jacks pads these work well with the Milenco Stacka Corner feet you can also get the Milenco Jockey wheel pad (Contains Affiliate links)


    Step-by-Step Guide to Leveling a Caravan

    Let’s break the process into three main phases:

    1. Side-to-side leveling
    2. Front-to-back leveling
    3. Final steadying

    Step 1: Choose Your Pitch

    When you arrive on-site, first choose a pitch. Some are naturally level, others are sloped or uneven.

    Top tips for choosing the right spot:

    • Walk around and visually assess the ground slope.
    • Choose a pitch with minimal gradient if you can.
    • Avoid soft or boggy ground.
    • Check access to electric hook-up and facilities.

    Step 2: Side-to-Side Leveling (Axle Axis)

    This is the first and most important step because it’s the hardest to adjust once the caravan is unhitched.

    Instructions:

    1. Place a spirit level on the caravan floor, ideally across the axle or kitchen worktop (width-wise).
    2. If the bubble isn’t centred, raise the lower side using a levelling ramp.
    3. Drive slowly onto the ramp (or use your motor mover) until the bubble is centered.
    4. Place chocks behind the wheel once level, to prevent rolling.

    Optional: If the ramp is too steep, use leveling blocks to raise in stages.

    Don’t use corner steadies to lift the caravan side-to-side—they’re not designed for this and can cause damage.

    Caravan Levelling Ramps ~ Affliate link


    Step 3: Chock Your Wheels

    Once you’re level side-to-side, place a wheel chock behind (and in front if needed) the wheels to prevent any movement.

    If you’re on a steep pitch or if the ground is loose (gravel, grass), double-chock both sides.


    Step 4: Unhitch the Caravan (If you didnt use motormover or pushed into place) Skip to step 5 if so.

    Now that you’ve secured the side-to-side leveling, it’s time to unhitch.

    Steps:

    1. Apply the caravan handbrake.
    2. Disconnect the electrics and breakaway cable.
    3. Lower the jockey wheel and wind it down until it touches the ground.
    4. Unhitch the tow ball and drive the car away.
    5. Use the jockey wheel to support the caravan front.

    Tip: Always double-check the handbrake is on before driving away.


    Step 5: Front-to-Back Leveling (Longitudinal Axis)

    Now use the jockey wheel to level the caravan front-to-back.

    Instructions:

    1. Place the spirit level lengthways on a flat surface (e.g. floor or worktop).
    2. Wind the jockey wheel up or down until the bubble is centered.
    3. When the front-to-back level is perfect, lock the jockey wheel into place.

    Pro Tip: A digital caravan leveller or phone app (like “Levelling Tool”) ~ Contains affiliate link, can help with precision.


    Step 6: Lower the Corner Steadies

    With the caravan now level, use the corner steadies to stabilise it.

    How to do it:

    1. Use a winding handle or cordless drill to wind each corner steady down until it contacts the ground.
    2. Apply light pressure to stabilise—do not lift the caravan with them!
    3. Use leveling pads or blocks underneath if the ground is soft or uneven.

    Don’t over-tighten steadies—it stresses the chassis and can twist the frame.

    The Drill we use is a Makita Cordless Drill with the Caravan leg winder socket (Contains Affiliate links)

    Makita Cordless drill with caravan steadies drill bit
    Makita Cordless drill with caravan steadies drill bit

    Step 7: Double-Check Everything

    Do a final walk-around:

    • Caravan is level both side-to-side and front-to-back
    • Wheels are chocked
    • Handbrake is applied (If your pitched on somewhere flat and no risk of it moving we keep the handbrake off to prevent it from seizing)
    • Corner steadies are down and secure
    • Jockey wheel is locked
    • Doors and windows open and close smoothly

    Common Mistakes to Avoid (Don’ts)

    New to caravanning? These are the most common leveling mistakes and how to avoid them:

    Don’t rely on corner steadies for lifting.
    They are for stability, not weight-bearing.

    Don’t skip leveling just because it “feels okay.”
    Your fridge and plumbing could be affected even with slight tilt.

    Don’t level on the jockey wheel first.
    Always level side-to-side before unhitching or use motormover.

    Don’t forget to chock the wheels.
    This can lead to rolling—dangerous and damaging!

    Don’t park nose-down on steep hills.
    It can overwork your handbrake and affect waste water drainage.


    Handy Leveling Tips (Dos)

    Use your spirit level before buying ramps.
    Every caravan is different—some need steeper or longer ramps.

    Label your ramps and chocks.
    Keep everything tidy in one box or bag marked “Leveling Kit.”

    Practice on your driveway or garden.
    Get familiar with your tools in a low-pressure setting.

    Upgrade to a motor mover.
    Leveling becomes much easier when you can fine-tune wheel positions without driving the tow car.

    Use a digital leveller app.
    Modern tools like Bluetooth levels or phone apps can give real-time guidance.

    Recheck your levels after a day.
    Weather and weight movement (e.g. water tanks filling) can affect balance.

    Invest in wide steadies if you camp off-grid.
    They’re better for grass and gravel pitches.

    Single axel motor mover caravan
    Single axel motor mover caravan

    Optional Tools That Make Leveling Easier

    If you find manual leveling tricky or time-consuming, here are some gadgets to consider:

    Motor movers – Allow you to drive the caravan onto ramps remotely.

    Digital leveling sensors – Sync with your phone to show real-time leveling data.

    Auto-levelling systems – High-end systems that electronically level your caravan at the push of a button.

    Spirit levels with magnets – Handy for sticking to the A-frame or inside door for a quick glance.


    Final Thoughts – Make Leveling Part of Your Routine

    Once you’ve done it a few times, leveling your caravan becomes second nature. It’s a vital part of setting up, and doing it right will improve your comfort, keep your appliances happy, and extend the lifespan of your caravan chassis and legs.

    Just remember: side-to-side first, chock securely, then front-to-back with the jockey wheel, and finally lower the steadies for stability. And never use the steadies to level the van!

  • Choosing your caravan layout

    Choosing your caravan layout

    Choosing the Right Caravan Layout: Types, Sizes, Berths & Real-World Pros and Cons

    When it comes to caravanning, one of the most exciting—but also most overwhelming—decisions is choosing the right caravan layout. Whether you’re a couple looking for quiet weekend escapes, a young family craving spontaneous adventures, or seasoned tourers upgrading to something more luxurious, your caravan’s layout can make or break your experience on the road.

    In this blog, we’re diving into the different types of caravan layouts, sizes, and berth options available on the market today. We’ll share what works well, what can feel cramped, and what we’ve learned from owning both a traditional layout with a make-up bed and an upgraded model with a fixed island bed. From practical use of space to bedtime routines and storage hacks, this guide blends technical insight with real-world experience to help you pick your perfect pitch.


    Table of Contents

    1. Understanding Caravan Berths & Layouts
    2. Popular Caravan Layout Types
      • Front Lounge Layouts
      • Fixed Bed Layouts
      • Bunk Bed Family Layouts
      • Twin Single Bed Layouts
      • End Bathroom Layouts
      • L-Shaped Lounges
    3. Caravan Sizes Explained
    4. Pros and Cons of Different Layouts
    5. Our First Caravan: The Elddis Typhoon GT
    6. Our Upgrade: The Elddis Crusader Aurora
    7. What We’ve Learned from Both
    8. How to Choose the Right Layout for You
    9. Final Thoughts

    1. Understanding Caravan Berths & Layouts

    Before diving into specific layouts, it’s important to understand what “berth” means. A berth is simply the number of people a caravan can sleep. Common sizes include:

    • 2-Berth: Ideal for couples.
    • 4-Berth: Great for families or couples who want guest space.
    • 5-6 Berth: Often has bunk beds and larger seating areas—suited for families with children.

    Layout, on the other hand, refers to the interior design and arrangement of beds, seating, bathrooms, and kitchens. While berths give you capacity, layout determines comfort and usability.


    2. Popular Caravan Layout Types

    2.1 Front Lounge Layouts

    This classic layout features a U-shaped or parallel front seating area that converts into a double bed or two singles at night. It’s often paired with:

    • A central kitchen and washroom
    • An end bathroom or fixed bed

    Best for: Couples or smaller families who don’t mind making up the bed.

    2.2 Fixed Bed Layouts

    Fixed beds come in various styles: French beds (sideways), transverse island beds, or rear island beds. They offer a ready-made sleeping space, which is incredibly convenient.

    Best for: Couples who want comfort and less hassle.

    2.3 Bunk Bed Family Layouts

    Designed for families with kids, these layouts often feature:

    • A fixed double or lounge bed at one end
    • Stacked bunks at the opposite end
    • A central washroom and kitchen

    Best for: Families who need multiple permanent beds.

    2.4 Twin Single Bed Layouts

    This layout features two single beds, often in the rear, with a central washroom and kitchen. Some people prefer this over a double bed for ease of access.

    Best for: Friends touring together or couples who prefer separate sleeping.

    2.5 End Bathroom Layouts

    An end bathroom spans the width of the caravan at the rear and usually includes a generous shower, wardrobe, and toilet.

    Best for: Tourers who want a bigger bathroom and extra changing space.

    2.6 L-Shaped Lounges

    This layout maximizes the seating area at the front, creating a more social and “open-plan” feel. Some versions include a rear dinette or fixed bed.

    Best for: People who value open space and comfort in the lounge.

    Swift L Shape Lounge caravan
    Swift L Shape Lounge

    3. Caravan Sizes Explained

    Caravans range from compact 2-berth models under 6m to full-size twin axles stretching 8m or more. Size affects:

    • Weight: Heavier vans need a more powerful tow car.
    • Manoeuvrability: Shorter vans are easier to tow and pitch.
    • Storage: More space means more comfort—but harder storage logistics.

    4. Pros and Cons of Different Layouts

    Let’s break down the real pros and cons of each layout:

    Layout TypeProsCons
    Front LoungeFlexible, airy, great viewsMaking up bed daily can be a chore
    Fixed BedAlways ready to sleep, comfortTakes up space during the day
    Bunk BedsIdeal for kids, quick bedtime setupMay sacrifice adult seating/storage
    End BathroomSpacious, private changing areaCan limit storage at rear of van
    Twin Single BedsNo bed sharing, easy to accessNo “cosy” double bed feel
    L-Shaped LoungeMore social seatingOften reduces front window size

    5. Our First Caravan: The Elddis Typhoon GT

    Our first ever caravan was the Elddis Typhoon GT, and honestly, it was the perfect introduction to touring life.

    Key Features:

    • Front lounge that converted into a double bed or two singles
    • Bunk beds midway for our child
    • A spacious end bathroom with a decent-sized shower and wardrobe

    What we loved most was the generous storage, especially in the rear washroom. Having the bunks meant our child had a dedicated space, and we could unwind in the front seating area once they were asleep. However, we won’t sugarcoat it: making up the bed every night did get a little tiring, especially after a long day of adventures.

    Elddis gt end bathroom
    Elddis gt end bathroom

    6. Our Upgrade: The Elddis Crusader Aurora

    A few years later, we upgraded to a 4-berth Elddis Crusader Aurora, and wow—it felt like luxury compared to the Typhoon.

    Key Features:

    • Fixed island bed at the rear
    • Separate shower and bathroom in the middle
    • Front lounge that converts into a bed

    The fixed bed was a game-changer. Not having to wrestle with cushions and bedding every evening felt like a real treat. It also gave our mornings a slower, more relaxed pace.

    However, there are some compromises:

    • The front seating area is slightly shorter, so it doesn’t feel as roomy.
    • While it’s a 4-berth van, it can feel tight with two adults and an 8-year-old.
    • You lose a bit of floor space to the fixed bed and middle washroom layout.

    That said, we love it and have happily toured in it year-round, including over Christmas holidays.

    Fixed end bed caravan
    Fixed end bed caravan

    7. What We’ve Learned from Both

    Comfort vs Space

    Having a fixed bed equals comfort, but you’ll lose some space—especially in the front lounge. If you’re touring with kids, consider how much room you’ll need for daytime living.

    Bedtime Routines Matter

    In the Typhoon, one of us had to wait until the bed was made to relax. In the Aurora, we just crawl in when we’re ready, no fuss.

    Storage is Everything

    Layouts with end bathrooms tend to give you more wardrobe and cupboard space. The Aurora, while plush, has less room to tuck things away.

    Every Layout Is a Compromise

    There is no one-size-fits-all layout. You’re always trading one benefit for another—be it a bigger kitchen, a fixed bed, or extra floor space.


    8. How to Choose the Right Layout for You

    When picking your caravan layout, ask yourself:

    1. How many people will be sleeping in it regularly?
    2. Do you mind making up the bed each night?
    3. How important is storage space?
    4. Are you touring in winter (extra space indoors matters)?
    5. Do you need privacy or open-plan living?

    If you’re a couple who value comfort and travel often, a fixed island bed will feel like a luxury hotel room on wheels. Families with younger children might benefit more from bunk beds and a flexible front lounge.


    9. Final Thoughts

    There’s something uniquely personal about choosing your caravan layout. It’s not just about features—it’s about how you live on the road. We’ve been lucky to experience both ends of the spectrum: a traditional family-friendly layout in our Elddis Typhoon GT, and now a more luxurious fixed bed setup in the Crusader Aurora.

    Both had their strengths, and both helped create incredible memories.

    So whether you’re looking for more sleeping space, a permanent bed, or the biggest bathroom you can get, we hope this guide helps you narrow down the layout that’s right for you.

    Remember: try before you buy if you can, and picture your typical day in the van. That’s where the magic lies.


    🚐 Have a layout you love (or hate)? Share your experiences with us at Pick and Pitch Adventures—we’d love to hear from you!

  • Quick healthy family caravan dinners

    Quick healthy family caravan dinners

    10 Quick and Healthy Family Dinners to Cook in Your Caravan

    When you’re away in your caravan, the last thing you want is to spend hours cooking or rely too much on takeaways. With limited space and equipment, the key is to keep meals simple, healthy, and family-friendly. Whether you’re feeding kids or adults, these quick recipes are perfect for your compact kitchen, portable hob, or even a BBQ.

    Here are 10 easy and wholesome caravan dinner ideas that will keep everyone full and happy after a day of adventuring!


    • 1. One-Pan Chicken Fajitas

    Why we love it: Minimal washing up, bursting with flavour, and everyone can build their own wrap.

    Ingredients (serves 4):

    • 2 chicken breasts, sliced
    • 2 bell peppers, sliced
    • 1 red onion, sliced
    • 1 tbsp olive oil
    • 1 tsp smoked paprika
    • 1 tsp cumin
    • Salt and pepper to taste
    • 4 wholemeal tortillas
    • Optional: sour cream, grated cheese, salsa

    How to make:

    1. Heat the oil in a large frying pan.
    2. Add chicken, paprika, cumin, salt, and pepper. Cook until browned.
    3. Add peppers and onions. Sauté for 5–7 minutes until softened.
    4. Serve in tortillas with your choice of toppings.

    • 2. Tuna Pasta with Sweetcorn & Greek Yogurt Sauce

    Why we love it: No cream needed! Greek yogurt makes it creamy and protein-packed.

    Ingredients:

    • 300g pasta (wholewheat if possible)
    • 1 tin of tuna in spring water, drained
    • 1 tin sweetcorn, drained
    • 4 tbsp Greek yogurt
    • 1 tsp mustard
    • Salt and pepper
    • Optional: grated cheese or parsley

    How to make:

    1. Boil pasta, then drain and return to the pot.
    2. Stir in tuna, sweetcorn, yogurt, mustard, and season.
    3. Mix well and heat gently (don’t boil, or yogurt may curdle).
    4. Serve with a sprinkle of cheese or parsley.

    • 3. Sausage & Veg Tray Bake (Oven or BBQ)

    Why we love it: One tray, loads of flavour. Works great in a caravan oven or foil-wrapped on a BBQ.

    Ingredients:

    • 6 chicken or turkey sausages
    • 3 carrots, chopped
    • 2 sweet potatoes, cubed
    • 1 red onion, quartered
    • 1 tbsp olive oil
    • 1 tsp dried rosemary or thyme
    • Salt and pepper

    How to make:

    1. Toss all ingredients in oil and seasoning.
    2. Lay on a tray or wrap in foil.
    3. Bake at 200°C for 30–35 mins or BBQ in foil for about 25 mins, turning halfway.

    • 4. Stuffed Pita Pockets with Hummus & Falafel

    Why we love it: No cooking needed if using pre-made falafel—just assemble!

    Ingredients:

    • 4 wholemeal pitas
    • 8 pre-cooked falafel balls
    • Hummus
    • Grated carrot
    • Cucumber slices
    • Lettuce
    • Greek yogurt (optional)

    How to make:

    1. Warm pitas lightly on the hob or BBQ.
    2. Cut open and spread hummus inside.
    3. Add falafel, grated veg, and a spoon of yogurt if you like.
    4. Wrap in foil for an easy on-the-go dinner.

    Quick BBQ on a recent trip
    Quick BBQ on a recent trip
    • 5. Caravan Veggie Stir-Fry with Noodles

    Why we love it: Uses up leftover veg and cooks in under 10 minutes.

    Ingredients:

    • 1 pack egg noodles or rice noodles
    • 2 tbsp soy sauce
    • 1 tbsp sesame oil (or olive oil)
    • 1 garlic clove, chopped
    • 1 red pepper, sliced
    • 1 courgette, julienned
    • 1 carrot, grated or sliced
    • Optional: cooked chicken or prawns

    How to make:

    1. Boil noodles, then drain.
    2. Heat oil in a wok or frying pan. Sauté garlic, then veg.
    3. Add noodles and soy sauce. Stir-fry for 2–3 mins.
    4. Add protein if using. Serve hot.

    • 6. BBQ Chicken & Corn Foil Packs

    Why we love it: No pans needed—everything cooks in one foil wrap!

    Ingredients:

    • 2 chicken breasts, diced
    • 2 corn on the cobs, halved
    • 1 red pepper, sliced
    • 1 tbsp BBQ sauce per pack
    • Olive oil, salt, and pepper

    How to make:

    1. Mix all ingredients with seasoning and BBQ sauce.
    2. Divide between two large foil sheets and wrap tightly.
    3. Cook on BBQ or in oven at 200°C for 25–30 mins.
    4. Open carefully and serve with crusty bread.

    • 7. Lentil & Tomato Curry

    Why we love it: A warming veggie meal that’s full of protein and super cheap!

    Ingredients:

    • 1 cup red lentils, rinsed
    • 1 tin chopped tomatoes
    • 1 onion, diced
    • 2 garlic cloves, minced
    • 1 tsp curry powder
    • ½ tsp turmeric
    • 500ml water or stock
    • Optional: spinach or peas

    How to make:

    1. Sauté onion and garlic until soft.
    2. Add spices, lentils, tomatoes, and water.
    3. Simmer for 20–25 mins until thick.
    4. Add spinach or peas in the last 5 mins. Serve with naan or rice.

    • 8. Egg Fried Rice with Veggies

    Why we love it: Great way to use up leftover rice. Ready in 10 minutes.

    Ingredients:

    • 2 cups cooked rice (chilled)
    • 2 eggs, beaten
    • 1 cup mixed frozen veg or chopped fresh veg
    • 1 tbsp soy sauce
    • 1 tsp sesame oil or olive oil
    • Optional: cooked chicken or prawns

    How to make:

    1. Heat oil in a pan. Add eggs, scramble quickly, then push to the side.
    2. Add veg and stir-fry for 3–4 mins.
    3. Add rice and soy sauce, stir everything together.
    4. Heat through and serve hot.

    • 9. Mini Tortilla Pizzas

    Why we love it: Fun for kids to help make! No oven? Use a frying pan or BBQ.

    Ingredients:

    • 4 tortilla wraps
    • 4 tbsp tomato purée or pizza sauce
    • Grated cheese
    • Toppings: ham, mushrooms, sweetcorn, olives, etc.

    How to make:

    1. Spread sauce over wraps.
    2. Add cheese and toppings.
    3. Cook on a dry frying pan over low heat or foil-lined BBQ tray for 5–7 mins until cheese melts and base is crisp.
    Lidls Gas Pizza oven connected to the BBQ point on the caravan
    Lidls Gas Pizza oven connected to the BBQ point on the caravan

    • 10. Caravan Chilli Con Carne

    Why we love it: A hearty one-pot meal that’s perfect for cool evenings.

    Ingredients:

    • 500g lean mince (beef or turkey)
    • 1 tin kidney beans, drained
    • 1 tin chopped tomatoes
    • 1 onion, diced
    • 1 garlic clove, minced
    • 1 tsp chilli powder or paprika
    • Salt and pepper
    • Optional: rice or tortilla chips

    How to make:

    1. Brown mince in a large pan, then add onion and garlic.
    2. Stir in spices, tomatoes, and beans.
    3. Simmer for 20 mins. Add water if needed.
    4. Serve with rice or over tortilla chips for chilli nachos.

    Final Tips for Caravan Cooking

    • Plan ahead: Pre-chop or pre-cook ingredients before your trip if possible.
    • Use minimal pans: Choose recipes that need one pot or foil wraps.
    • Stock up on staples: Tinned goods, pasta, rice, wraps, and spices go a long way.
    • Portable BBQs or induction hobs: These make cooking outdoors easier and more enjoyable.
    • Make it fun: Get the kids involved with pizza toppings, pita building, or wrapping foil packs.

    Wrapping It Up

    Caravan dinners don’t need to be boring or a hassle. With a few pantry staples, a little creativity, and some flexible ingredients, you can whip up healthy, tasty meals in no time—even in a small space.

    From one-pan wonders to BBQ favourites and no-cook meals, there’s something here for every family. These recipes are perfect for sunny evenings, busy days, or even those rainy nights when you’re tucked up inside playing board games or watching a movie.

    So, fire up the stove or BBQ, gather your ingredients, and enjoy stress-free family meals under the stars!

  • How to make sure your car is caravan ready

    How to make sure your car is caravan ready

    Is Your Car Caravan-Ready? The Ultimate Towing Prep Guide from Our Family Adventures

    Discover how to make sure your car is suitable for towing a caravan, with safety checks, legal requirements, and personal tips from our own experience towing with a Land Rover Freelander.

    There’s nothing quite like hitching up the caravan and hitting the open road. The freedom, the flexibility, and the fun of making your own adventures wherever the wind (or weather) takes you. But before the adventure begins, there’s one crucial step every caravanner must take seriously: making sure your car is safe and suitable to tow.

    From weight limits and towing capacities to legal requirements and simple safety checks, this guide has everything you need to prepare your tow vehicle—and we’ll even throw in some personal insights from our own towing journey with our Land Rover Freelander!

    Is Your Car Suitable for Towing a Caravan?

    Before you even consider hitching up, you need to make sure your car is physically and legally capable of towing a caravan. Not all cars are built to tow—and towing with a car that isn’t up to the job can be dangerous, illegal, and expensive.

    BMW M Sport
    This car is not a suitable tow car!

    Step 1: Check Your Vehicle’s Towing Capacity

    Your car’s towing capacity is the maximum weight it can safely pull. You’ll usually find this in the vehicle handbook or on the manufacturer’s plate (located inside the driver’s door frame or under the bonnet).

    There are two important terms to know:

    • Braked Towing Capacity: This is the maximum weight your car can tow if the caravan has its own braking system (which most do).
    • Unbraked Towing Capacity: The limit for trailers or caravans without brakes (usually much lower).

    Top Tip: Never exceed your car’s braked towing limit—it’s illegal and puts you and others at serious risk.

    Step 2: Understand Weight Terminology

    When it comes to matching your car and caravan safely, weight really matters. Here are the key terms you need to know:

    • MTPLM (Maximum Technically Permissible Laden Mass): The maximum weight your caravan can be when fully loaded.
    • MIRO (Mass in Running Order): The caravan’s weight as it leaves the factory, with no added gear or water.
    • Payload: The difference between MTPLM and MIRO—i.e., how much you can load into the caravan.
    • Kerb Weight: The weight of your car with all standard equipment, fluids, a full tank of fuel, and a driver.

    Use this info to calculate the caravan-to-car ratio. A good rule for beginners is the 85% rule: try not to tow a caravan that weighs more than 85% of your car’s kerb weight.

    Our Setup: Towing with a Land Rover Freelander

    When we first got our Land Rover Freelander, it didn’t have a tow bar. But we knew we’d be using it for towing our Elddis Crusader Aurora caravan, so we had a tow bar professionally fitted—specifically with an AL-KO tow ball, designed to work perfectly with AL-KO hitch stabilisers.

    And let me tell you—it made a world of difference! The added stability when towing was immediately noticeable, especially at higher speeds or in windier conditions. It gives us peace of mind knowing we’ve got the right gear for the job.

    Pre-Tow Car Checks: Is Your Vehicle Ready to Tow?

    Even if your car is suitable for towing, it still needs a bit of TLC and prep work before each trip. Here’s what we check before setting off on every caravan adventure:

    1. Tow Bar & Tow Ball

    • Ensure the tow bar is securely fitted and free from rust or damage.
    • Check the AL-KO tow ball is clean and grease-free (essential if you’re using an AL-KO hitch).
    • Inspect for any movement or loose bolts—everything should feel solid.
    Alko Towball on towbar
    Alko towball on towbar

    2. Electrics & Lights

    • Plug in your caravan’s 7-pin or 13-pin connector and do a light check.
    • Make sure brake lights, indicators, tail lights, fog lights, and reversing lights all work properly.
    • If your lights flicker or don’t work, check for corrosion or dirt in the socket.

    3. Towing Mirrors

    Using towing mirrors isn’t just helpful—it’s the law if your caravan is wider than your car.

    We personally use the Emuk XL universal towing mirrors (Affiliate link), and we absolutely love them. They’re super stable, easy to fit, and give us a clear, extended view down the side of the caravan. That extra visibility makes a huge difference when changing lanes, reversing, or checking for overtaking traffic.

    Legal Note: You must be able to see 20 metres behind and 4 metres to the side of your caravan. No excuses—mirrors matter!

    4. Tyre Checks

    • Check your car’s tyre pressure, including the spare.
    • Inspect tyre tread depth and look for any cracks or bulges.
    • Make sure your caravan tyres are also in good condition!

    5. Fluids & Brakes

    • Top up oil, coolant, and windscreen wash.
    • Ensure your brakes feel firm and responsive.
    • Remember—your car is working harder when towing, so everything needs to be in tip-top shape.

    Caravan Hitch-Up Safety Checks

    Once your car is ready, it’s time to hook up the caravan. Here’s our safety checklist that we do every single time before we drive off:

    1. Check the Hitch

    • Make sure the caravan is properly hitched onto the tow ball.
    • You should hear a satisfying “click” as the hitch engages.
    • Double-check by winding the jockey wheel down and confirming the hitch stays on.

    2. Breakaway Cable (Affiliate link)

    This vital safety cable engages the caravan brakes if it becomes detached from the tow car.

    • Clip it to a designated point on your tow bar (not just looped around).
    • Make sure it’s not dragging on the ground or overly taut.

    3. Jockey Wheel

    • Wind it fully up and clamp it securely out of the way.
    • Stow the handle so it won’t fall or get caught.

    4. Corner Steadies

    • Wind up all four caravan corner steadies.
    • Store the winding handle securely.

    5. Windows, Rooflights, & Doors

    • Make sure everything is shut, locked, and latched.
    • Don’t forget to lock any external lockers.

    6. Interior Prep

    • Secure all loose items inside the caravan.
    • Make sure cupboards, fridge, and oven doors are latched.
    • Turn off the gas at the bottle.

    🧠 Knowing the Law: Weight, Licences & Limits

    ⚖️ Towing Limits and the Law

    • Stay under your car’s braked towing capacity—no excuses.
    • Do not exceed your Gross Train Weight (GTW): this is the combined maximum weight of your car + loaded caravan.
    • If your caravan is over 750kg, it must have its own braking system.

    Driving Licence Categories

    Depending on when you passed your test, you may have restrictions on what you can tow:

    • If you passed your test before 1 Jan 1997, you can tow a combined weight up to 8.25 tonnes.
    • If you passed between 1 Jan 1997 and 18 Jan 2013, your combined weight limit was 3.5 tonnes—unless you took a B+E test.
    • After December 2021, Category B drivers can now tow trailers up to 3,500kg, but you should still check your own licence for confirmation.
    Pre Towing Checks on the Freelander
    Pre towing checks on the freelander

    Final Pre-Trip Checklist: Don’t Hit the Road Without It

    Before we leave for any trip, whether it’s a weekend escape or a full family holiday, we run through this final checklist:

    ✅ Task💡 Notes
    Check car & caravan tyre pressureIncluding spares
    Fit towing mirrorsWe love the Emuk XLs
    Confirm hitch & breakaway cableHear the “click”!
    Lights checkBrake, indicators, rear
    Corner steadies raisedHandle stowed
    Gas off at bottleFor safety while towing
    Windows & doors lockedInside & out
    Jockey wheel raisedFully up & clamped
    Number plate on caravanMatches the tow car
    Load weight checkStay under MTPLM and car’s capacity

    Why We Take Towing Prep Seriously

    Towing a caravan is a responsibility—not just to your passengers, but to other road users too. We’ve had a few hiccups along the way (who hasn’t?), but by sticking to our safety checklist and using the right gear, we’ve enjoyed years of smooth, stable towing across Northern Ireland and beyond.

    From getting the AL-KO tow ball fitted to upgrading our towing mirrors and learning the weight ratios inside out, we’ve built confidence trip by trip. And it’s all worth it when we pull into a new pitch, unhook, and start another adventure—whether it’s a peaceful countryside retreat or a Christmas holiday in our beloved Elddis Crusader Aurora.

    Gear We Use and Recommend

    Here are a few bits of kit we personally use and trust:

    • Land Rover Freelander – solid, stable, and a great match for our 4-berth caravan.
    • AL-KO Tow Ball – gives amazing stability with our AL-KO hitch.
    • Emuk XL Towing Mirrors – fantastic visibility and super sturdy.
    • Tyre Pressure Gauge – quick and easy to check before every trip.
    • LED Light Board Tester – helps us catch any electrical issues early.

    Ready for the Open Road?

    There’s no feeling like setting off with the caravan behind you, knowing you’ve done all your checks and prepped your gear. Safe towing starts with your car—but it ends with your attitude. Be thorough, be safe, and enjoy every mile of the journey.

    Whether you’re new to caravanning or a seasoned tourer, making sure your tow car is caravan-ready is the first step to stress-free adventures. Happy towing!

    Also check out our guide on caravan towing covers

  • How to keep dogs cool in a hot weather

    How to keep dogs cool in a hot weather

    How to Keep Dogs Safe and Cool in a Heatwave: Home & Caravan Tips for Pet Parents

    As temperatures rise during the summer months, our canine companions are at risk of overheating. Dogs don’t sweat like humans, making them more vulnerable to heatstroke, dehydration, and sunburn. Whether you’re enjoying the summer sun at home, heading off in your caravan for an adventure, or just out and about, it’s crucial to know how to keep your dog cool and comfortable during a heatwave.

    In this comprehensive guide, we’ll explore everything you need to know about protecting your dog from extreme heat—including practical tips for staying cool in the caravan, travel safety, and which cooling accessories are worth investing in.

    Why Dogs Struggle in the Heat

    Dogs regulate their body temperature mainly through panting and a small amount through the pads of their paws. This makes it much harder for them to cool down during a heatwave, especially in enclosed environments like cars and caravans.

    Key risks of heatwaves for dogs:

    • Heatstroke (life-threatening if not treated)
    • Dehydration
    • Sunburn (especially on noses and ears)
    • Burned paws (from hot tarmac or sand)
    • Lethargy and vomiting

    Flat-faced breeds (like Pugs or Bulldogs), elderly dogs, puppies, and those with thick coats or health conditions are at even greater risk.

    Heatwave Dog Safety Tips at Home

    Even if you’re staying at home during hot weather, your dog needs extra care and attention. Here’s how to keep them safe:

    1. Keep Your Dog Indoors During Peak Heat

    Avoid letting your dog outside during the hottest part of the day (usually between 11 am and 4 pm). Instead, walk them early in the morning or after sunset when the ground is cool and the sun isn’t blazing.

    2. Create a Cool Zone

    Set up a cool retreat in your house:

    • Close blinds and curtains to keep the sun out
    • Use fans or air conditioning
    • Lay down damp towels for your dog to lie on
    • Place their bed on tile or laminate flooring

    3. Hydration is Key

    Provide fresh, clean water at all times. Add ice cubes to their bowl for an extra chill or use a dog-friendly water fountain to encourage drinking.

    4. Cooling Treats & Toys

    Try homemade doggie ice lollies using low-sodium stock or plain water with their favourite treats frozen inside. Offer cooling chew toys from the fridge or freezer.

    5. Limit Exercise

    It’s tempting to maintain routines, but strenuous exercise can be dangerous. Keep walks short and gentle, avoiding hilly routes or running.

    6. Check the Pavement

    Before heading out, test the pavement with your hand. If it’s too hot to hold your palm on it for 5 seconds, it’s too hot for paws.

    Relaxing in the nice weather
    Relaxing in the nice weather

    Must-Have Accessories to Keep Dogs Cool

    Here are top-rated cooling accessories to invest in for home and travel:

    Product (Contains Affiliate Links below)Description
    Cooling MatsPressure-activated gel mats that cool down when your dog lies on them. No refrigeration needed.
    Cooling VestsLightweight and water-activated. Soak them in water and they cool your pup via evaporation.
    Portable Water BottlesIdeal for walks or road trips—bottles with attached bowls or flip-out troughs.
    Cool CoatsReflective or wet-to-wear jackets for walkies in hot weather.
    Pop-Up Shade TentsFor use in gardens, parks or campsites. Portable and breathable.
    Cooling BandanasTie around your dog’s neck for a refreshing and stylish heat-relief.

    Keeping Dogs Cool in a Caravan During a Heatwave

    Summer caravan trips with your dog can be unforgettable… but only if planned with their safety in mind. Caravans, like cars, can heat up quickly. Without proper precautions, they can become dangerous for pets in minutes.

    1. Never Leave Your Dog in the Caravan Unattended

    Just like in a car, a caravan can become an oven. Always take your dog with you or ensure the caravan is well ventilated, shaded, and monitored with a pet temperature alarm if you must leave them for a few minutes.

    2. Use Reflective Window Covers & Thermal Blinds

    Prevent heat from building up inside by fitting reflective blinds or blackout curtains. Roof light covers also help reduce sun exposure.

    3. Portable Fans & Cooling Systems

    Invest in 12V caravan fans or portable air conditioning units. Place them near your dog’s crate or favourite spot.

    4. Choose a Shaded Pitch

    When booking your campsite, request a pitch with natural shade or bring a caravan awning with UV protection to create a cool outdoor zone.

    5. Lay Cooling Mats Inside the Van

    Put them in your dog’s bed or where they usually sit. Some caravaners also use cold, damp towels refreshed throughout the day.

    6. Caravan Airflow Tips

    • Open roof vents and windows
    • Use flyscreens to keep bugs out
    • Keep interior doors open for better airflow

    7. Limit Midday Travel

    Plan your driving for cooler hours—early morning or evening. Use sunshades on the rear windows and ensure good ventilation in the tow car.

    Travel Tips for Dogs in Hot Weather

    Driving to your campsite? Here’s how to keep your pup comfy on the move:

    1. Pre-Cool the Car

    Start your air conditioning before loading your dog in. Never place your dog in a hot car that hasn’t been cooled down first.

    2. Harness and Secure Them Safely

    Use a car-safe harness, crate, or dog seatbelt to keep them secure and reduce stress.

    3. Offer Water Often

    Use spill-proof travel bowls or take regular stops to offer water. Hydration is vital during any road trip.

    4. Sunshades and Window Tints

    Cover side and back windows with sunshades or use tinted film to protect your dog from direct sunlight.

    Camping & Outdoor Activities with Dogs in a Heatwave

    If you love camping with your dog during summer, here are ways to enjoy it without risking their health.

    1. Stick to Early or Late Walks

    Cool morning strolls or evening adventures are best. Avoid strenuous hikes in peak heat.

    2. Bring a Travel Shade Tent

    Ideal for beach days or open field stops, a pop-up shade tent gives your dog a designated cool zone to rest.

    3. Check for Signs of Heatstroke

    Symptoms include:

    • Heavy panting
    • Excessive drooling
    • Lethargy
    • Vomiting
    • Confusion or wobbliness

    If your dog shows any of these signs, move them to a cool area, wet their coat, and contact a vet immediately.

    4. Cooling Towels on the Go

    Soak a towel in cool (not cold) water and drape it over your dog for instant relief.

    5. Paw Protection

    Use dog booties if you’re walking on hot sand or tarmac. Or stick to shaded paths and grass.

    Dog-Friendly Water Fun in the Heat

    Water activities are brilliant for helping your dog stay cool—and entertained.

    Ideas to try:

    • Paddling pools (even collapsible ones are great for travel)
    • Sprinkler play
    • Lake dips or river swims (check for strong currents or toxic blue-green algae)
    • Beach visits (choose dog-friendly shores, pack shade and plenty of water)

    Just remember: always supervise your dog around water, especially if they’re not a strong swimmer. We also recommend leaving these activities until it has cooled down a bit.

    Caravan Packing Checklist: Hot Weather Dog Essentials

    Here’s a quick list to help you pack smart for your furry friend:

    ✅ Fresh water & bowl (plus travel bottle)
    ✅ Cooling mat and/or vest
    ✅ Pop-up dog shade tent
    ✅ Towel for wetting
    ✅ Dog-safe sun cream (for light/short-haired dogs)
    ✅ Travel fan or portable A/C
    ✅ Dog first aid kit
    ✅ Non-slip travel crate or seatbelt harness
    ✅ Grooming brush (to remove excess fur)
    ✅ Spare leads and poop bags
    ✅ Dog booties (for hot ground)

    Final Thoughts: Staying Cool Is Caring

    Heatwaves can be scary when you’re a pet parent, but with preparation and care, you can ensure your dog stays happy, safe, and cool—whether you’re at home, on the road, or off-grid in your caravan.

    Never underestimate the dangers of heat, and remember: if you’re feeling hot, your dog is feeling hotter.

    By planning ahead, investing in the right cooling gear, and adjusting your routines, you’ll create unforgettable summer adventures that your dog will love just as much as you do.

    keeping dogs cool in heatwave
    keeping dogs cool in heatwave

  • Surviving a heatwave in a caravan

    Surviving a heatwave in a caravan

    How to Survive a Heatwave in a Caravan: Stay Cool with the Best Tips & Accessories

    As summer temperatures soar and heatwaves become more common, caravanning during hot spells can be challenging—especially when your home on wheels turns into a rolling oven. But don’t worry, we’ve got you covered with expert advice, practical tips, and essential accessories to help you stay cool, safe, and comfortable during even the hottest days and muggiest nights.

    Whether you’re pitching up in the middle of a sunny field or parked by the beach, this guide will help you beat the heat and enjoy your caravan adventure to the fullest.

    ☀️ Why Heatwaves Are Hard on Caravanners

    Caravans, especially older models or those without air conditioning, can heat up quickly due to poor insulation and limited airflow. Unlike a brick-and-mortar home, caravans absorb and retain heat from the sun, turning your relaxing getaway into a sweaty, sleepless experience if you’re not well prepared.

    Common problems include:

    • Overheating during the day
    • Struggling to sleep at night
    • Food spoilage
    • Pets or children becoming overheated
    • Battery and appliance strain due to excess heat

    That’s why planning ahead for a heatwave is crucial—not just for comfort, but for your health and safety too.

    Essential Accessories to Beat the Heat in Your Caravan

    Here are must-have accessories that will help you and your family stay cool during a heatwave:

    1. 12V or Rechargeable Fans

    Lightweight, quiet, and easy to move around, 12V fans are a lifesaver in a caravan. Look for oscillating or clip-on fans for airflow where it’s needed most. Rechargeable USB fans are ideal for wild camping or off-grid sites.

    Top Tip: Use multiple small fans instead of one large one to circulate air more efficiently.

    2. Portable Air Conditioner or Cooling Unit

    If you have the space and hook-up power, a compact portable air conditioner can dramatically drop the inside temperature. Alternatives include evaporative coolers, which work better in dry heat.

    Note: Make sure your caravan electrics can handle the wattage—check before buying!

    3. Reflective Thermal Blinds or Sun Shades

    Thermal blinds and reflective screens for your windows, roof lights, and skylights help block out the sun and reflect heat away from your caravan. They’re also excellent for privacy and insulation in winter!

    4. Awning or Sun Canopy

    Create a shaded outdoor space with a porch awning or sun canopy. This helps reduce heat buildup inside and gives you an area to relax outside without direct sun exposure.

    Bonus Tip: Open your caravan door and sit under the awning to let cooler air flow inside.

    5. Cool Gel Pillows & Mattress Toppers

    Heat rises—so it’s no surprise that sleeping can be a nightmare in a hot caravan. Cool gel-infused pillows or bamboo mattress toppers can help regulate body temperature at night.

    6. Cooling Towels or Neck Wraps

    Dip these in cold water and drape them around your neck or forehead. They’re reusable and perfect for instant relief during a walk or while chilling at your pitch.

    7. Low-Wattage Electric Fan Heater with Cool Mode

    Some small fan heaters have a cool air setting, doubling as fans in summer and heaters in winter.

    8. USB or Battery-Operated Mini Fridge

    Ideal for drinks, fruit, or skincare! A small tabletop fridge near your bed or seating area keeps essentials cool without overloading your main fridge.

    How to Choose the Right Pitch During a Heatwave

    Where you pitch your caravan can dramatically affect the internal temperature.

    • Seek shade when possible: Trees can provide natural cover—but be cautious of sap and bird droppings!
    • Face away from direct sun: Pitch so that your main windows and door are shaded during peak heat (usually afternoon).
    • Use wind to your advantage: Try to park where you’ll get natural airflow through vents and windows.
    Sunshine through the clouds
    Sunshine through the clouds

    Daytime Survival Tips for Staying Cool in a Caravan

    Here’s how to manage the heat hour by hour during scorching days:

    1. Open Early, Close Midday

    Open all windows, vents, and skylights early in the morning to flush out stale warm air. By midday, close blinds and windows on the sun-facing side to trap in cooler morning air.

    2. Stay Hydrated

    Always keep a supply of cold water in the fridge. Consider adding an extra container or collapsible water carrier. Rehydration salts or electrolyte tablets are great if you’ve been sweating a lot.

    3. Cook Outside

    Avoid using the caravan oven or hob—these pump out heat quickly. Use a gas BBQ, camping stove, or electric hotplate outside instead. Salads, wraps, or cold picnic-style meals are your friend in a heatwave!

    4. Dress for the Heat

    Wear loose, light-coloured, breathable clothing. Avoid tight-fitting outfits that trap heat. Breathable sandals or flip-flops will keep your feet cool and reduce swelling.

    5. Cold Foot Bath or Hand Soak

    A simple washing-up bowl of cool water under the table can help cool your whole body down—perfect for kids too!

    How to Stay Cool at Night in Your Caravan

    Nighttime is often the most uncomfortable part of a heatwave in a caravan, especially with limited airflow. Here’s how to beat the sweaty nights and sleep better:

    1. Create a Cross Breeze

    Open windows on opposite sides of the caravan to allow air to circulate. Use fans at the windows to draw in cooler night air and push hot air out.

    2. Freeze a Bottle

    Fill plastic bottles with water, freeze them, and place them in front of a fan or beside your bed. As they melt, they create a cooling effect.

    3. Cold Sheets Trick

    Place your sheets or pillowcase in a plastic bag and chill in the fridge for an hour before bedtime. It sounds odd, but it works!

    4. Sleep in Lightweight Cotton Bedding

    Avoid polyester or flannel. Opt for bamboo or cotton sheets which are breathable and wick away moisture.

    5. Use a Cooling Mattress Topper

    If you suffer from overheating at night, a gel-infused topper can make a world of difference.

    Staying Cool with Kids and Pets

    For Kids:

    • Use blackout blinds to keep bunks shaded
    • Let them play in water trays or paddling pools (never leave them unsupervised)
    • Offer frozen fruit snacks and lots of fluids
    • Use handheld fans or mist sprays

    For Dogs:

    • Never leave them in the caravan alone
    • Walk them early morning or late evening
    • Use cooling mats, bandanas, and lots of water bowls
    • Let them lie on tiled or laminate flooring for cooling effect

    We always carry our dog’s cooling mat and collapsible travel bowl during summer trips—our little dachshund/Jack Russell loves it!

    Safety Tips During a Heatwave

    Staying cool isn’t just about comfort—it’s about safety too. Heat-related illnesses like heatstroke or dehydration can creep up fast.

    Be Aware of Heat Exhaustion Symptoms:

    • Dizziness
    • Heavy sweating
    • Weakness
    • Nausea
    • Headaches

    If someone exhibits signs of heatstroke—stop all activity, move to a cooler place, hydrate, and seek medical help immediately.

    Electrical Safety Tip:

    High temperatures can strain your battery and appliances. If you use fans or cooling units, monitor your leisure battery with a battery monitor or voltage checker. We once had a battery overheat and it was dangerously hot to touch—avoid that mistake!

    Heatwave Caravan Essentials Shopping List

    Here’s a quick checklist to tick off:

    AccessoryUse
    Rechargeable FansCirculate air
    Reflective Thermal BlindsReflect sunlight
    Awning/CanopyProvide shade
    Cooling TowelsCool the body
    Mini FridgeKeep essentials chilled
    Cooling Gel PillowsSleep comfort
    USB FansNight cooling
    Water CarrierExtra hydration
    Portable AC/CoolerDrastic temp drop
    Mattress Topper (Bamboo/Gel)Sleep cool

    Planning Ahead: When to Travel & Where to Stay

    • Avoid midday arrival/departure: Set up early morning or late evening to avoid the sun.
    • Pick shaded or breezy sites: Check site maps or call ahead.
    • Travel during cooler months: Spring and early autumn offer sunshine without extreme heat.

    Real-Life Caravan Heatwave Experience

    We once took our Elddis Crusader Aurora on a July trip and got caught in a heatwave. The inside temperature shot up to over 30°C within hours. Thankfully, we’d packed our reflective window covers, cooling fan, and gel pillows—and took shelter under the awning with a cold drink. We avoided using the oven entirely and made it a BBQ week instead!

    The best thing we did was add a simple battery monitor to keep an eye on voltage and temperature. It’s now one of our favourite summer upgrades!

    Final Thoughts: You Can Caravan Comfortably in a Heatwave

    With the right planning, accessories, and common sense, caravanning during a heatwave doesn’t have to be a sweaty struggle. Use shade wisely, stay hydrated, invest in a few cooling gadgets, and take it slow. It’s all about adapting to the rhythm of the weather and making the most of those bright summer days.

    Even in the heat, your caravan can be a cool oasis—literally and figuratively.

    Elddis Crusader Aurora in the sun

  • Our Caravan Battery Disaster

    Our Caravan Battery Disaster

    When Routine Maintenance Goes Wrong

    Bringing your caravan in for its annual service should be a straightforward task — routine, even. You expect peace of mind, safety, and reassurance that everything is road- and site-ready. That’s exactly what we thought too. But what unfolded next turned into one of the most stressful — and potentially dangerous — caravan experiences we’ve ever had.

    In this post, we’re sharing our personal story of how a caravan battery overheated to the point of near-disaster after its annual service, what we learned about battery grades, and the essential safety steps we now take to avoid a repeat. Whether you’re new to caravanning or a seasoned explorer, we hope our experience helps you stay safer and more informed.


    The Setup: Post-Service and a Narrow Escape (Literally)

    We had just collected our caravan after its routine service — nothing seemed out of the ordinary. As usual, we brought it home and unhitched on the lane near our house. Our lane is narrow and slightly inclined, so we always use the motormover to straighten and reposition the van before hitching it back up to tow into our back garden.

    The plan was simple:

    • Unhitch
    • Use the motormover to line up the caravan
    • Reattach and tow it up to the gate and use the motor mover the remainder of the way (Cant be towed into place)

    Only, that didn’t happen.


    Warning Signs: A Beeping Alarm and a Stubborn Motormover

    As soon as we unhitched and engaged the motormover, it began beeping — loudly and repeatedly. We assumed it was just the remote battery needing a change. Swapped it. Same problem. The motormover would start for a few seconds, then cut out again. More beeping. We fought with it, manually adjusting, retrying again and again.

    Eventually — after a lot of sweat and stress, and more than a few puzzled looks from passersby on our narrow road — we managed to line the caravan up just enough to hitch back up and pull it into our garden. The sense of relief was short-lived.


    Part Two: The Caravan Refuses to Cooperate Again

    With the van in the garden, we had to unhitch again and use the motor mover one more time to get it into position. Same issue. A few seconds of movement, then cutting out. Constant alarm beeping.

    We checked the onboard control panel — low battery warning.

    That was odd. The caravan had just returned from its service. We were specifically told them to ensure the battery was charged before we brought it back home!

    We grabbed the electric hook-up cable and connected the caravan to mains power. After waiting a while, we tried the motor mover again. It lasted marginally longer but failed just the same. After about an hour of struggling, worrying we were blocking the lane too long, and unable to manually push due to the incline (and weight), we finally got it into its resting spot.

    We thought the worst was behind us.

    Partly stuck in the garden
    Partly stuck in the garden

    The Smell No One Could Ignore

    The next day, I went out to repack the caravan after emptying it for the service. I plugged in the electrics, tidied up, and went about my usual routine. Everything seemed fine.

    A short time later, my partner noticed the caravan’s alarm going off again. Curious, they went out and said there was a weird smell — blaming me for leaving something stinky inside. We aired it out and thought nothing more of it.

    Then came the rain.

    We closed the door, and after a while, I went out to grab something from the van. As soon as I opened the door, the smell hit me — like a punch in the face.

    It was the unmistakable stench of rotten eggs. The air inside was thick with it, and it was overwhelmingly hot. My stomach dropped. I knew something wasn’t right. I remembered hearing somewhere that overheating batteries can give off that smell due to hydrogen sulphide gas.

    I ran to unlock the battery locker.


    A Near-Disaster: The Overheating Battery

    As soon as I opened the battery compartment, I could feel the heat pouring out. The locker was boiling and the smell was horrific. I instantly shut everything down and rushed back inside to get my partner, shouting that the battery was about to explode.

    But we couldn’t remove it straight away — it was too hot to safely touch. We had to wait for it to cool down, constantly checking in the meantime, hoping it wouldn’t burst or catch fire.

    Eventually, the battery cooled enough to disconnect and safely remove it from the caravan. It was a terrifying experience and could have ended far worse than it did.


    Diagnosis: What Went Wrong?

    So what actually caused the battery to overheat to such a dangerous extent?

    • The service team told us the battery “read fine” during its check.
    • We knew it was working perfectly before it went in.
    • It hadn’t been drained on our end — we never let it run flat.

    We eventually got the old battery tested. The verdict? It had likely been allowed to drain completely at some point (possibly during the service), then recharged too quickly — a known cause of internal damage. This can lead to gassing, overheating, and irreversible chemical breakdown.

    But there was another revelation…


    The Hidden Issue: We Had the Wrong Battery Type All Along

    Our caravan had come with a leisure battery — as most do. But until now, we had no idea there were different grades of caravan batteries, each suited to specific uses.

    Our battery was a Grade C.

    These are generally budget leisure batteries designed for light use — not the kind of deep, repeated discharge required by a motormover. Running a motormover places a huge strain on the battery, requiring a more robust, deep-cycle solution.

    Let’s break this down:


    Understanding Caravan Battery Grades

    Caravan batteries are graded into three main categories:

    🔋 Grade A (Best for Heavy Use)

    • Deep cycle AGM or Gel batteries
    • High charge/discharge cycles
    • Withstand motormover use and off-grid living
    • Long life (often 5+ years)
    • Great for frequent touring and off-grid users

    🔋 Grade B (Medium Use)

    • For regular but lighter discharge
    • Good for short breaks or site with hook-ups
    • Decent lifespan and reliability

    🔋 Grade C (Light Use Only)

    • Best for site-only users with full EHU
    • Not designed for motormovers or off-grid power
    • Cheapest — but also most limited

    We realised our Grade C battery was never designed for the heavy strain we were putting on it. And somehow, it had lasted this long — until it didn’t.


    What We Did Next: Upgrades and Safety Measures

    After researching deeply, we purchased a high-quality Grade A AGM battery built to handle motormover demands and prevent deep discharge damage.

    But we didn’t stop there.

    We also installed a battery monitor — an absolute game-changer. It now shows us:

    Installing Battery Monitor
    Installing the Battery Monitor
    • 🔋 Charge level (%)
    • 🌡️ Temperature (a key overheating warning)
    • ⚡ Voltage (to detect drops or faults early)

    We can now track the battery’s condition in real-time. No more guessing. Here is the link to the one we purchased here. ~ Affiliate Link

    You can buy Bluetooth ones which connect to your phone via Bluetooth ~Affiliate Link

    Please do your research on your battery and its needs and which battery monitor is best suited or contact a proffesional for advice.


    What We Learned (So You Don’t Have To)

    1. Always double-check your battery grade.
      Just because your caravan came with it, doesn’t mean it’s suitable — especially if using a motormover.
    2. Low battery warnings should never be ignored.
      If your motormover is failing or alarms are going off, don’t assume it’s the remote — check the actual power supply.
    3. Rotten egg smell = danger.
      Hydrogen sulphide is highly flammable and toxic. If you ever smell this inside your caravan, switch off power immediately and ventilate.
    4. Battery monitors are worth every penny.
      Prevention is cheaper (and safer) than battery replacement — or worse.
    5. Even serviced caravans need a post-check.
      Just because a workshop says your battery is “fine” doesn’t mean it is. Check for yourself.
    6. Proper ventilation is crucial.
      Battery lockers should allow gasses to escape — make sure your venting is working.

    Conclusion: A Costly Lesson, But a Valuable One

    We ended up spending money on a new battery and monitor — but we’re grateful that’s all it cost us. A battery explosion could have set the caravan alight or worse, especially if it had happened overnight or while we were travelling.

    What started as a routine service turned into a serious safety scare — and a wake-up call about battery health, proper equipment, and caravan preparedness.

    New Battery and Battery Monitor
    New Battery and Battery Monitor

    Have You Checked Your Battery Lately?

    If this post has given you pause, do yourself a favour — open your battery locker and check:

    • What grade is your battery?
    • Is it warm to touch after charging?
    • Do you smell anything odd?
    • Do you know its voltage/charge level?

    Don’t wait until something goes wrong. See our post on Importance of servicing you caravan here.

  • Guide to buying your first caravan

    Guide to buying your first caravan

    Thinking about buying your first caravan? 🚐 Whether you’re dreaming of weekend escapes or full-time travel, choosing the right caravan can feel overwhelming for first-time buyers. In this complete beginner’s guide to buying a caravan, we’ll walk you through everything you need to know—from setting a budget and choosing between 2 berth or 6 berth caravans, to understanding key features, towing requirements, and ownership costs. Avoid costly mistakes and make a confident, informed decision with this easy-to-follow guide built for first-time caravan buyers in the UK.

    🛻 Guide to Buying Your First Caravan

    1. 🎯 Define Your Needs

    Start with the essentials:

    • How many people will use it? Couples may only need a 2-berth, while families may need 4–6 berths.
    • How often will you use it? Occasional trips vs. full-time travel can impact what type of caravan is suitable.
    • Where will you travel? On-road or off-road? International or domestic?
    • Towing vehicle? Ensure your car is suitable (see below).

    2. 🚙 Check Your Towing Capacity

    Your vehicle’s towing capacity is critical.

    • Check the Gross Vehicle Mass (GVM) and Tare weight of the caravan.
    • Match it to your car’s Maximum Braked Towing Capacity.
    • Remember the Gross Combination Mass (GCM) if loading both the vehicle and caravan.
    • Make sure you have a suitble tow bar that takes the correct nose weight, you can test your caravans nose weight with this device

    💡 Pro tip: Stay under 85% of your car’s kerb weight for safer towing if you’re a beginner.

    Land Rover Freelander Tow car and Elddis crusader caravan
    Elddis Touring caravan

    3. 🏕️ New vs. Used Caravans

    New Caravan Pros:

    • Warranty and latest tech.
    • No hidden damage.

    Used Caravan Pros:

    • More affordable.
    • Slower depreciation.

    🔍 When buying used, inspect:

    • Damp, mold, and water damage. You can buy a damp meter tester.
    • Chassis and tires.
    • Appliances and electrics.
    • Service history.
    Old Elddis Typhoon GT 4 berth EB Caravan
    Elddis Typhoon GT 1997

    4. 🛏️ Layout and Features

    Popular layouts vary—visit dealerships or expos to explore:

    • Fixed bed vs. convertible seating
    • Separate shower/toilet or combined wet room
    • Kitchen space and cooking appliances
    • Storage options

    🔧 Must-have features for many:

    • Heating/AC
    • Solar or battery setup
    • Awning –
    • Security devices (tracker, wheel lock) for the one that we use.

    5. 💰 Budget and Hidden Costs

    Besides the purchase price, consider:

    • Insurance
    • Storage (if not kept at home)
    • Maintenance and servicing
    • Towing mirrors and hitch locks. Towing mirror
    • Site fees and club memberships (like Caravan and Motorhome Club)

    6. 🧾 Legal & Safety Requirements (UK Example)

    • Valid driving licence for the weight (Check your Category B license limits)
    • Number plate on the caravan
    • Properly rated towbar and electrics Example Alko system requires this tow hitch
    • Working brake lights and indicators
    • Ensure caravan brakes and breakaway cable are functional. Buy a replacement (Click here)

    7. 📍 Where to Buy

    • Dealerships – Safer, with consumer protections
    • Online marketplaces (e.g., Autotrader, Facebook marketplace)
    • Caravan shows – Try multiple models in one place
    • Private sellers – Cheaper but riskier

    8. 🧪 Try Before You Buy

    If unsure, rent a caravan for a weekend. This gives you a real sense of what layout and size works for you.


    9. 🛠️ Plan for Servicing and Storage

    • Annual servicing is recommended (chassis, gas, electrics).
    • Store under cover if possible to reduce wear. You can buy one

    10. 🧭 Join a Caravan Community

    Great for advice, buying tips, campsite recommendations:

    • Caravan and Motorhome Club
    • Online forums or Facebook groups
    • YouTube channels (many do walkarounds and reviews)

    For all your caravan needs or to browse (Click here)

    We have other useful reading if you wish to read more, other things we think you might like..

    (Why is it important to have a towing cover)

    (Quick guide on caravan awning accessories)

    Here you can find a full list of everything we have on our website. ( Click Here )